Working with tasks in ELMA BPM mobile app
ELMA BPM mobile app allows you to work with three categories of tasks:
In ELMA BPM mobile app you can create only user tasks. You can view and complete the other types of tasks.
To create a user task:
-
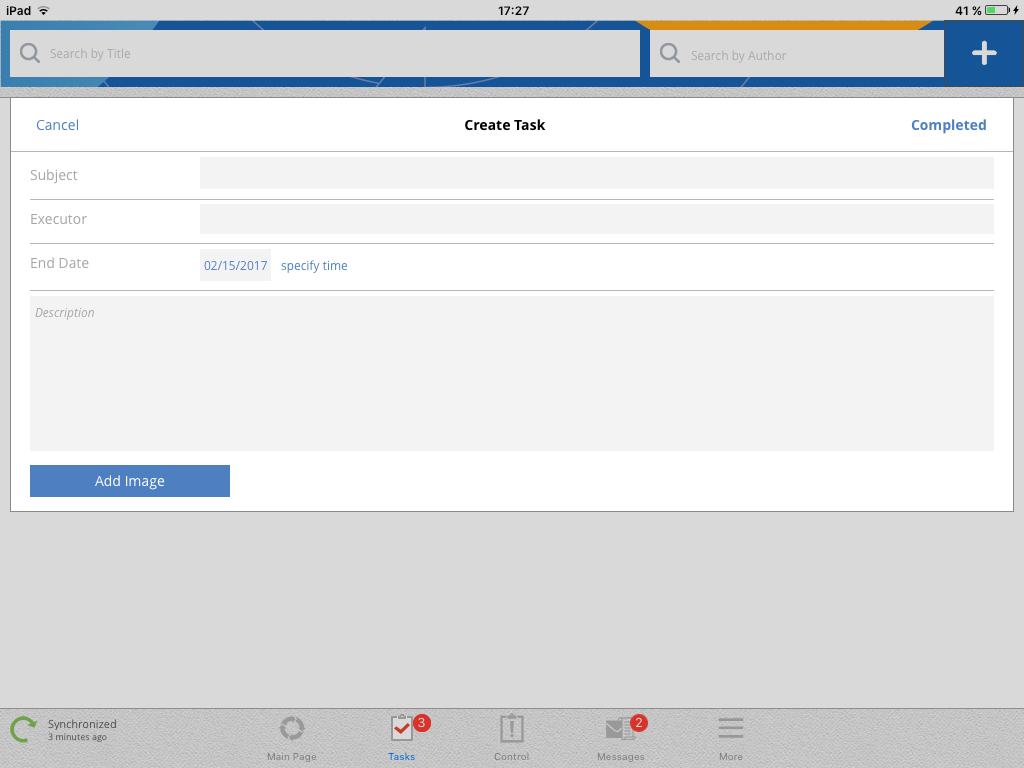
tap the  button in the top menu of any section and select Create Task;
-
fill in the required fields on the opened task creation form (fig. 1) and tap Completed.
|
|
|
Fig. 1. Task creation form
|
Subject – task subject. Displayed in the Tasks section. This field is required.
Executor – field for selecting the task executor. You can select several executors. This field is required.
End Date – task end date. You can also specify the time, if necessary. This field is required.
Description – description of the task.
Add Image – attach an image to the task.
In ELMA BPM mobile app tasks can be created offline. All the new tasks will be sent to the executors once the mobile device is connected to the Internet and the application is synchronized.
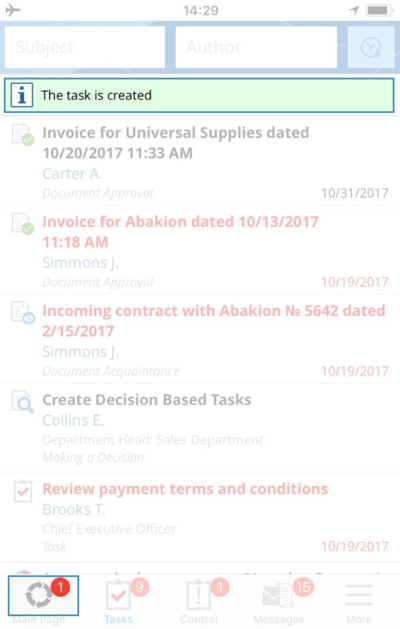
After creating a task in the offline mode, a notification will be displayed above the task list (Fig. 2), and in the bottom left corner next to the synchronization icon a number will appear. This number denotes the number of information packages (operations) that need to be sent to the server at the next synchronization.
|
|
|
Fig. 2. ELMA BPM for iOS. Task Section. Notification on new task (iPhone)
|
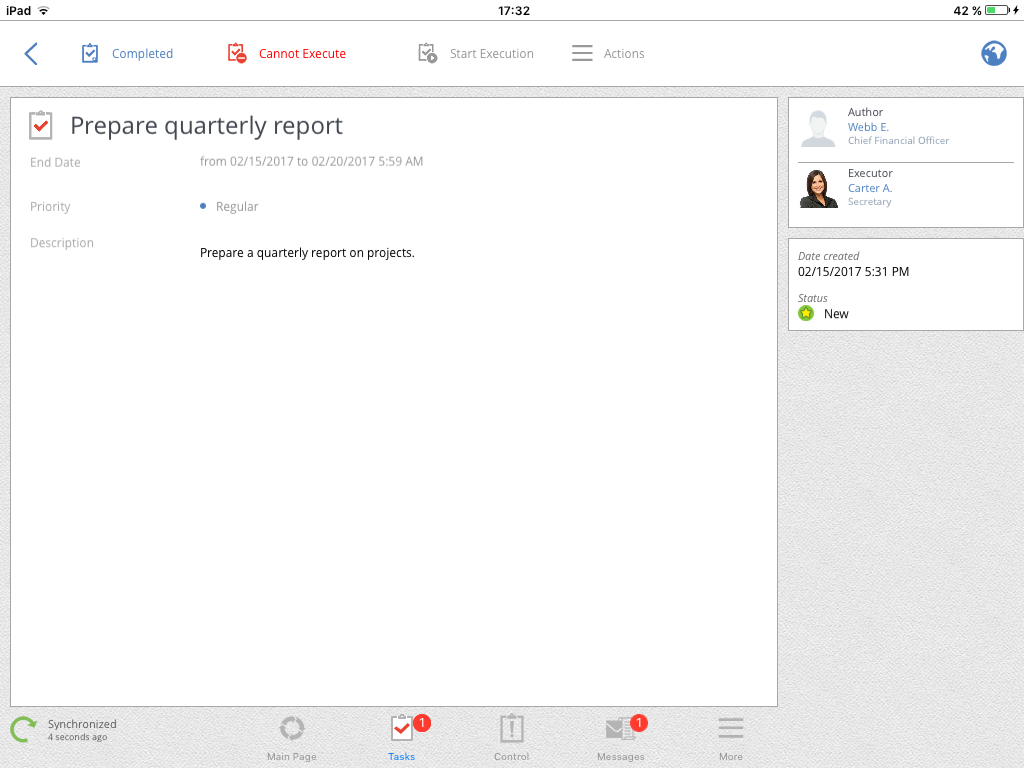
To view a user task, tap on its name on the main page, in the Tasks or Control section. The task page displays information on the task (fig. 3) – task subject, end date, priority, attached files (if any), description, author, executor, controller, creation date and status.
Top menu buttons:
|
|
Return to the previous page.
|
|
|
Complete the task. The task status is changed to Completed. In the opened dialog box you can add a comment and an image.
|
|
|
Tap this button to change the task status to Cannot Execute. In the opened dialog box you can add a comment and an image. This field is required.
|
|
|
Start execution. When you tap this button, the task status changes to Execution Started. In the opened dialog box you can add a comment and an image.
|
|
|
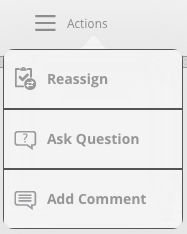
When you tap Actions, a drop down menu opens, which allows you to:
-
reassign the task to another user. In the opened dialog box, select the new executor, start and end dates, add a comment and tap Completed.
-
ask a question on the task. In the opened dialog box, select a user to ask a question, and enter the question in the Description field.
-
add a comment to the task. In the opened dialog box, add a comment and tap Completed.
|
|
|
|
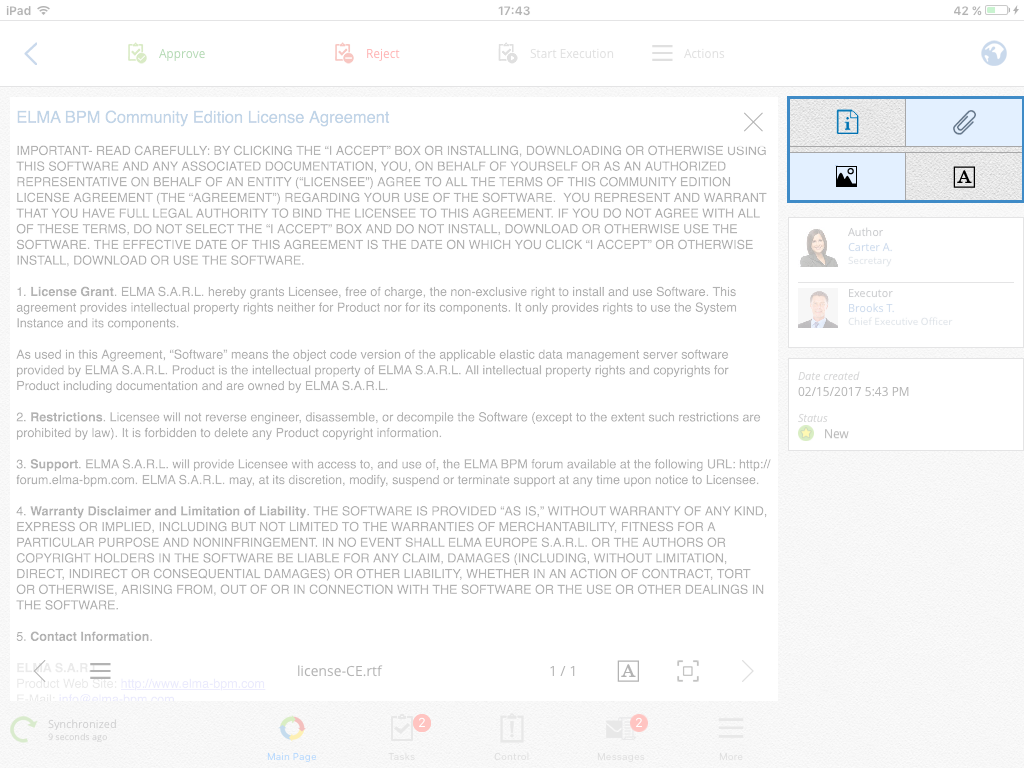
If the task has attached files or documents, then additional buttons are displayed (fig. 4):
|
|
|
Fig. 4. Additional buttons
|
|
|
Show general information on the task.
|
|
|
Show information on the attached file or document.
|
|
|
Preview the document or file. This button is displayed only if the  button is active. button is active.
|
|
|
Open the document page. This button is displayed if a document is attached to the task and the  button is active. button is active.
|
These buttons are available for mobile users even without the Internet connection.
Approval/acquaintance task page
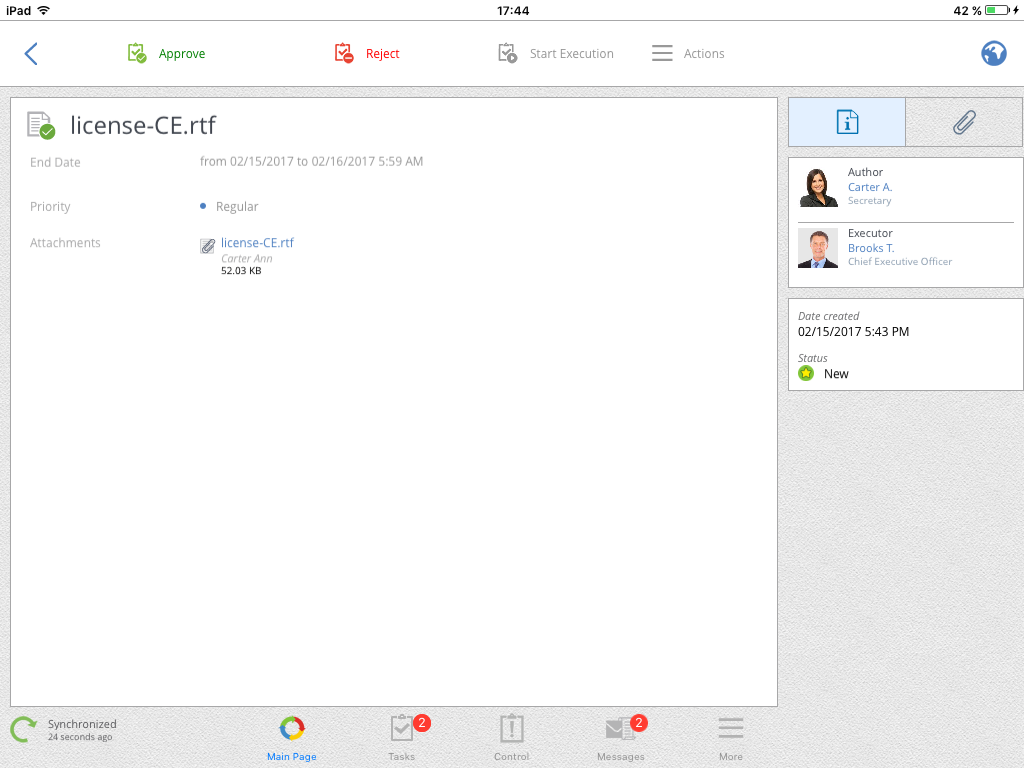
Approval/acquaintance task page is similar to a user task page, but it has some differences (fig. 5).
|
|
|
Fig. 5. Approval task page
|
1. The top menu contains additional tabs, depending on the task type.
Additional buttons of the approval task:
|
|
Complete the task with the Approved status. You can add a comment in the opened dialog box. To complete the task, tap Approved.
|
|
|
Complete the task with the Rejected status. You can add a comment in the opened dialog box. To complete the task, tap Rejected.
|
Additional buttons of the acquaintance task:
|
|
Complete the acquaintance task. When you tap this button, a form opens, where you can add a comment. To complete the task, tap Acquainted.
|
2. There are no Completed and Cannot Execute buttons.
These buttons are available in the approval/acquaintance tasks for mobile users even without access to the Internet.
Consideration task page
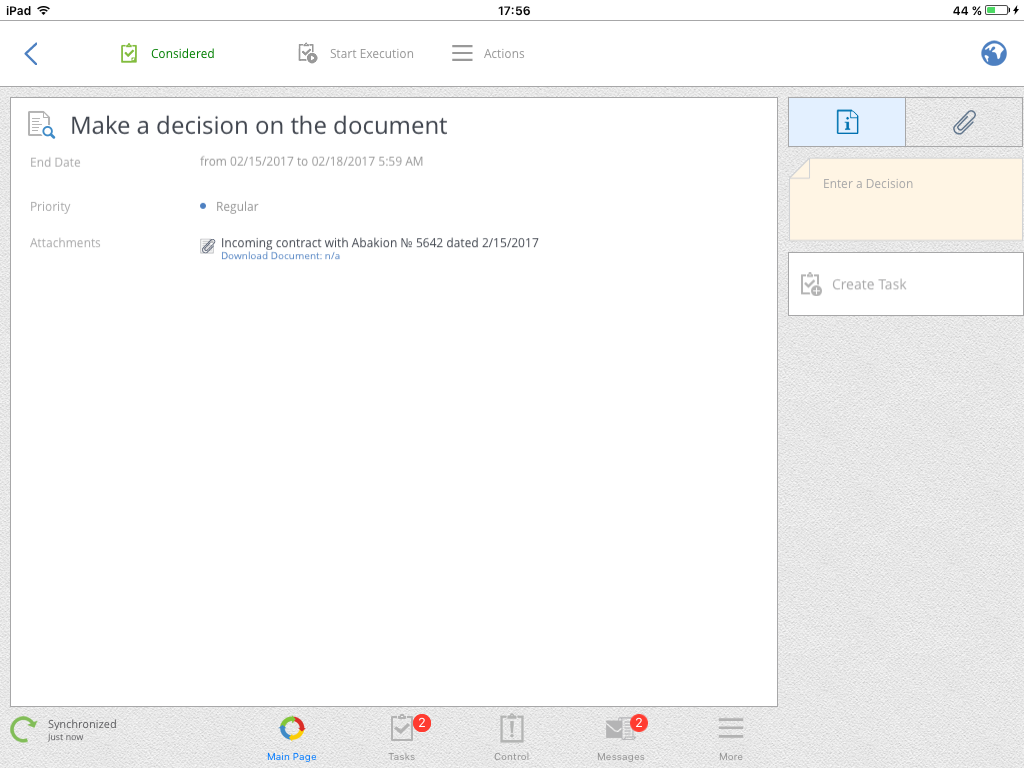
The consideration task page is similar to the user task page, but it has some specifics (fig. 6).
|
|
|
Fig. 6. Consideration task page
|
1. The top menu includes the Considered button. This button completes a consideration task. When you tap on it, a form opens, where you have to select the user, who will assign decision based tasks. The consideration task can be completed in the offline mode.
2. There are no Completed and Cannot Execute buttons.
3. To the right is the Enter a decision unit.
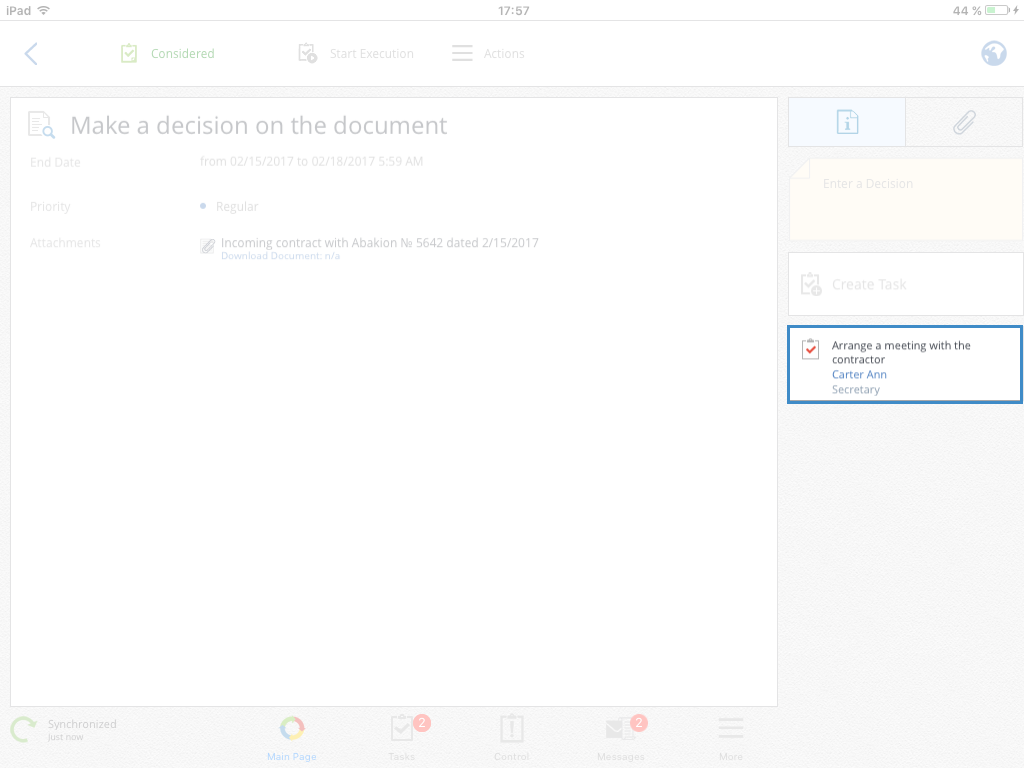
4. Below the Enter a decision unit there is an Add Task button. This button is used to create decision based tasks. When you tap it, a form for creating a user task opens, where you have to fill in the required fields and tap Completed. All the created decision based tasks are displayed below the Add Task button (fig. 7).
|
|
|
Fig. 7. Decision based task
|
5. Below the task section, the following information is displayed: Process Instance name, Process, Start Date, Initiator and Executor.
6. Below the process information section there is a Process map button.
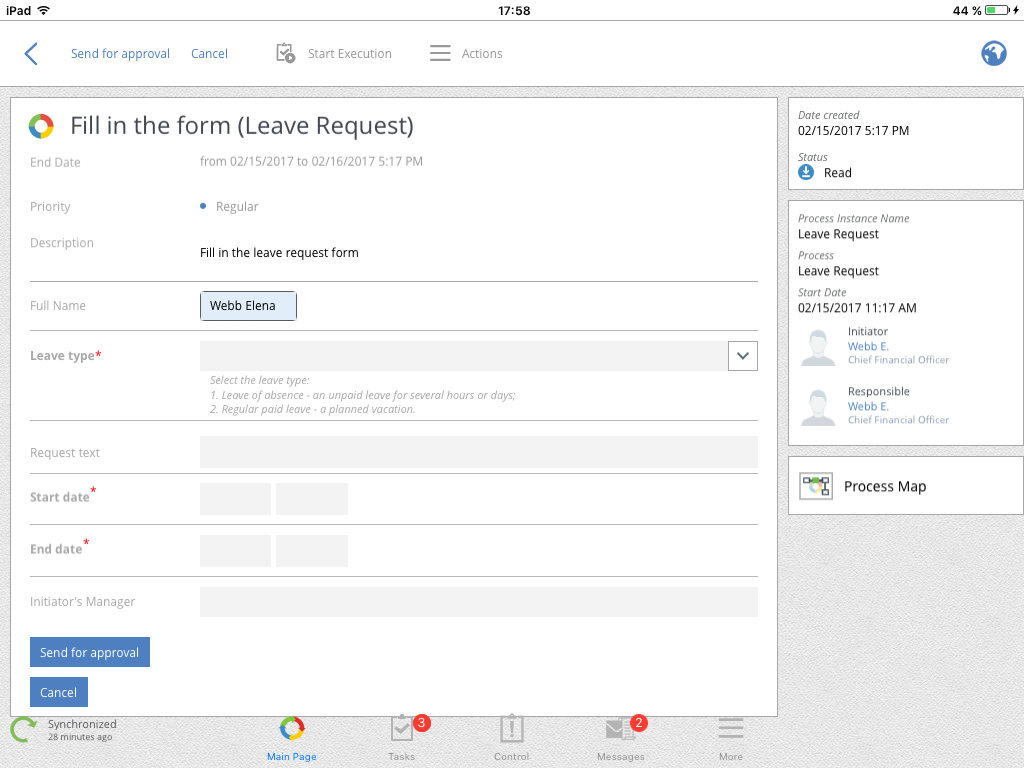
The process task page is similar to the user task page, but it has some specifics (fig. 8).
|
|
|
Fig. 8. Process task page
|
1. The task information area may contain different fields, depending on the business process. Some fields only provide information, and the others require filling in.
2. The top menu of the page contains the Start Execution, Actions and task completion (e.g. Send for Approval) buttons. The button for completing the task depends on the process settings.
3. To the right is the process information unit: Process instance name, process, start date, initiator and responsible.
4. Below the process information unit is the Process Map button, which opens the process map.
Copyright © 2006–2019 ELMA

