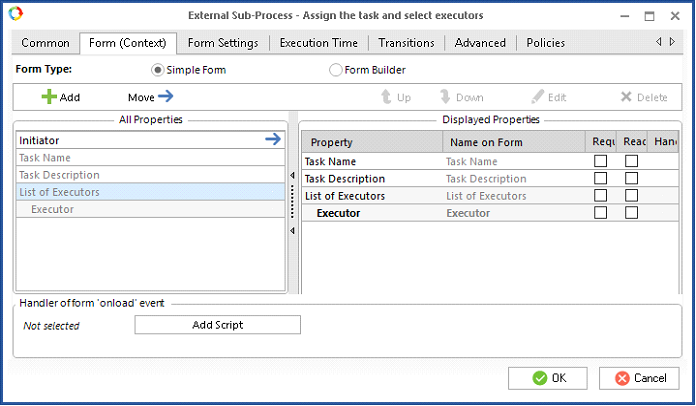
On the Form (Context) tab, you can configure the list of context variables that a user will see on the task form in Web Application. There are two types of task forms: a simple form and a form created in the Form Builder. The Form Builder allows you to customize the form display, add new information blocks and set up each outgoing connector. Specify the form type on the Form (Context) tab, in the Form type field by selecting one of the available options.
Simple Form
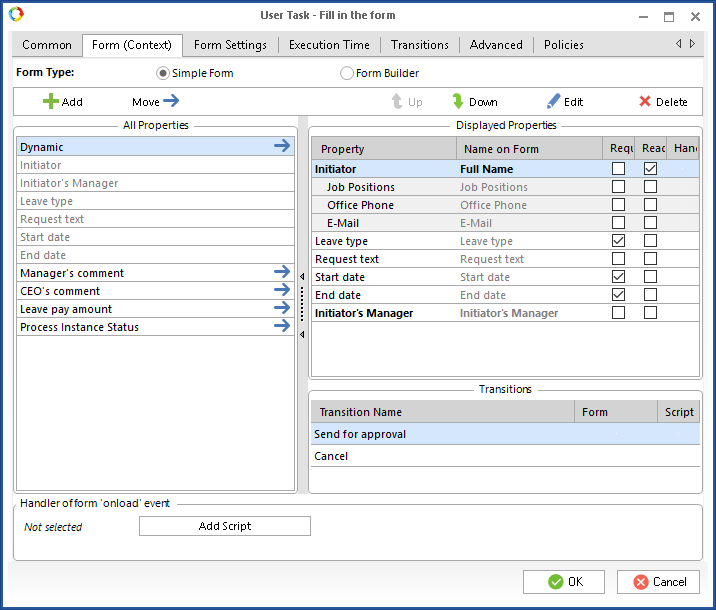
All the context variables listed in the Displayed Proprieties section will be displayed in Web Application along with the task description (fig 1).
|
|
|
Fig. 1. The task settings window. The Form (Context) tab. The Simple type form.
|
The list of process context variables (All Proprieties) is shown in the left part of the tab. You can move a context variable from the All Properties section to the Displayed Properties section by using one of the following methods:
-
Select a variable in the All Properties list and then click Move above the list;
-
Click the arrow icon  next to the variable you want to move;
-
Select the variable by clicking and holding the left mouse button and drag it to the Displayed Properties list.
The variables that have been added to the Displayed Properties list are shown grey in the All Properties list.
If the All Properties list does not contain the required context variable, it can be created by clicking the Add button above the list. The variable page will open where you must fill in the required fields and click OK to save the data.
The buttons above the Displayed Properties allow you to customize the display order of the context variables in Web Application and the variable properties.
The Up and Down buttons can be used to move the variable up and down as needed.
To open the variable settings either click Edit or double-click on the variable name.
The Delete button allows you to remove the selected variable from the Displayed Properties list, however, it will not be removed from the process context.
Transitions
In the Transitions section all the outgoing task connectors are displayed. For each connector you can set up a script, which will be executed before the transition or the form opens. To add a script, double left click on the transition name. A window with additional settings opens. It contains two tabs:
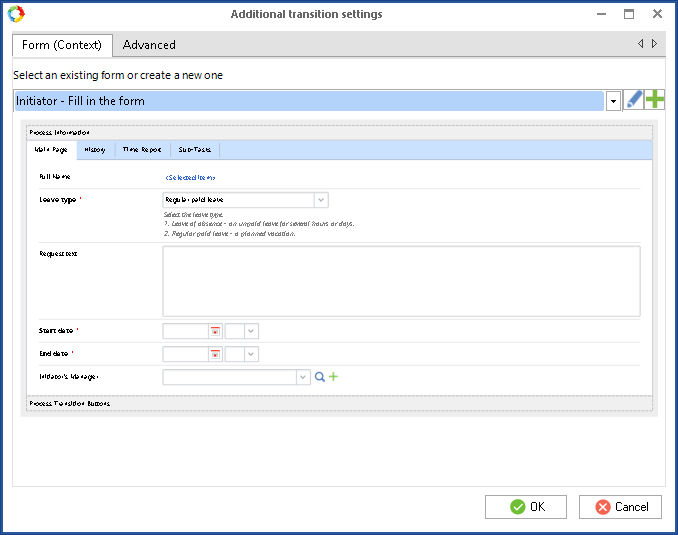
To add a script or a form, double-click on the transition name. A window will open featuring two tabs: Form (context) (fig. 2) and Advanced (fig. 4).
Fig. 2. Additional transition settings
Form (context) tab
The Form (context) tab and is similar to that of a User Task when the Form Builder option is selected. The only difference is that there are no Transitions table below the form.
Fig. 3. Additional transition settings. Selecting a form
Advanced tab
To add a script that you want to be executed before the process follows the transition, open the Advanced tab (fig. 4). This tab is similar to the Script tab of the Script activity. For more information on adding and creating a script, read the corresponding Help article.
Fig. 4. Additional transition settings. Advanced tab
Handler of form “onload” event
The Handler of form "onload" event allows you to create a dynamic task form. The dynamic form contains a set of variables and attributes that can be changed depending on the context of each specific process instance. In this field, you can specify the script the system will run before loading the form in Web Application. Such a script should only be used to hide or display variables on the form. It is not recommended to use this script to create variables and objects or change their values.
If a context variable is a complex object, its name will appear in bold. Complex objects have a predefined set of properties. To select the properties you want to display in Web Application go to the context variable page – the Nested Properties tab.
|
|
|
Fig. 5. The task settings window – the Form (Context) tab – the Displayed Properties list – Initiator complex object
|
-
Required — If you select this checkbox, users will not be able to start the process until they define the variable value.
-
Read Only — If you select this checkbox, users will not be able to change the value of the variable.
If you create a script on value change, then next to the variable name, in the rightmost column you will see the  icon.
icon.
Form Builder
Select this option if you want to use the Form Builder to create a custom form for the context variables input. The system offers to create a new form or select an existing one (fig. 6)
Fig. 6. The task settings window – the Form (Context) tab – the Form Builder.
Click the Create New Form button; in the emerged window type the form name and click OK (fig. 4). In the Form Builder create a task form that will be loaded in Web Application.
The name of the created form is automatically inserted in the selection box on the Form (Context) tab.
Fig. 7. The task settings window – the Form (Context) tab – the Create form dialog box.
If you click Select Existing Form you will be able to select one of the available forms from a drop-down list. To view the list items, click the  button (fig. 5). Under the selection box you will see the form thumbnail and transitions.
If the existing forms are not suitable, you can either create a new form by clicking the cross icon  , or edit an existing form in the Form Builder, by clicking the icon
  .
.
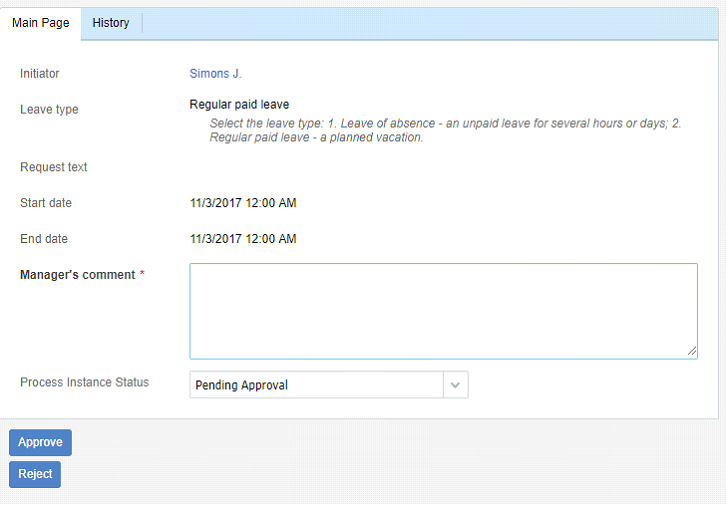
When working in Web Application, a user will see the form specified in the selection box (fig. 9).
Fig. 8. The task settings window – the Form (Context) tab – The Form Builder. Selecting a form.
If you add a
script to the transition, the

icon will be displayed in the
Transitions unit, next to the transition name in the
Script column. If you add a
form, the

icon will be displayed in the
Transitions unit, next to the transition name in the
Form column.
The form will be displayed for the user in Web Application, when working with the task.
Fig. 9. A process task form in Web Application.
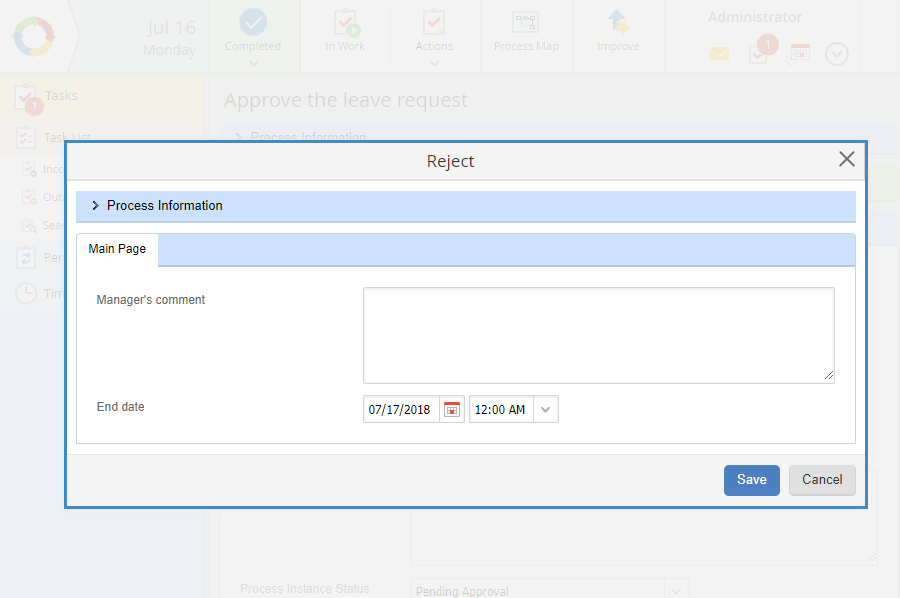
When you click on a transition button, for which you added a form, a dialog box opens (fig. 10). Fill in the required fields and click Save.
Fig. 10. Transition form in Web Application
Copyright © 2006–2019 ELMA

