An ELMA user profile features all the basic information about the user. Users can also adjust the system settings to their needs here.
The following settings are available to each user:
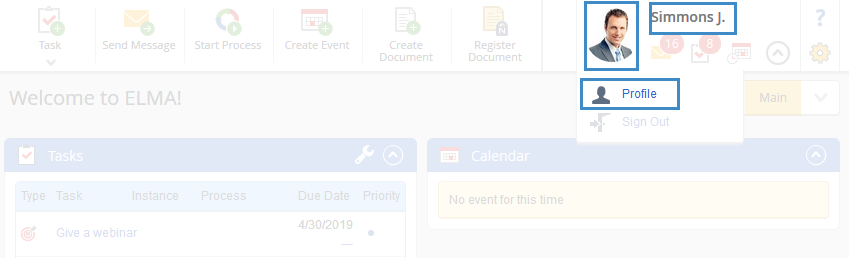
To open the user profile, click on the user's name or photo in the top right corner of the page. Another way to open the user profile is to click on the  button and select Profile in the context menu (fig. 1).
|
|
|
Fig. 1. Links to the user profile
|
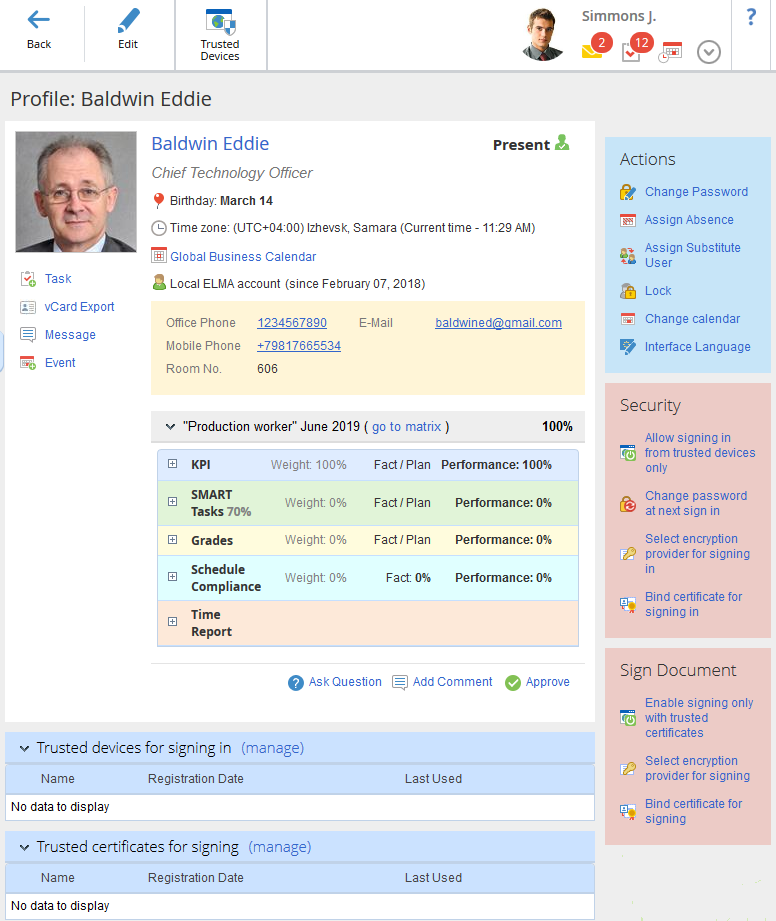
The user profile page will open (fig. 2).
It features:
User's personal data, time zone, business calendar, contact details, and the presence/absence or locked status of the employee. By default, in the upper right corner of the page the Present status is shown (see Figure 2). If the employee is away from the workplace, the respective status (Absent) will be displayed in their profile (Figure 2), on the user page (Figure 3), as well as the date and time when they return to work. The information about missing users corresponds to the absence schedule, which can be found in the Administration - Users - Absence Schedule section. Note that the data from the substitution schedule are not shown here. If a substitution is configured, the corresponding information will be displayed in the substitution page with a link to the substitute user page. The page of a locked user features the Locked status and the date the user was locked. Among other things, on the user page you can
create a task or an
event, send a
message and
export users’ business cards in the vCard format (this feature is available if the
vCard module is installed).
-
The Performance matrix shows the current user's performance for the selected period. The section is displayed in the user's profile only if the ELMA KPI application is activated and the performance matrix templates are configured for the current user. To learn more about configuring this section, go to the respective Help page.
-
-
Actions section:
-
Change Password - change your password.
-
Assign Absence – assign the current user or any other ELMA user as absent. This option is available only if the current user has respective permissions.
-
Assign Substitute User – assign a
substitute for the current user or any other ELMA user. This option is available only if the current user has respective
permissions.
-
Change Calendar – change the employee's business calendar. After clicking on this link, the dialog box opens, in which you can select a business calendar. By default, this option is available if the current user has the system administrator permissions. The permissions are assigned in Administration > Users > Access settings > Global access settings > Calendar > Business Calendar Settings.
-
Interface Language – you can change the language of the interface. Click on this link to open a language selection window.
Security section:
Sign Document section:
Downloads section:
-
ELMA Agent – download ELMA Agent to your computer. ELMA Agent is an application for messaging and working with documents in ELMA:
-
-
-
ELMA Designer – download and install ELMA Designer. Only users who have respective access permissions can download ELMA Designer. Access permissions are managed in Administration – Application Access Settings – Global Access Settings – ELMA Designer . When you click on the download link, ELMA identifies the edition installed on your computer and offers an appropriate file for downloading.
Toolbar buttons
|
|
Edit user data and personal settings. This feature is available for both the user and the administrator.
|
|
|
|
Editing personal data
When you click on the Edit button, the user profile opens for editing (fig. 4).
There are several tabs available for editing:
Here you can edit the personal data and add a photo (avatar).
|
|
|
Fig. 4. User profile in edit mode. "Profile" tab.
|
Account* – user's login. This field is required.
Last Name* – user's last name. This field is required.
First Name* – user's first name. This field is required.
Middle Name – user's middle name.
Birth Date – user's birthday.
Hire Date – the date the user was hired.
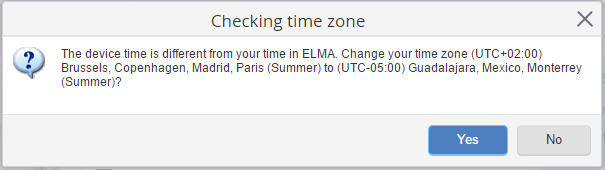
Time Zone – select from the drop-down list the time zone that will be set for the current user. The default user's time zone is the current time zone of the operating system. When you change the time zone on a personal device, ELMA BPM offers to set the similar time zone in the user profile (see Figure 5). If you have refused to change the time zone, ELMA BPM saves your preferences. Next time you enter any other time zone with the same offset the system will not bother you with notifications and will automatically block the time zone change. You can always adjust time settings manually in your profile.
|
|
|
Fig. 5. Checking Time Zone
|
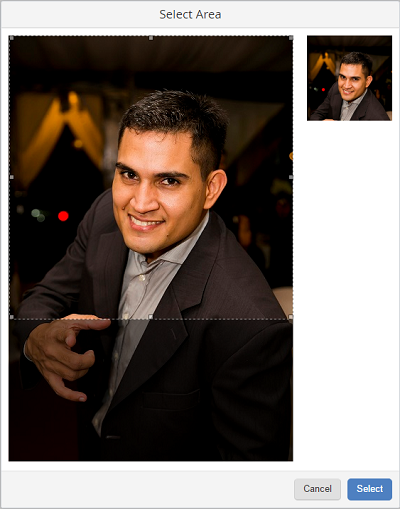
Photo – a form for uploading a user's photo. The recommended image size is 120 х 120 pixels. The maximum file size is 1000 MB. If your image is larger than recommended (120 х 120 pixels), you will have to select an area of the photo, which will be uploaded as your user picture (fig. 6). To select the area, drag the dashed line over your image. The selected area will be highlighted. After that, click Select.
|
|
|
Fig. 6. Selecting the image area to upload as user picture
|
Interface* – here you can select one of the available ELMA interfaces. This field is required.
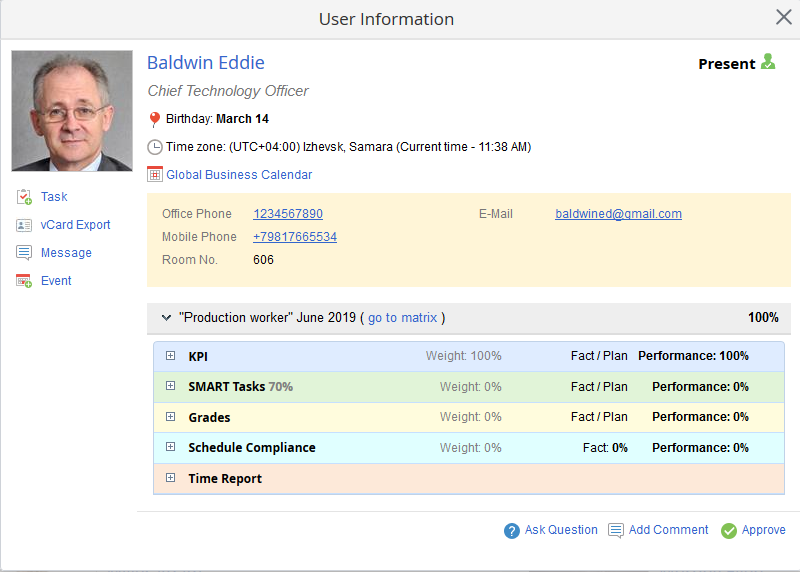
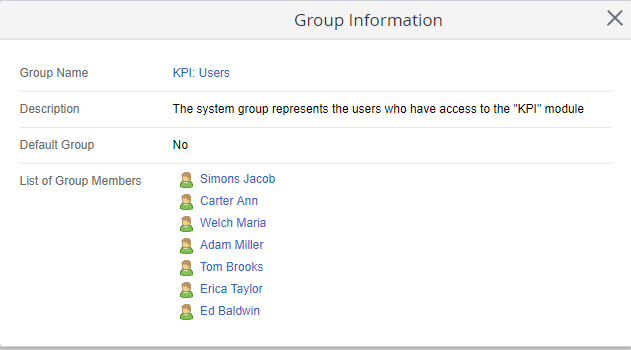
Groups – here you can manage the ELMA user groups to which the current user belongs. When you click on the group's name, the dialog box opens with the information about this group and its participants (fig. 7).
|
|
|
Fig. 7. User profile. Group information
|
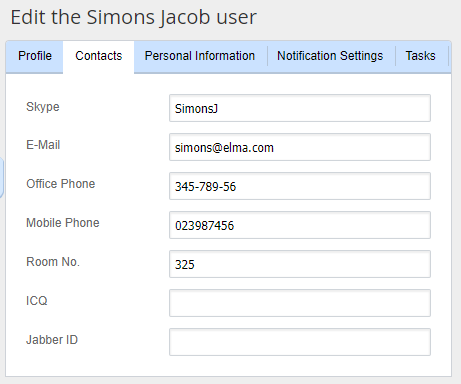
Contacts
Here you can specify your contact details (Fig. 8). These data will be shown in the window with the user information. We recommend to fill in and to update these data since they are needed for better communication within the company.
|
|
|
Fig. 8. User profile. "Contacts" tab
|
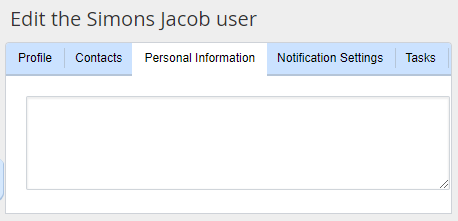
This tab features additional information about the current user that might be valuable to other system users (fig. 9).
|
|
|
Fig. 9. User Profile. Personal Information
|
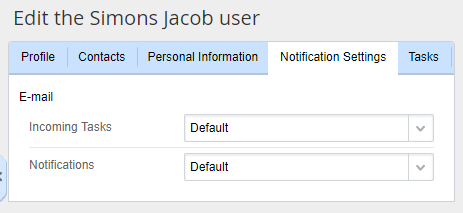
Notification Settings
The common notification settings for exceptions and e-mail messages notifying the user about upcoming tasks and events are managed in Administration – System Settings – E-Mail Notifications Settings.
Still, each user can additionally configure these settings to his or her liking on the Notification Settings tab of the user profile.
On this tab, you can set up exceptions and the format of e-mail notifications about incoming tasks and personal messages (the e-mail address used is the one specified on the Contacts tab) (fig. 10).
|
|
|
Fig. 10. User Profile. "Notification Settings" tab.
|
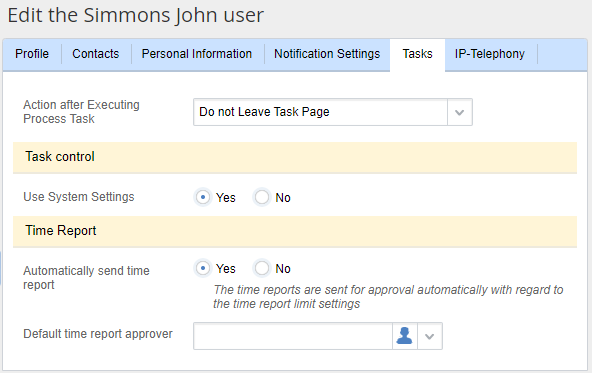
Incoming Tasks – here you can select the action that must be performed when you receive a task in ELMA:
If this setting is enabled, the Task Control section is displayed on the Tasks tab of the user profile. It allows choosing the following options:
Use System Settings:
Default control type – select the control type that will be used by default for your tasks.
Automatically send time reports – ELMA will automatically send your time reports to the selected approvers. For this, you need to specify the activities that was performed, select its type, the approver and enter the number of hours spent on the completed tasks. Note that time reports for the current date will not be sent automatically for approval. By default this option is disabled. To enable this option it is also required to select respective settings in the Administration section.
Copyright © 2006–2019 ELMA