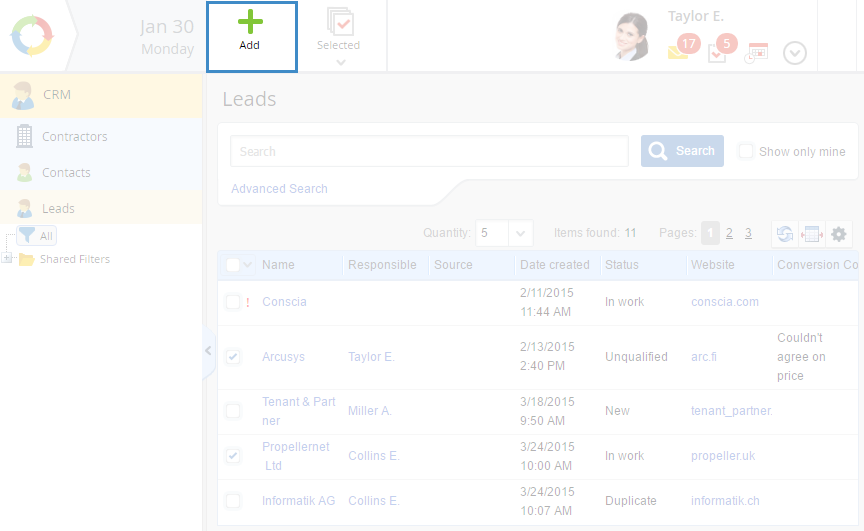
To create a lead, click Add in the toolbar of the Leads page (fig. 1).
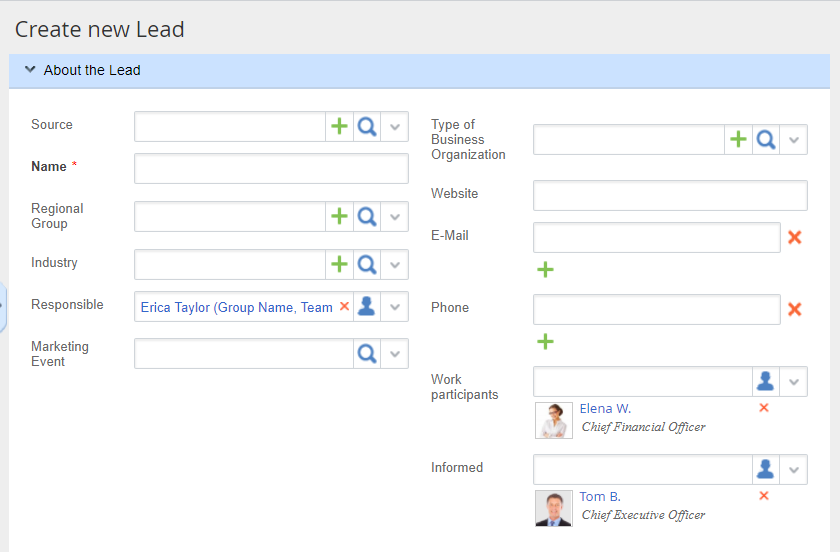
On the opened page (fig. 2), fill in the required fields and click Save in the toolbar.
|
|
|
Fig. 2. Page for creating a lead
|
The page for creating a lead contains several units: About the Lead, Categories, Description, Contact, Address. The header of each unit is light-blue. Click on a unit header to expand or collapse it.
Filling in the fields
Some fields are filled in with values of objects. You can find CRM objects in Objects – CRM. The system administrator assigns access permissions to objects in Administration – Users – Access Settings – Objects. To learn more about objects, see the respective Help section.
These fields are unique for leads:
Source – information source, from which the lead learned about the company. The drop-down list allows selecting an instance of the Lead Source object.
About the Lead – a description of the lead.
After you fill in the fields and click
Save, a lead is created and checked for
duplicates in accordance with the
scoring settings. This operation may take a while, wait until it is complete. A notification that the lead is being checked will be displayed (fig. 3).
Fig. 3. Lead page. Found duplicates notification
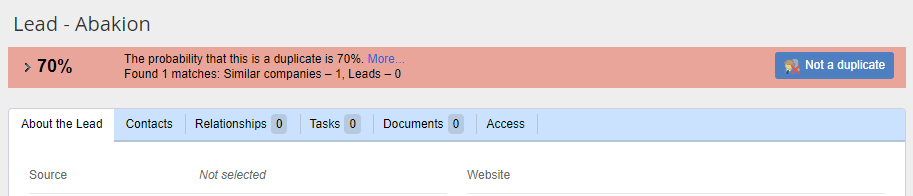
If matches are found, a notification panel will appear (fig. 4), which displays the match percent, the number of found matches and their types (companies, leads).
Fig. 4. Lead page. Found duplicates notification
If you click

or
More…, a table with information about the found matches will be displayed (fig. 5).
If many matches are found, use the table settings panel (available for each unit - Contractors and Leads). When working with data in these panels, you can navigate only in the selected objects.
Fig. 5. Table of found duplicates
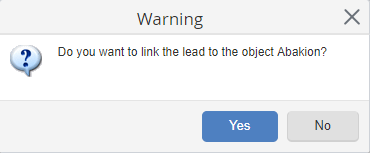
To bind the created lead with an existing contractor or lead, click Bind next to the required object. In the opened dialog box (fig. 6), confirm your action by clicking Yes.
Fig. 6. Confirmation dialog box
The created lead receives the Duplicate
status.
If the lead is not a duplicate of any of the found objects, click Not a duplicate in the right part of the notification panel (fig. 4).
Copyright © 2006–2019 ELMA