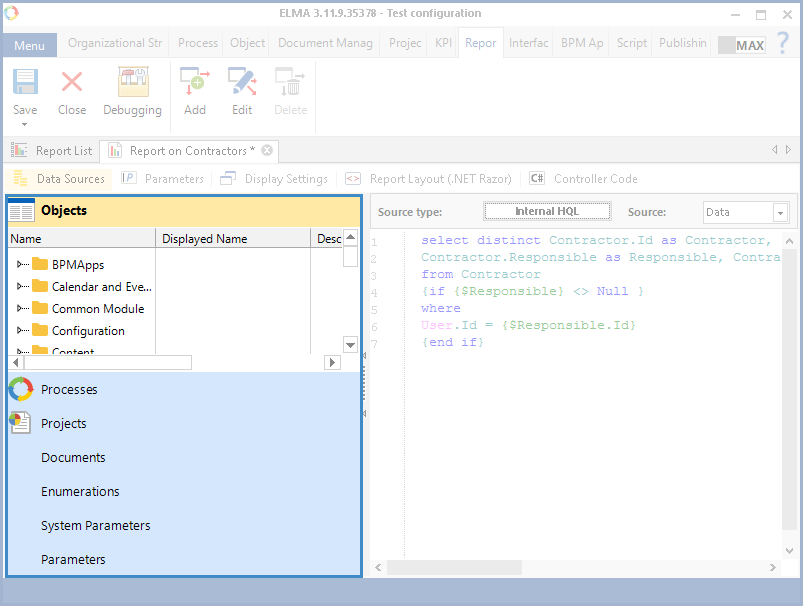
You can create an HQL or SQL request in ELMA Designer. HQL works with the system objects, and SQL works with the database items (e.g. tables, columns, entries). You can select the request language when creating or editing the source.
The Data Sources tab contains the left panel with the data, which can be used in the request. When you use the HQL language, the data on the panel are grouped by objects (fig. 1), and when you use the SQL language, the data are represented as sets of tables and their fields (fig. 2).
|
|
|
Fig. 1. Left panel, when using HQL
|
|
|
|
Fig. 2. Left panel, when using SQL
|
You can drag the items from the left panel to the required spot on in the right part of the window.
Database Objects unit (when using SQL)
This unit (fig. 2) displays ELMA tables and database fields The fields in this unit are grouped depending to which database table they belong.
Objects unit (when using HQL)
This unit (fig. 1) displays all the ELMA objects. Each object has properties, displayed on the lower level in the tree.
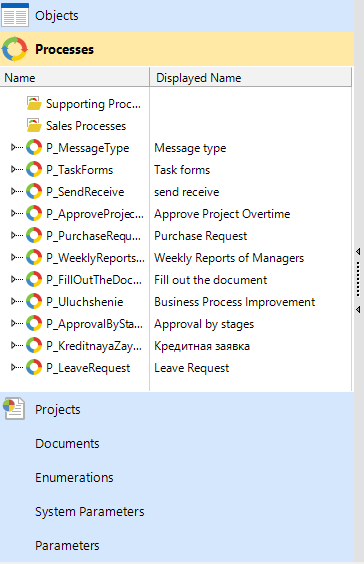
Processes unit
This unit (fig. 3) displays the processes and their context variables. When you create a process on the Processes page in ELMA Designer, it is automatically added to this unit.
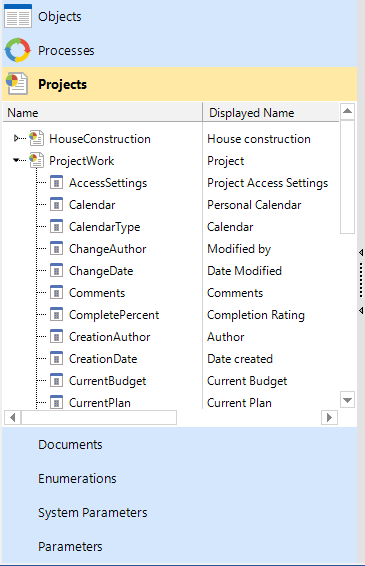
Projects unit
This unit (fig. 4) displays the project types and attributes. This unit is available only if you have the Projects+ application.
Documents unit
This unit (fig. 5) displays the document types and attributes. If the ECM+ application is activated, you can create new document types and attributes on the Document Management tab of ELMA Designer, which will be added to this unit.
"Enumerations" unit
This unit (fig. 6) displays all the enumerations and enumeration groups. When you create an enumeration on the Objects tab of ELMA Designer, it is automatically added to this unit.
|
|
|
Fig. 6. "Enumerations" unit
|
As an example of using enumerations, consider a report, which will display tasks with a particular status. In this case, you need to add the required task status from the Enumerations unit to the request (fig. 6).
System Parameters unit
This unit (fig. 7) displays the system parameters ("Current User" and "Current Date"), which can be added to the request.
|
|
|
Fig. 7. "System Parameters" unit
|
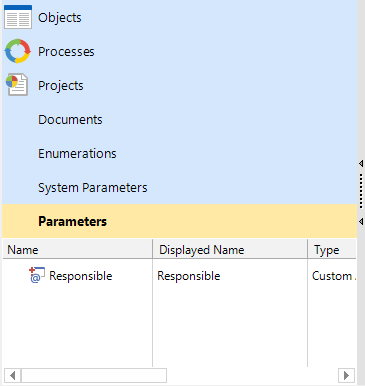
Parameters unit
|
|
|
Fig. 8. "Parameters" unit
|
Writing queries
When writing queries on the
Data Source Tab, it is important to take into account the following features that apply to all data sources:
-
A query must begin with the keyword
select;
-
Do not use sorting for the selection results;
-
Do not use the keyword
order by;
-
Consider the restrictions on the length of the database alias for the following DBMS:
MSSQL Server - 128 characters;
Firebird 2.5 - 255 characters;
PostgreSQL - 63 characters;
Oracle - 30 characters (from version 12.2 and higher - 128 characters).
-
Do not use quantitative restrictions for the selection results. Use the following keywords for DBMS:
Firebird – FIRST, SKIP;
PostgreSQL – OFFSET, LIMIT;
MS SQL Server – OFFSET, FETCH NEXT.
-
to sort and group the data from the selection, you must specify a database alias for the source of Internal (HQL) type.
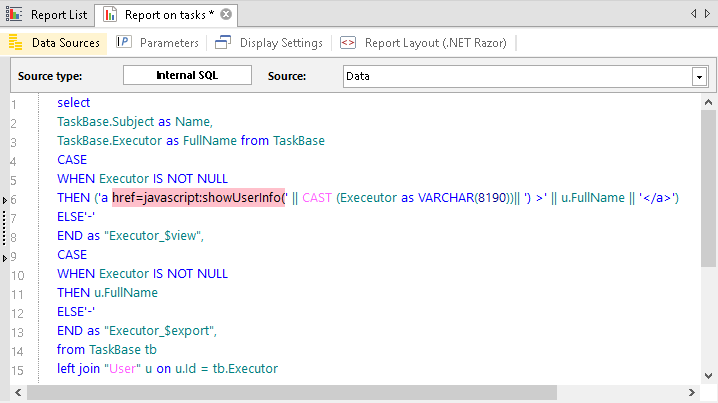
Example query to display a report with a customizable table
Consider the following example. Create a report with a selection of all user tasks (incoming, outgoing) and their executors. In this case, the report layout (with a customizable table) will be generated using a query.
|
|
|
Fig. 9. "Data Sources" Tab
|
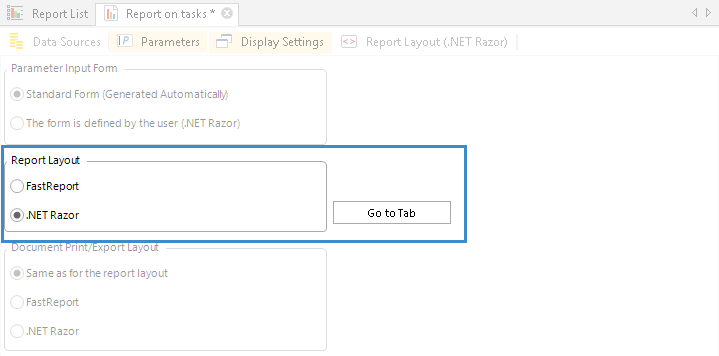
On the
Display Settings tab, in the
Report Layout section, select
.NET Razor and click the Go to tab button (Figure 10).
|
|
|
Fig. 10. "Report Layout" section. "Display Settings" tab.
|
On the opened tab, in the toolbar, click the Template - Table Template button (Figure 11).
|
|
|
Fig. 11. Button "Template - Table template". Report Layout (.NET Razor) tab
|
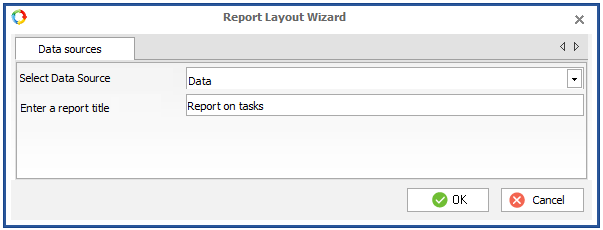
In the opened dialog box, fill in the fields and click OK (Figure 12).
|
|
|
Fig. 12. The "Report Layout Creation Wizard" dialog box
|
|
|
|
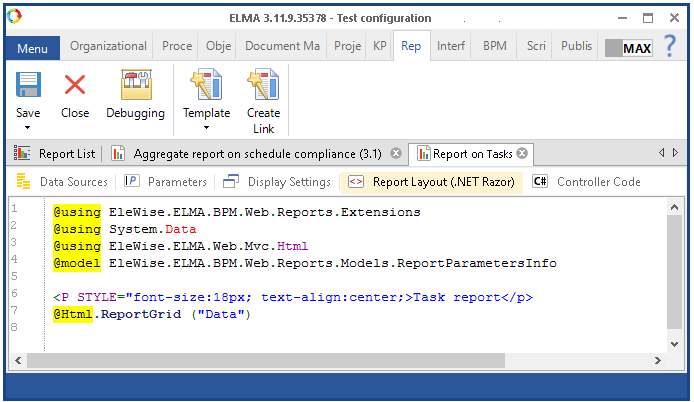
Fig. 13. Report Layout tab (.NET Razor)
|
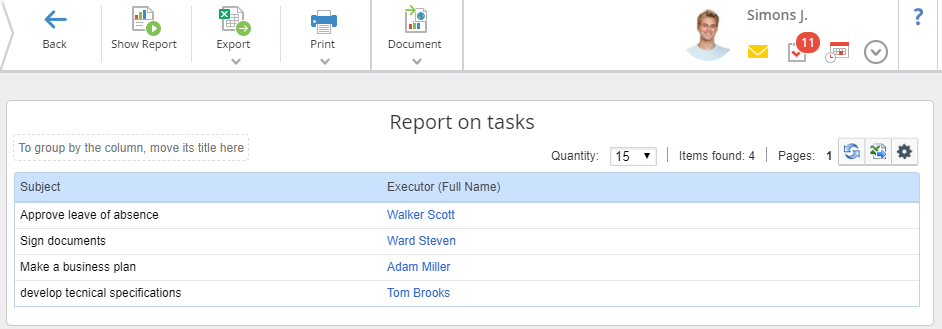
The Fig. 14 shows the report display in Web Application.
|
|
|
Fig. 14. Report in the web application
|
The data in the table can be sorted, grouped, the number of data displayed in the table can be changed, etc. For more information about setting up the data table, see the
corresponding Help page.
Note that the table display settings are saved individually for each user. If the report is modified in the Designer, all user settings will be reset.
Copyright © 2006–2019 ELMA