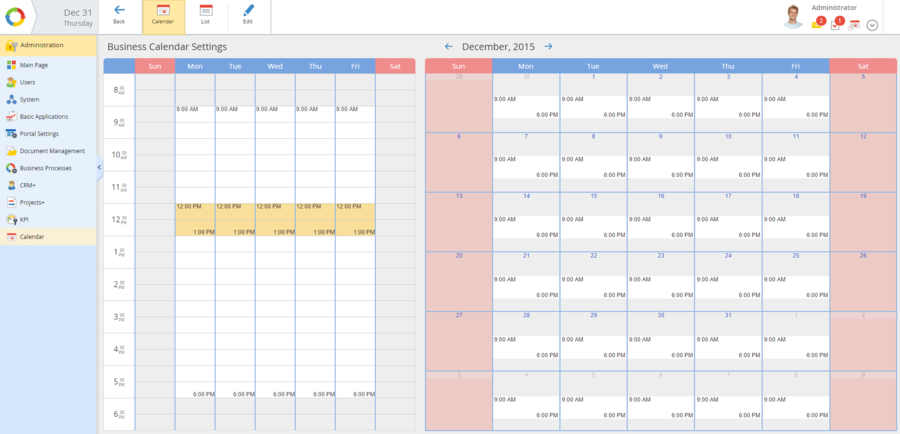
This page can display a business week in two modes:
as a calendar (fig. 1);
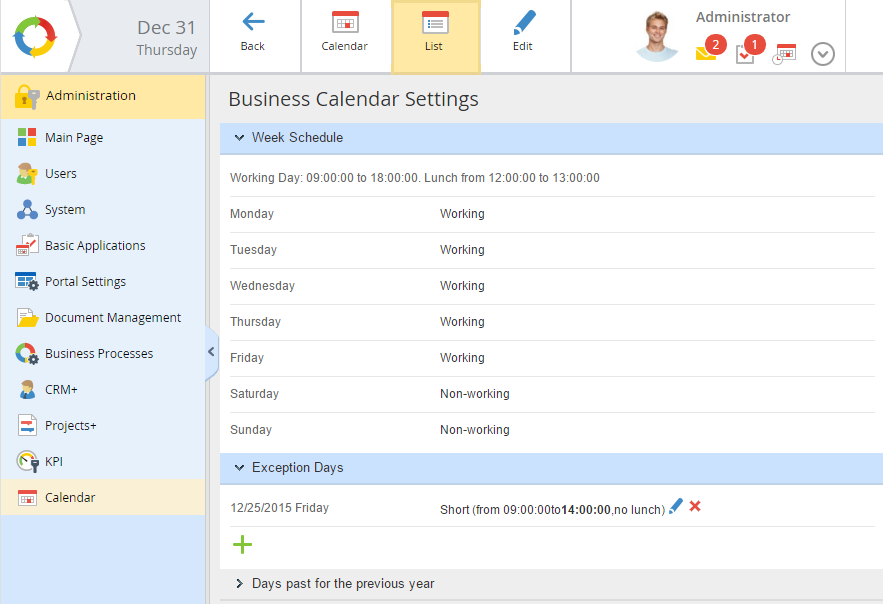
as a list (fig. 2).
Fig. 2. Work week as a list
The list calendar page consists of three units:
Week Schedule – contains information on the working days and lunch duration and the day types;
Exception Days – contains information on the exceptional days, of the current year. To add an exceptional day, click the button. To edit an exceptional day, click the button to the right of the required day. To delete an exceptional day, click the button to the right of the required day.
Days past for the previous year – contains the list of exceptional days for the previous year.
You can collapse the lists, if necessary. To do so, click the name of the required unit. To expand a unit, click the name again.
Configure Week Days
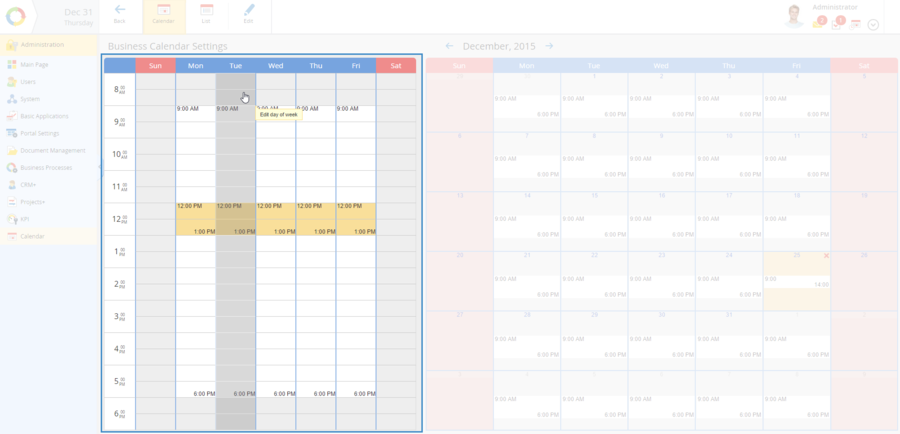
You can configure week days in the left part of the page (fig. 3). By default the calendar is configured like this:
working days – from Monday till Friday (blue);
weekend – Saturday and Sunday (red);
working hours – 9AM – 6PM (white);
lunch – 12PM – 1PM (dark yellow).
To configure a week day, mouse over the required day and click it (fig. 3).
Fig. 3. Week day settings
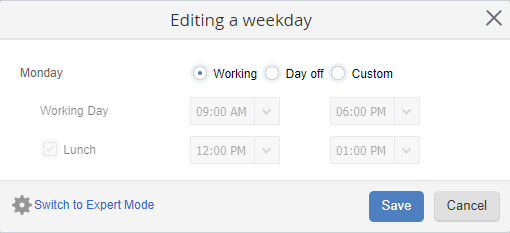
A dialog box will open (fig. 4), in which you have to configure the required parameters and click Save.
Fig. 4. Day editing dialog box
Day of Week – the edited week day.
Day Type – select a day type from the drop down list:
Working –working day, with the schedule specified in the basic settings of this business calendar (fig. 4).
Day off – additional day off (will be highlighted red);
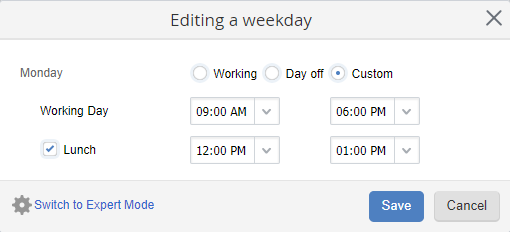
Custom – working day, with a custom schedule (fig. 5). If you select this day type, you will be able to set up the working hours and the lunch time.
Fig. 5. Day editing dialog box. "Short" day type
Working Day – select the day start and day end from the dropdown lists;
Lunch – select the lunch start and lunch end from the dropdown lists. If you check the No Lunch box, these fields will be hidden. By default, the box is unchecked.
Working – a working day, with a configured schedule. When you select this day type, the dialog box (fig. 6) will display the information on the work and lunch schedule.
Switch to Expert Mode – opens the working time intervals for editing as a table. To learn more, read this paragraph.
Configure Exception Days
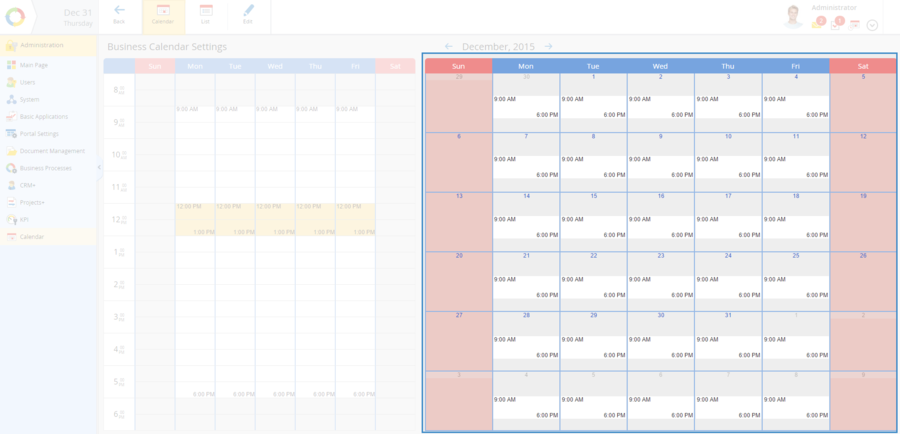
You can configure exception days in the right section of the page in the calendar display mode (fig. 6) or in the Exception Days unit in the list display mode (fig. 2). By default, the business calendar has no exceptional days.
Fig. 6. Configure exception day
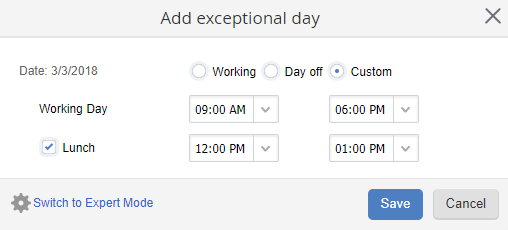
To add and configure an exceptional day, select the required month (by clicking or ) and click the required date in the calendar view mode or click the button in the Exception Days unit in the list display mode. A dialog box will open (fig. 7), in which you have to configure parameters and click Save.
Fig. 7. Exception day dialog box
Date – select the date.
Day type– select the day type from the dropdown list (non-working, short, working).
To go to the next month with exceptional days, click , to the right of the selected month.
To go to the previous month with exceptional days, click .
To delete an exceptional day, click , in the top right corner of the required date.
Business Week Settings
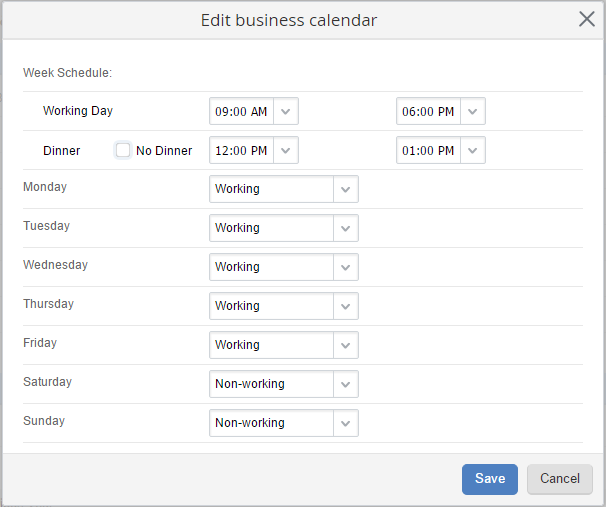
To simultaneously configure business week days, click the Edit button in Administration – Calendar(fig. 1) in the toolbar. A dialog box will open (fig. 8), in which you can make the required changes and click Save.
Fig. 8. Work week configuration dialog box
In this dialog box, you can configure working hours, lunch time and each day's type. More on these settings is said above.
Expert Mode
Expert mode – is an advanced mode for editing working hours. This mode is available for a business week, and for a day type. To enable the expert mode, click Switch to Expert Mode (fig. 10), at the bottom of the dialog box. Next you will see the settings of time intervals as a table (fig. 9). Once you have finished editing working intervals, click Save.
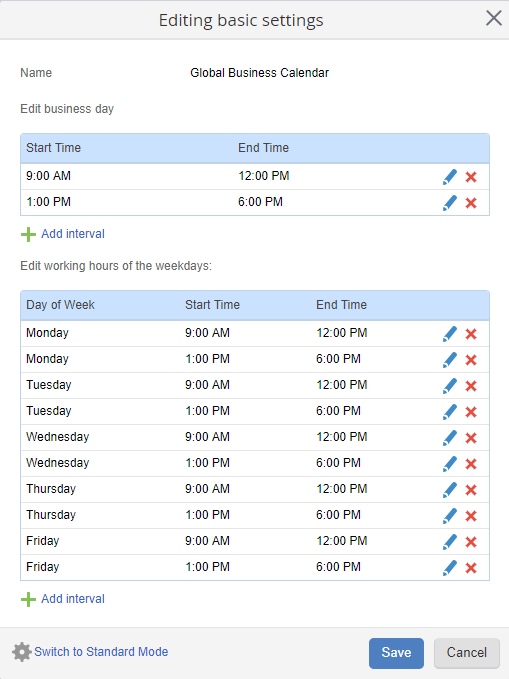
Fig. 9. Editing basic settings. Expert mode
To edit a working interval, click , to delete an interval, click .
You can add a new working time interval by clicking Add interval. After that, a dialog box will open (fig. 10), where you need to select a Day of Week, Start Time, End Time and click Add.
Fig. 10. Adding a working time interval
To return to the standard mode, click Switch to Standard Mode (fig. 8).