Message queue – is a component, used for communication between applications. Message queue functions allow collecting messages from different programs, placing them in a queue for sending, sorting and distributing among programs.
ELMA can work with the following queue types:
-
RabbitMQ – software that implements message exchange between components of a program, based on AMQP (Advanced Message Queuing Protocol) and licensed by Mozilla Public License;
-
-
JMS (Java Message Service) – a message queue implementation, containing Java API for working with messages, which allows creating, sending, receiving and viewing messages. Uses WebLogic JMS server.
Creating / editing message queues
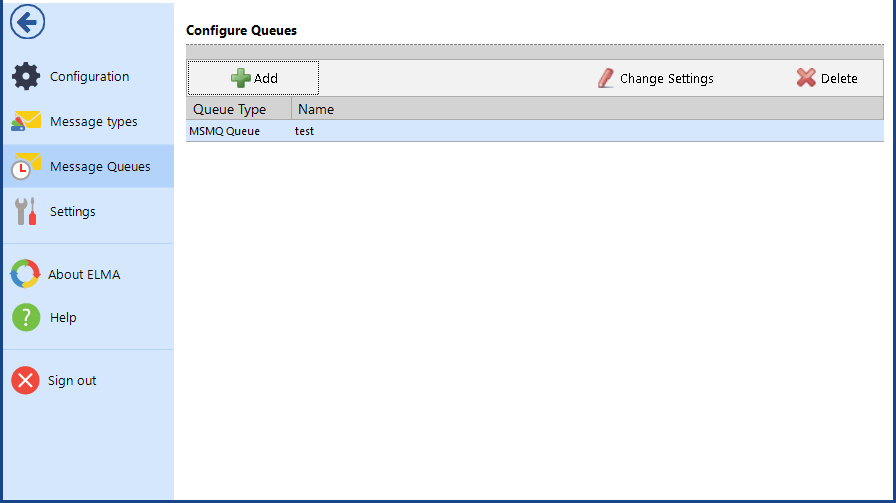
You can manage message queues in the main menu of ELMA Designer, in the Message Queues section (fig. 1).
|
|
|
Fig. 1. ELMA Designer. Menu tab. Message Queues section
|
To add a new message queue, click Add. To edit existing message queues, click Change Settings. To delete a message queue, click Delete.
The set of fields on the creating/editing form depends on the queue type.
RabbitMQ settings
For RabbitMQ to work correctly, you need an installed and available RabbitMQ server.
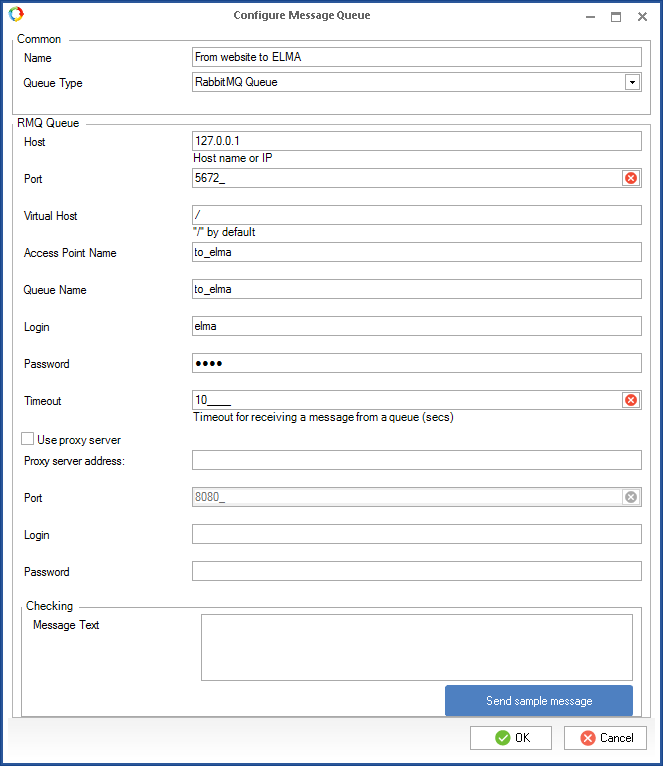
Fig. 2 illustrates the dialog box for creating/editing a RabbitMQ message queue.
|
|
|
Fig. 2. Dialog box for configuring RabbitMQ
|
Name – message queue name.
Queue Type – select the required queue type (RabbitMQ, MSMQ, JMS).
Host – RabbitMQ server IP-address or name, to connect to (e.g. localhost).
Port – server connection port. By default, 5672 (specified, when creating a RabbitMQ message queue). This field can contain an underscore "_" (one or several) after the port number, which defines the number of digits available for inputting (up to 5).
Virtual Host – host, specified in the RabbitMQ server settings. By default, "/".
Access Point Name – access point name, specified in the RabbitMQ server settings, Exchanges section.
Queue Name – queue name, specified in the RabbitMQ server settings, Queue section.
Login, Password – login and password for connecting to the RabbitMQ server.
Timeout – time for receiving a queue message (seconds). By default, 10 seconds. This field can contain an underscore "_" (one or several) after the port number, which defines the number of digits available for inputting (up to 6).
To use a proxy server, check the Use proxy server box. The following fields will become available:
Proxy server address – a proxy server address.
Port – port for connecting to the proxy server. The 8080 port is used by default (filled in when creating a RabbitMQ type queue). This field can feature an underscore (or several) after the port number. It stands for the number of digits (up to five) that can be entered.
Login, Password – user login and password for connecting to the proxy server.
Checking unit
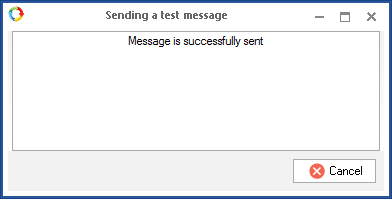
Message Text – text of the test message, which can be sent for testing the configured settings. To send a test message, click Send sample message. When you click this button, a test message is sent to the RabbitMQ server (Exchange section, specified in the Access Point Name field) for checking, if it is available. The result is shown in a dialog box (fig. 3).
|
|
|
Fig. 3. Dialog box with the results
|
MSMQ settings
There are public and private MSMQ message queues.
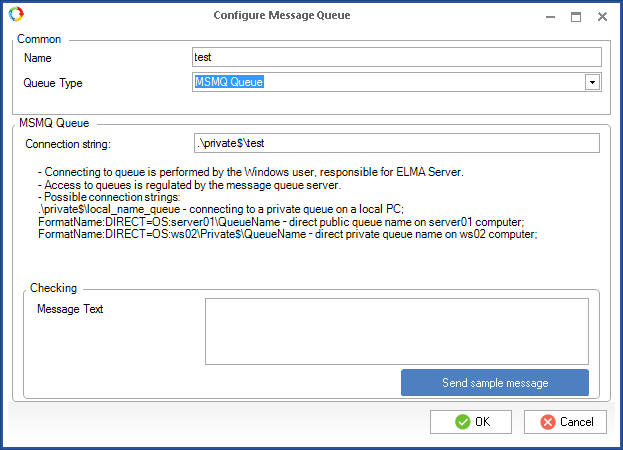
Fig. 4 illustrates the dialog box for creating/editing an MSMQ message queue.
|
|
|
Fig. 4. Dialog box for configuring MSMQ
|
Name – message queue name.
Queue Type – select the required queue type (RabbitMQ, MSMQ, JMS).
Connection string – define the main connection parameters (protocol, server name, queue type, queue name). The rules for entering the connection string are below this field.
Checking unit
Message Text – text of the test message, which can be sent for testing the configured settings. To send a test message, click Send sample message. When you click this button, a test message is sent to the RabbitMQ server (Exchange section, specified in the Access Point Name field) for checking, if it is available. The result is shown in a dialog box (fig. 3).
JMS Settings
To ensure correct settings and operation of the JMS message queue, you have to install the JMS server.
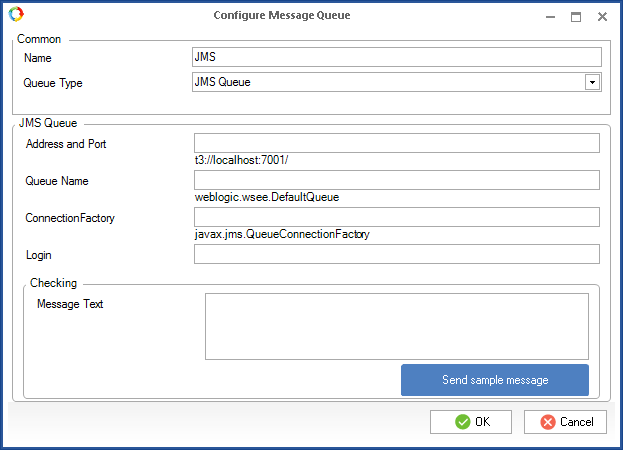
Fig. 5 illustrates the dialog box for creating/editing a JMS message queue.
|
|
|
Fig. 5. Dialog box for configuring a JMS queue
|
Name – message queue name.
Queue Type – select the required queue type (RabbitMQ, MSMQ, JMS).
Address and port – JMS server address and port as t3://localhost:<port>, where: localhost is the JMS server address; port is the JMS server port number.
Queue name – queue name, specified in the JMS server settings.
ConnectionFactory – object on the messages server, which encapsulates connection configuration parameters, defined by the server administrator. Used to establish a connection with the JMS provider.
Login, Password – login and password for connecting to the message queue.
Sending and receiving queue messages
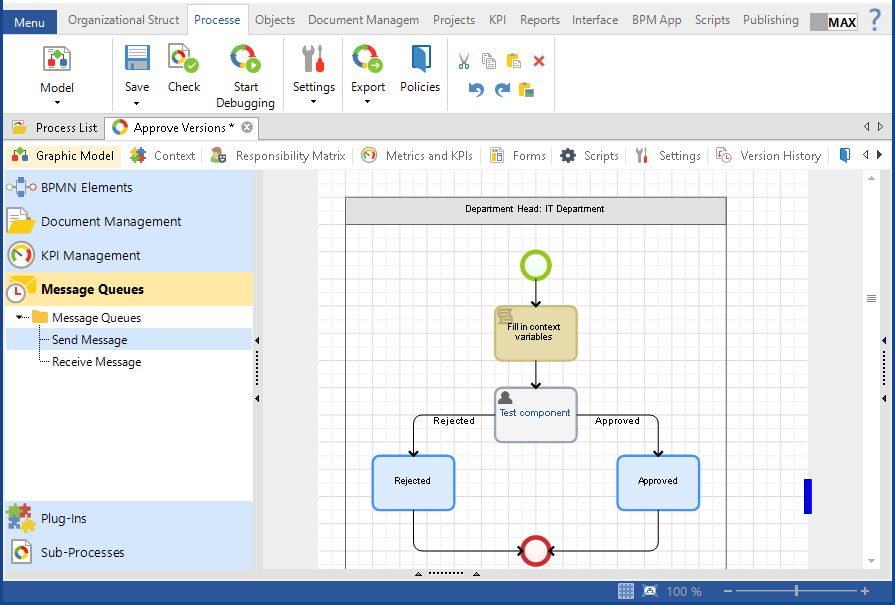
The Graphic Model tab of the process page includes the Message Queues unit (fig. 6), which contains the Send Message and Receive Message activities. These activities are independent from each other. We do not recommend adding these activities in one process (use separate processes for each of them).
Send Message activity is used for adding a message to a particular queue and sending it with the possibility to notify ELMA users on errors that occurred while sending the message. Receive Message activity is used for checking, if messages are in a queue and receiving them from the selected message queue with the possibility to notify ELMA users on errors that occurred, while receiving the message.
|
|
|
Fig. 6. A process with "Send Message" activities
|
Send Message activity settings
Common tab
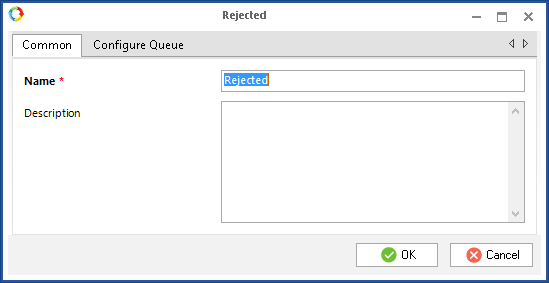
Fig. 7 illustrates an example of this tab.
|
|
|
Fig. 7. "Send Message" activity. Common tab
|
Configure Queue tab
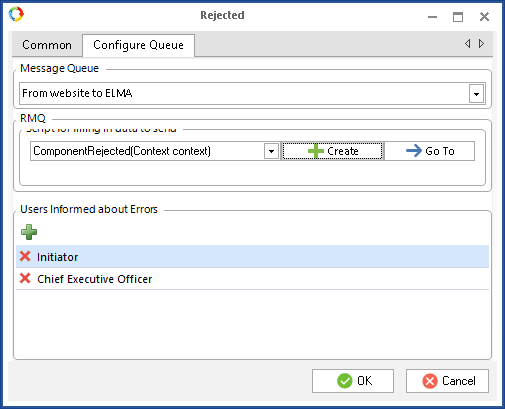
Fig. 8 illustrates an example of this tab.
|
|
|
Fig. 8. "Send Message" activity. Configure Queue tab
|
Message Queue – select the message queue, to which ELMA will send system messages for other programs. The drop down list contains all the queues from the Message Queues section (fig. 1).
Script for filling in data to send – select the script, which prepares system messages to send to the message server for other programs. When you add a script, the script text is generated automatically for the selected message queue.
Users Informed about Errors – the list of users, who will receive a system message, that an error occurred while sending the message.
Receive Message activity settings
Common tab
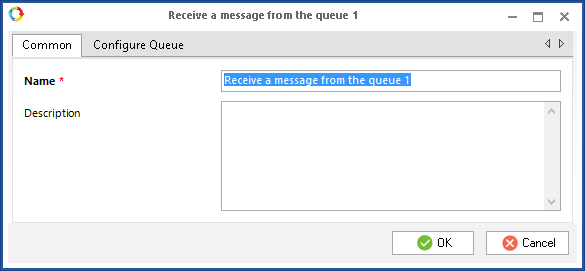
Fig. 9 illustrates an example of this tab.
|
|
|
Fig. 9. "Receive Message" activity. Common tab
|
Configure Queue tab
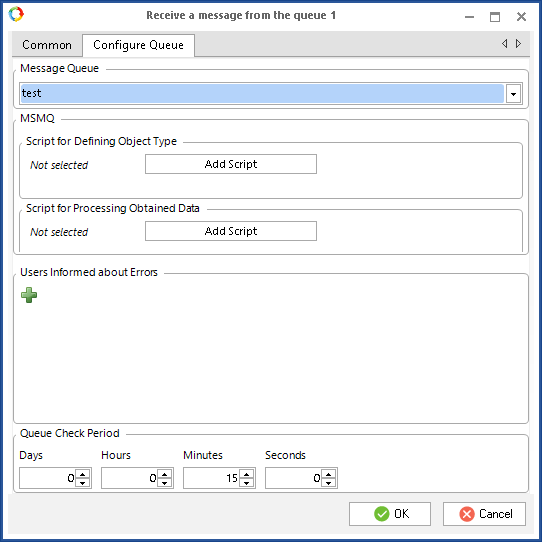
Fig. 10 illustrates an example of this tab.
|
|
|
Fig. 10. "Receive Message" activity. Configure Queue tab
|
Message Queue – select the message queue, to which ELMA will send system messages for other programs. The drop down list contains all the queues from the Message Queues section (fig. 1).
Script for Defining Object Type – select the script, which will automatically define the type of the received object. This script is executed before receiving the message.
Script for Processing Obtained Data – select the script, with the action, which ELMA will perform when receiving new messages from other programs.
For example, the selected message queue includes checking for new messages. If there are new messages, the script for defining the first of them is started. After that, the message is received and the script for processing this message is started.
Users Informed about Errors – the list of users, who will receive a system message, that an error occurred while sending the message.
Queue Check Period – time period, after which ELMA will request to the message server and receive messages. By default, 15 minutes.
Copyright © 2006–2019 ELMA

