For purposes of security, you can make access to ELMA available only from trusted devices.
Trusted devices are:
To enable access from trusted devices only, complete the following steps:
After that, you will be able to sign in to ELMA only from a device added to the list. If you try to sign in from a different device, you will receive an error message about an invalid password or login.
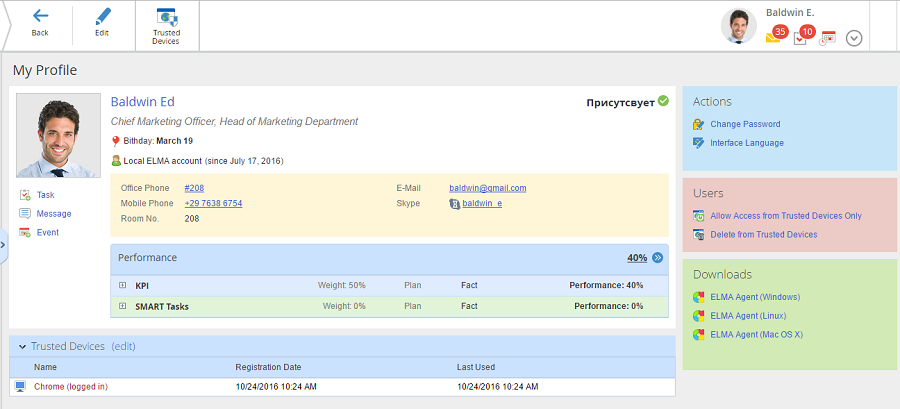
The list of trusted devices is shown in the user's profile, in the Trusted Devices section (fig. 3).
Adding a device to the list of trusted devices
To add a browser or an Apple iPad to your list of trusted devices, sign in from this exact browser or iPad, open your user profile and click on either of the following elements (fig. 1):
When you click on Trusted Devices or edit, the Trusted Devices section of your user profile opens (fig. 2).
|
|
|
Fig. 2. "Trusted Devices" section of the user profile.
|
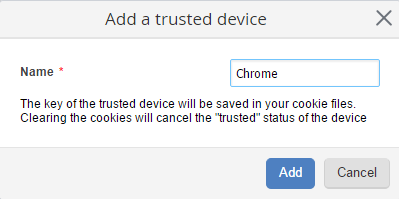
This section features all the user's trusted devices. If you click "Add trusted devices", a new window opens for you to add the device to the list (fig. 3). Enter the device's name and click Add. The new device will appear in the list of trusted devices (fig. 4).
|
|
|
Fig. 3. Adding a trusted device.
|
|
|
|
Fig. 4. Trusted device added to the list.
|
When you click on Add to Trusted Devices in the User Management section of your profile (fig. 1), a window for adding the device opens (fig. 3). Enter the name of the device and click Add. The device will appear in the list of trusted devices (fig. 4).
The list of trusted devices (fig. 5) can contain an unlimited number of devices. You can even add the same browsers but from different computers. Certificates are added to the list automatically when linked to a user account.
|
|
|
Fig. 5. List of trusted devices.
|
Enabling access from trusted devices only
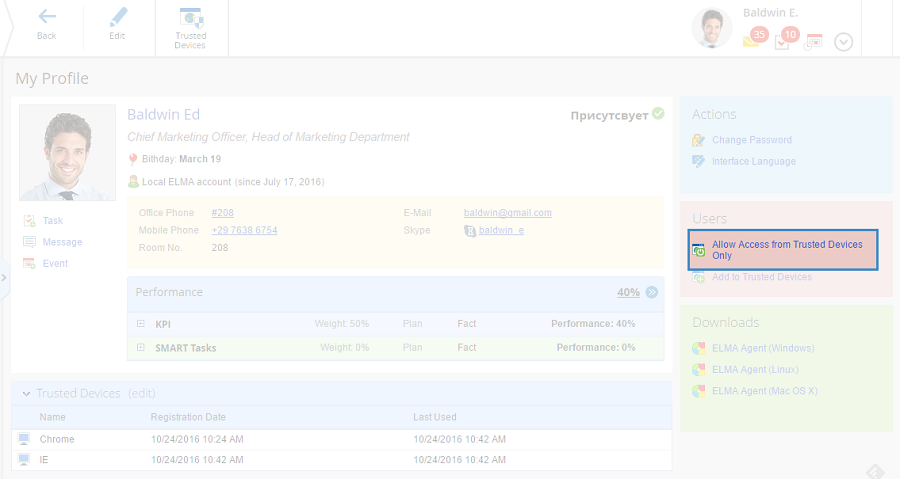
After you have formed a list, you can limit access to ELMA and make it available only from the listed devices. To do so, click on Allow Access from Trusted Devices Only (fig. 6, 7).
|
|
|
Fig. 6. List of trusted devices.
|
A confirmation window will open (fig. 8). Click Yes to enable access from trusted devices only.
|
|
|
Fig. 8. Confirmation window.
|
Deleting devices from the list of trusted devices
If you delete a device from the list, you will not be able to sign in from that device if the "Allow access from trusted devices only" option is enabled.
To delete a device from the list, open the trusted devices page (fig. 5) and click on the button next to the device's name. A confirmation window will open (fig. 9). Click Yes to delete the device from the list.
|
|
|
Fig. 9. Confirmation window.
|
Managing trusted devices
To open the trusted devices page, open the user profile and click the edit link in the Trusted Devices section (fig 1).
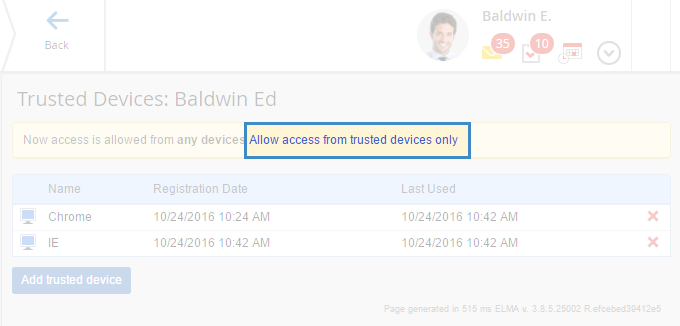
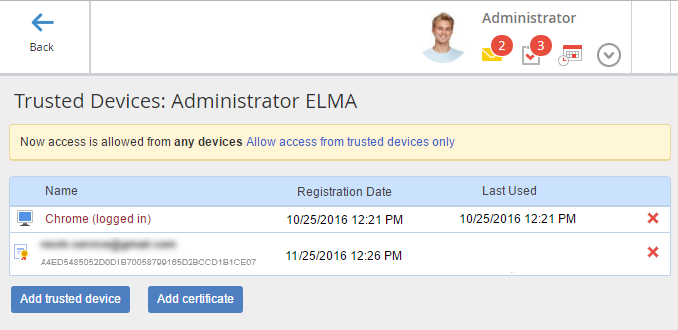
On this page you can (fig 10):
-
-
-
Add trusted device – add a browser or an iPad through which you are logged into ELMA to the list of trusted devices.
-
Add certificate – add a certificate to the list of trusted devices.
-
Allow access from trusted devices only - if this option has not yet been enabled, you can can enable it by clicking on the link. After that, you will be able to sign into your account only from the listed devices:
-
-
With a certificate – sign in with a certificate only from the computer to which it is bound;
|
|
|
Fig. 10. Trusted devices management page.
|
The name of the device with which you are currently logged in is marked brown and labeled "logged in" (Fig. 4).
Copyright © 2006–2019 ELMA

