Importing a Configuration
During configuration import, all the data selected at the first step is imported into the
current configuration of ELMA Designer.
Import of ELMA configurations consists of several steps. Once they are completed , all the imported objects must be
published and, if necessary, the server must be restated.
Use the

and

buttons to switch between the import steps. To cancel import, click

.
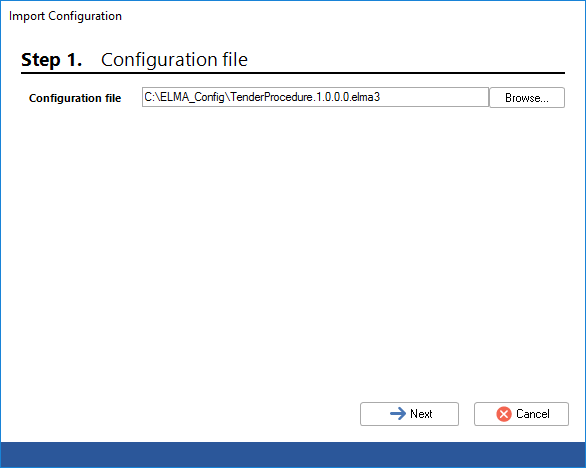
Step 1. Configuration file.
In the provided window (Fig. 1), click
Browse... and select the required configuration file. The configuration file has the .elma3 extension; it is created as a result of the
configuration export; or can be downloaded from ELMA Store (the catalogue of ready-made BPM apps). Click
Next to continue importing the configuration.
Fig. 1. Dialogue box for selecting configuration file
Step 2. Checking the configuration file.
Before importing the configuration,
publish all the modified objects and restart the server.
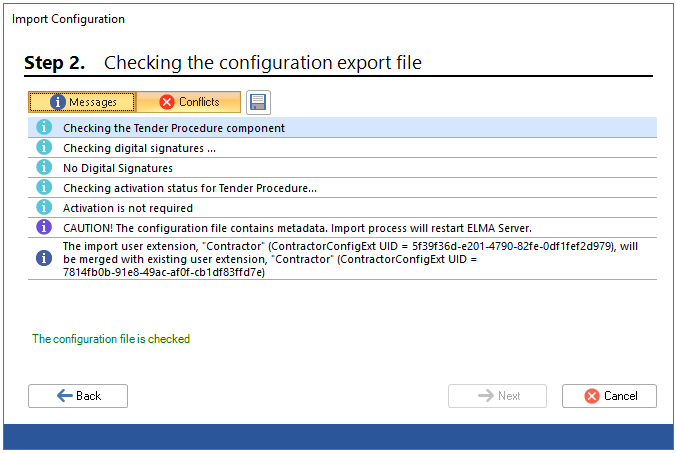
At this step (Fig. 2), ELMA checks the configuration file selected at step 1. It may take some time. Once the system has completed checking the configuration file, the results, respective notifications or error messages will be shown in the dialog box.
Fig. 2. Dialogue box for checking configuration file
The results will be displayed at the bottom of the dialogue box. To show/hide messages or conflicts, click the corresponding button (Messages / Conflicts). By default, the dialogue box shows all the notifications from both messages and conflicts sections.
Messages – messages about any changes that will be introduced to ELMA once the configuration import is complete.
Conflicts – messages about errors found when the file was checked. The data related to these errors will not be imported.
You can save the displayed information to a separate
TestConfigurationFile.txt file, by clicking the

button located at the top of the dialogue box. You will need to specify a folder to save the file.
Fig. 3 shows an example of a TestConfigurationFile file.
Fig. 3. Example of the "TestConfigurationFile.txt" file
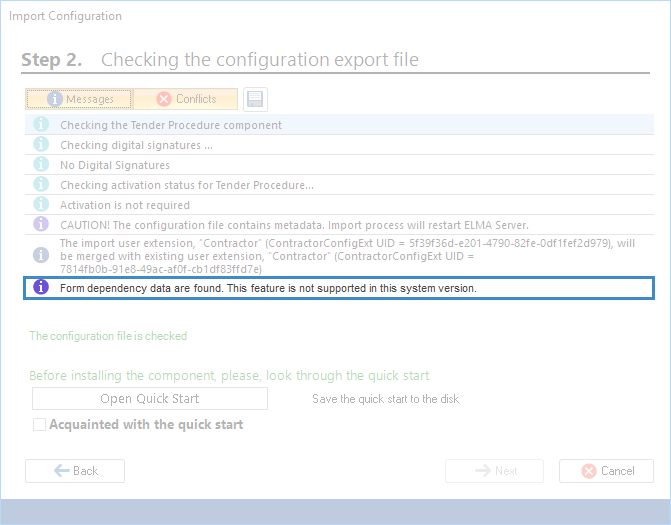
Note, that if you attempt to import form dependencies from ELMA 3.13.x to an earlier version, a notification will be shown (fig. 4), informing that this feature is not available in the current system version. The form features will be imported according to the capabilities of the system version, to which you are importing (i.e. features, missing in the current version, will not be imported).
Fig. 4. Checking configuration. Notification
When importing a component from the
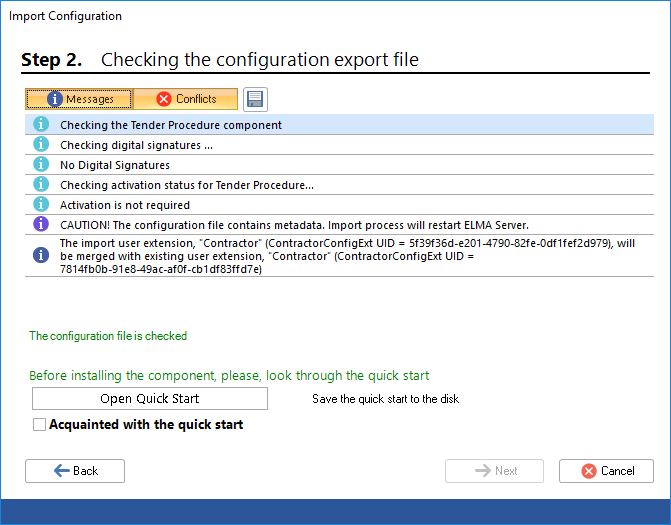
ELMA Store, at this step, ELMA Designer suggests looking through the component quick start (Figure 5):
|
|
|
Fig. 5. Dialogue box for checking configuration file
|
After clicking the Open Quick Start button, a file with the instructions will open in a new window (in the application used by default to open such files). To download this quick start, click on the link Save the quick start to the disk and choose the path to save the file.
By default, the Next button is inactive. To continue the import, you need to select the Acquainted with quick start box and click the Next button.
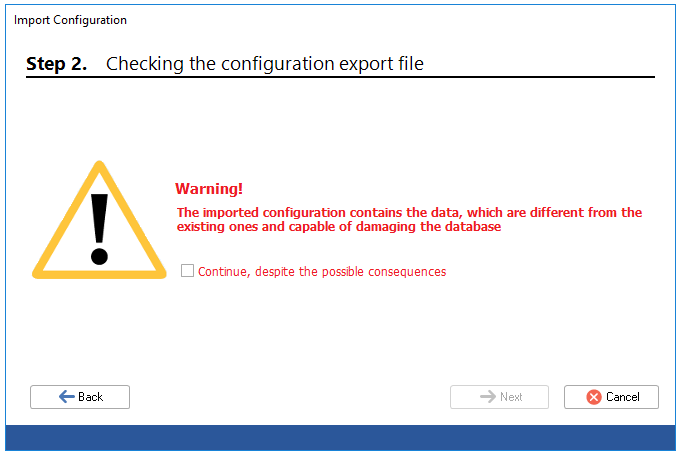
If the imported configuration contains data that is significantly different from the existing or capable of damaging the database, a corresponding warning will be displayed (Figure 6). In this case, it is not recommended to continue the import. In case if the import needs to be continued, select the Continue despite the possible consequences checkbox and click Next.
Fig. 6. Dialogue box for configuration export. Warning about harmful data
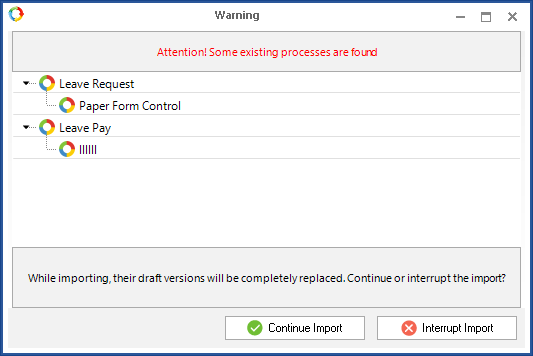
At this step, ELMA also checks if the imported processes match the existing processes (by the
GUID). If processes match, a dialogue box appears (Fig. 7) with a list of all the matching processes and the warning that all the
process drafts will be replaced if you continue the import. If you want to continue, click
Continue Import (the dialogue box will close). To cancel the import, click the
Interrupt Import button and/or close the dialog box.
Fig. 7. Dialogue box with warning about matching processes
Note that if you continue and the
drafts of the existing processes are replaced with the imported ones, you can always restore the previous versions from the
version history of the business process.
Step 3. Imported data
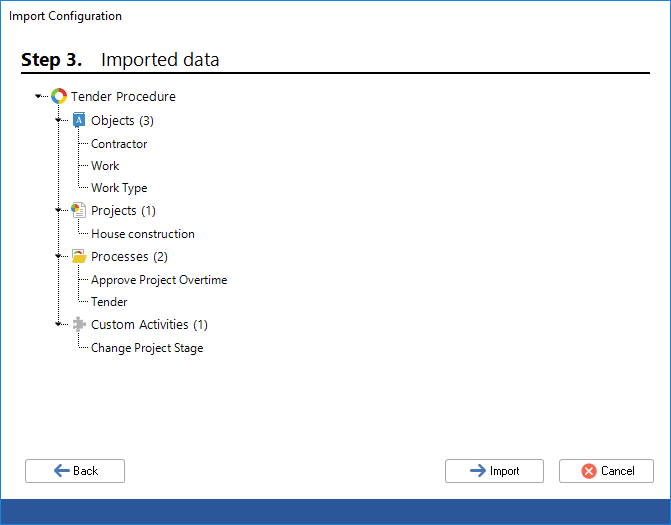
At the step 3, all the imported data is shown in the dialog box (fig. 8).
|
|
|
Fig. 8. Dialogue box with the list of imported data
|
To continue the import, click the Import button.
Step 4. Configuration import.
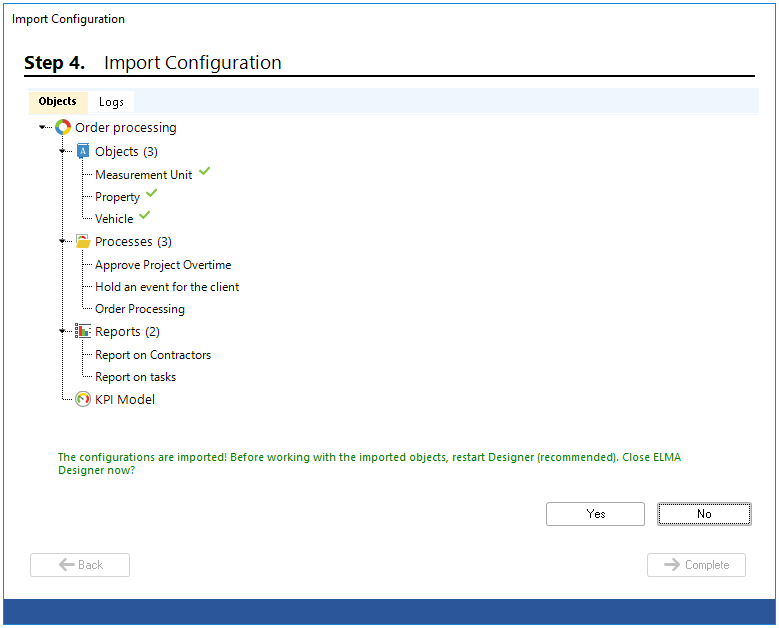
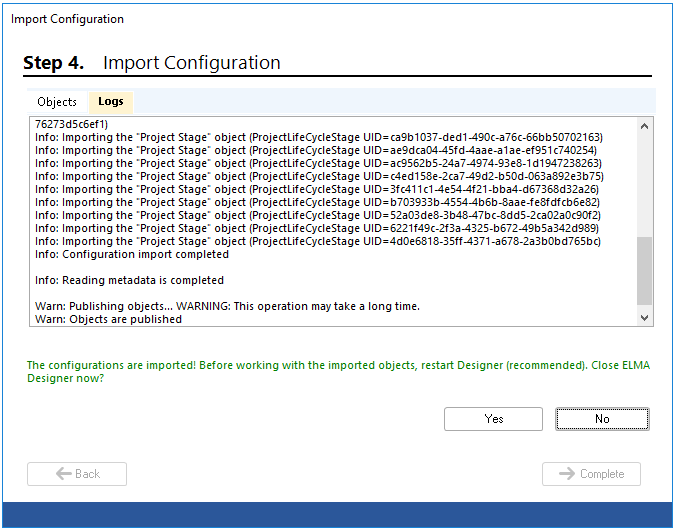
At this step (Figures 9, 10), the data selected at the first step is imported into the
current configuration of ELMA Designer. The dialog box includes two tabs: Objects (Figure 9) and Logs (Figure 10), which contain information about the progress of the data import.
When the imported data is being checked, on the Object tab, to the right of each object a

icon is displayed alternately indicating the object being checked at the moment. After checking the objects, to the right of each of them there will be a status icon:

successfully imported.

- failed to import .
|
|
|
Fig. 9. Import Configuration Dialogue box. Objects tab
|
|
|
|
Fig. 10. Import Configuration Dialogue box. Log tab
|
Depending on the imported data, you might need to restart ELMA Designer. If the restart of ELMA Designer is recommended but not required, a corresponding notification will appear in the dialog box and the transition buttons will become available (Fig. 9). To restart ELMA Designer, click Yes. To continue import without restarting ELMA Designer, click No.
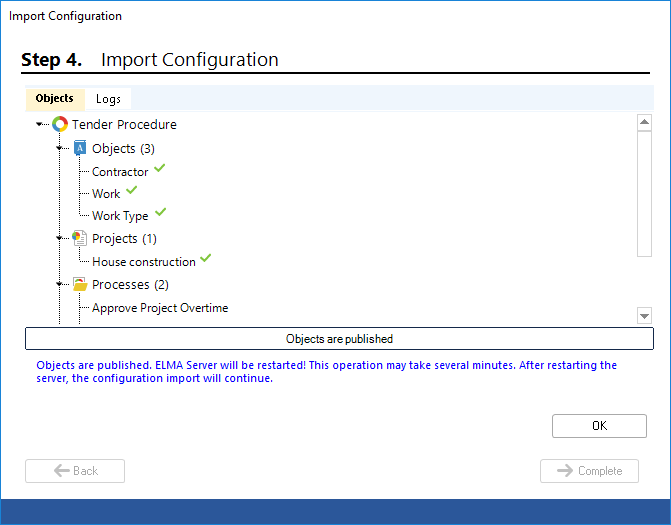
If you need to restart the ELMA server to continue the import procedure, a corresponding notification and OK button will be displayed (Figure 11). To continue the import, click OK. The ELMA server will be restarted. The configuration import will continue after the ELMA server is restarted. Restarting the server can take a long time, you need to wait until it is restarted.
|
|
|
Fig. 11. Importing configuration
|
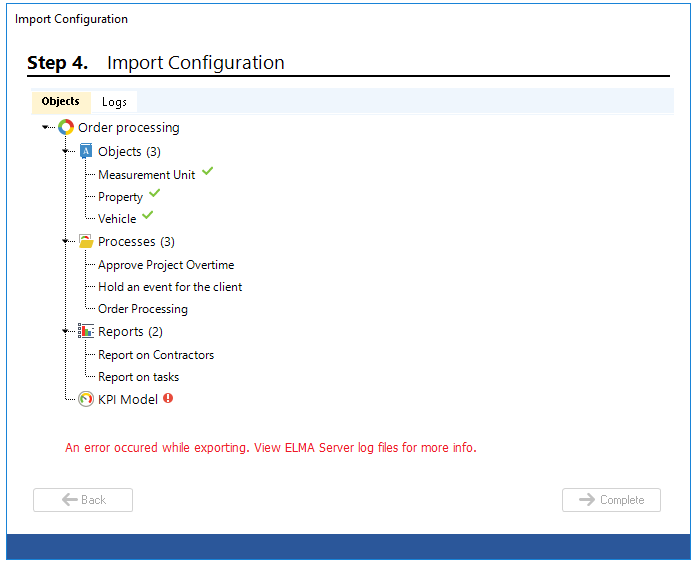
If errors are detected during the import process, a corresponding notification will be displayed and the Complete button (Figure 12) will be displayed. The error information is available in the files, located in directories ...\<Shared folder with ELMA files>\Designer\logs\all and ...\<shared folder with ELMA files>\Web\logs\ImportLog.
|
|
|
Fig. 12. Configuration import dialogue box. Error Message
|
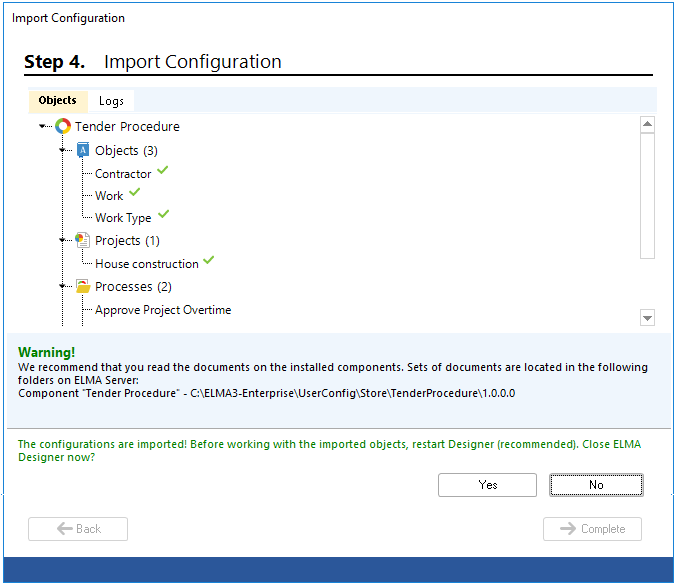
If the component is successfully imported from the ELMA Store, the Import Configuration dialog box displays a message about the configuration import finish and a recommendation to read the documentation on the installed components (Figure 13).
|
|
|
Fig. 13. Configuration import dialogue box.
|
Depending on the imported data, you might need to restart ELMA Designer. If the restart of ELMA Designer is recommended but not required, a corresponding notification will appear in the dialog box and the transition buttons will become available (Fig. 9). To restart ELMA Designer, click Yes. To continue import without restarting ELMA Designer, click No.
Step 5. Configure Swimlanes
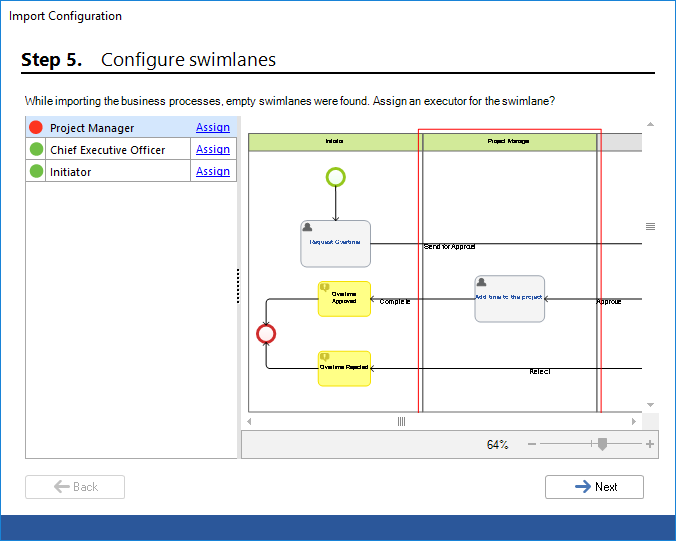
At this step (Fig. 14), you can configure the swimlanes.
If there are any conflicts in the imported swimlanes, you will see a red icon to the left of the import window, next to the swimlane name.
This can happen if there is a
static swimlane with a specified job position, which does not exist in the organizational structure of the
configuration into which the business process is imported. In this case, you can click
Assign and in the provided
dialogue box, select the positions or user groups which will act as executors in this swimlane.
Fig. 14. Configuration import dialogue box. Conflict in a swimlane
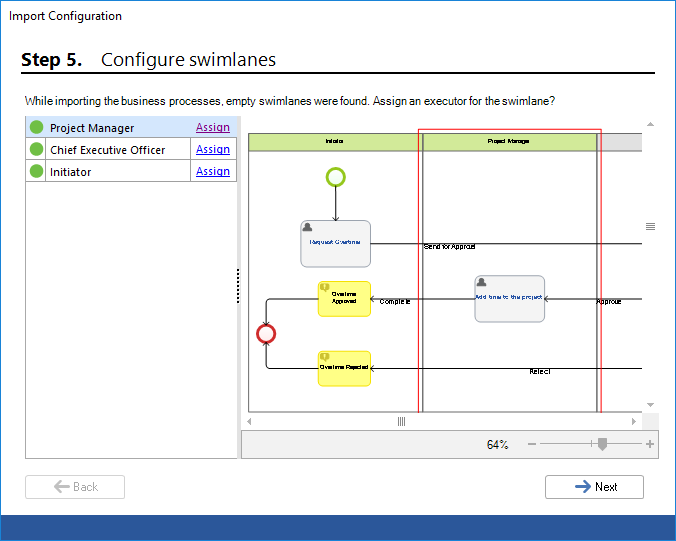
After you have corrected the error, the red icon will turn green (Fig.15).
Fig. 15. Configuration import dialogue box. No conflict in swimlanes
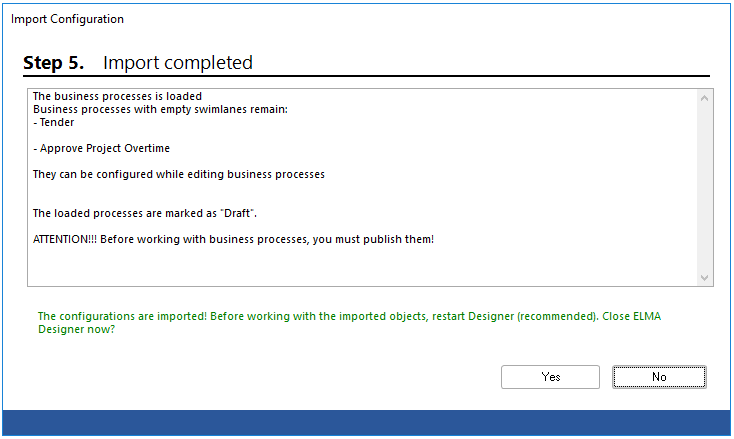
When you click Next, a dialogue box appears (Fig. 16) with the information about the importing process. If the configuration is imported successfully, you will see a corresponding notification. Click Yes to restart ELMA Designer.
Fig. 16. Import completion dialogue box
For proper operation of all the imported data you need to
restart the server. The imported processes are not published automatically, you need to
publish them manually.
Copyright © 2006–2019 ELMA

