|
Attention!
Further information applies only to ELMA 3.8.0 and higher. Creating component (BPM Apps) is available starting from version 3.7.0.
|
The BPM App creation procedure consists of two stages:
Stage 1. Select and save export parameters
Stage 2. Generate the .elma3 export file
Stage 1. Select and save export parameters
The procedure of creating an ELMA Store component in ELMA Designer includes several steps. The number and order of steps depend on the
activated applications.
Use the

and

buttons to switch between stepts. To save the BPM App parameters at any export step, click

. The
BPM Apps will open automatically. To cancel creation of a BPM App, click

.
There are two ways to create a component:
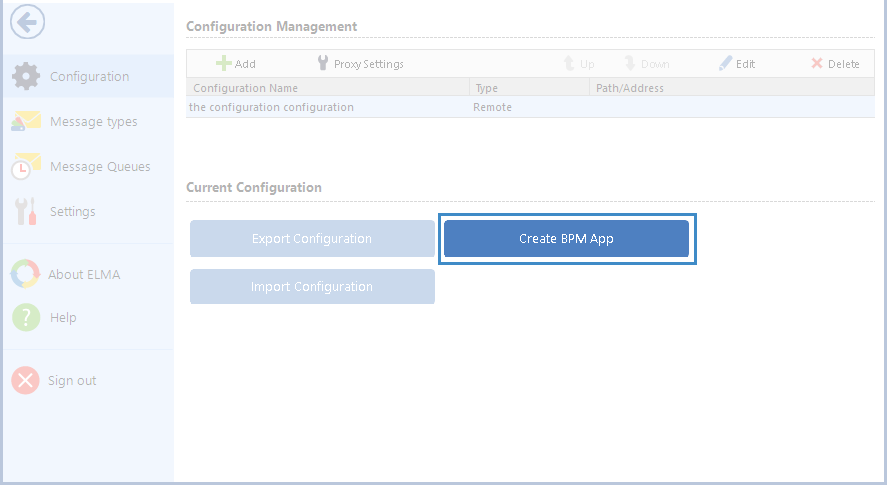
Fig. 1. ELMA Designer. Configuration section > Current Configuration > Create BPM App
-
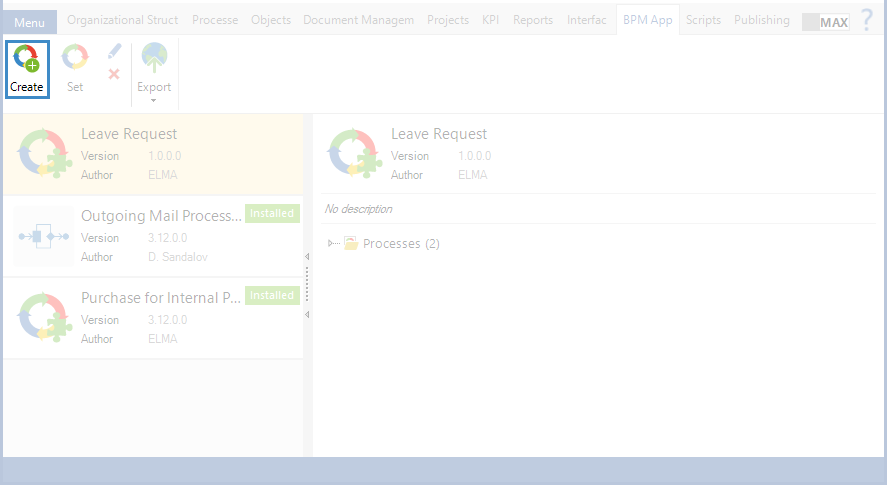
Click
Create in the toolbar of the
BPM Apps tab (Fig. 2).
Fig. 2. ELMA Designer. BPM Apps tab. Add button.
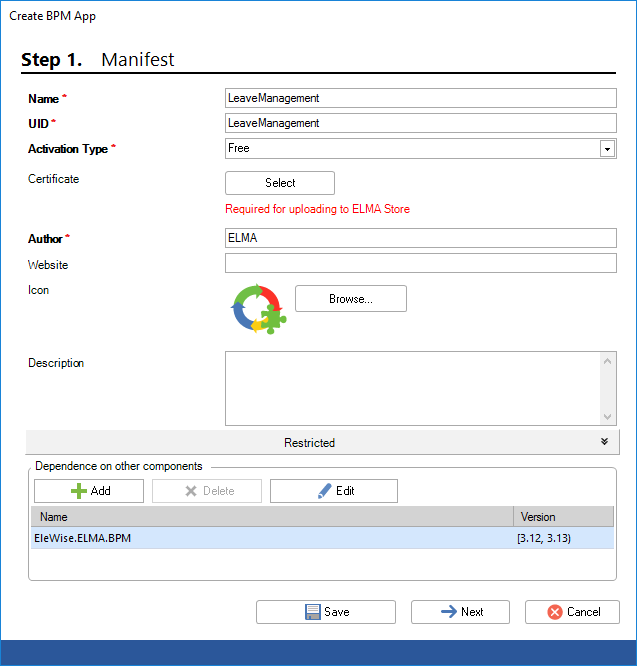
Step 1. Manifest
Enter the general information in the opened dialog box (Fig. 3) and click Next. Fields, marked with a red asterisk * are required fields.
Fig. 3. Step 1. Manifest dialog box
Name * – name of the created component.
UID * – unique identifier of the component; by default it is generated when you fill in the Name * field. For the component to work correctly in ELMA Store, the UID has to include the short component type name, underscore, component name.
Component types are abbreviated in the following way:
-
ELMA Application –
EleWise.ELMA -
Mobile application –
mob_ -
-
External application –
app_ -
-
Additional module –
EleWise.ELMA -
-
Activation Type * – select the activation type of the created component: Free or Non-Free.
Certificate * – select the certificate provided in ELMA Store, when creating the component page. This field is displayed only if you have selected Non-Free in the Activation Type* field.
|
Note
Only ELMA partners can work with component pages in ELMA Store.
|
Author* – author of the created component. Usually, it is the name of the component developer company.
Website – the company website.
Icon – add an image. Recommended size: 64*64. The default icon is the one to the left of the Browse… button.
Description – brief description of the created component.
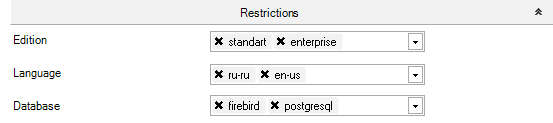
Restrictions unit
In this unit, you can place restrictions on components to make them work correctly with the system. Restrictions can be placed on
editions,
interface language, and/or database.
By default, this unit is collapsed. When you expand the Restrictions unit (fig. 4), the following fields will be available for filling in:
-
Edition – ELMA
edition type (
Express, Standart, Enterprise, Community Edition);
-
Language – ELMA
interface language. This field displays short alphabetic codes of different languages;
-
Database – database type (
Firebird, MS SQL, Oracle, PostgreSQL).
You can choose several restrictions in each field.
Fig. 4. Step 1. Manifest dialog box. Restrictions unit
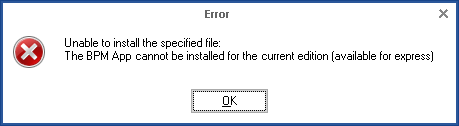
All restrictions are checked during the
installation of a component. If some restrictions were placed on a component and they do not match the user’s system settings, a dialog box will open when
installing the component where the error will be specified (fig. 5).
Fig. 5. Dialog box with error
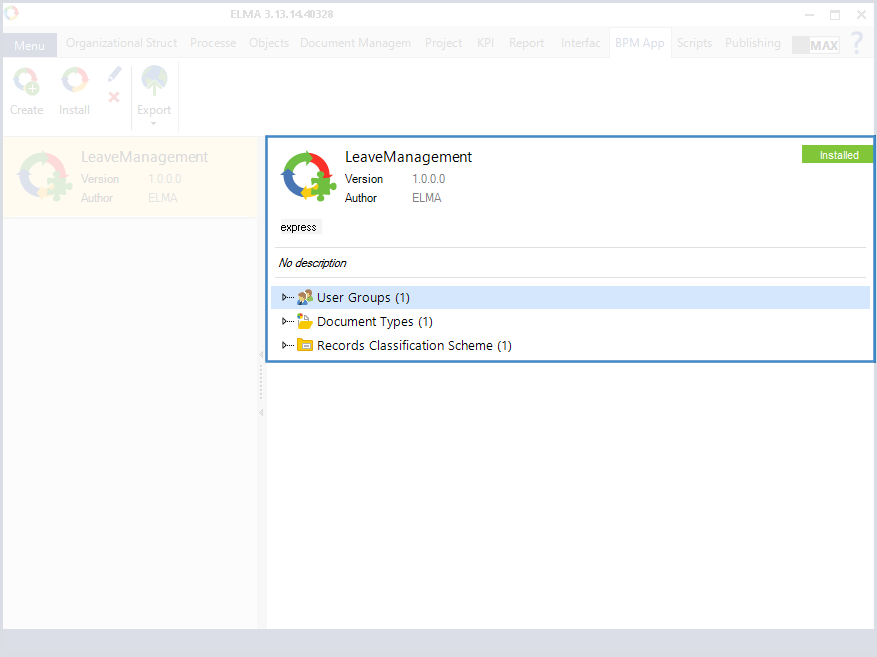
When a component is installed, the selected restrictions will be displayed in
BPM App content area (fig. 6).
Fig. 6. ELMA Designer. BPM Apps tab
"Dependence on other components" Unit
In this unit, you have to specify the system components, which ensure correct functioning of the created component (the selected components must be installed and activated in the system, to which the created component will be installed). The components in this unit will be checked when installing the component. By default, this unit displays only ELMA BPM Platform | Business Process Management, you cannot delete it.
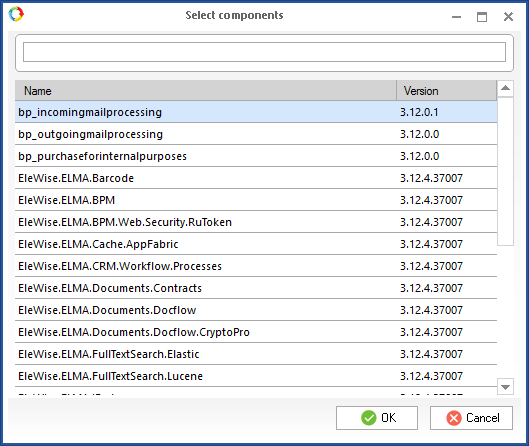
When you click Add, a dialog box opens (Fig. 7), where you can select the required dependency and click OK.
Fig. 7. Dependencies dialog box
This dialog box displays all the components, installed on the ELMA server. The list is similar to the components list, displayed in Web Application in
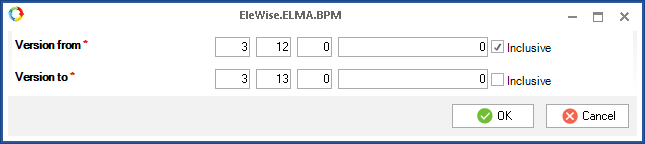
Administration - System - Components.When you click Edit in the Dependence unit (Fig. 3) a dialog box opens (Fig. 8), where you can specify the system versions range, which supports the created component. To save the changes, click OK.
Fig. 8. Versions range dialog box
When you click Delete in the dependence unit (Fig. 3), the selected module is deleted.
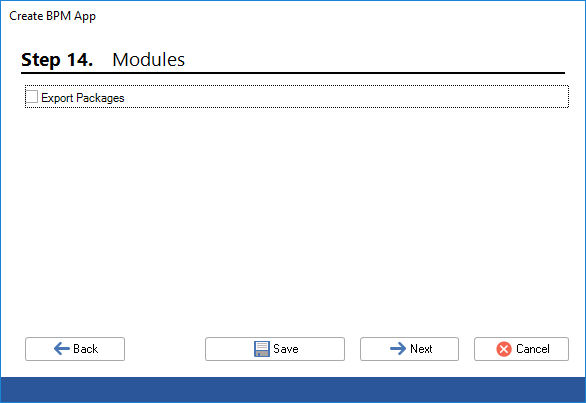
Step 14. Modules
In the opened dialog box (Fig. 9), check the Export Packages box, if you need to export the system modules.
Fig. 9. Step 14. Modules dialog box
Package Search Parameters – quick search of packages by name in the list of modules.
You can select modules to export in the Module List unit. To select a module, check its box. If there are linked modules, they are selected automatically. The names of the dependent modules are grey.
The Dependency List unit displays dependencies of the module, selected in the Module List unit. To select the required dependencies, check their boxes. We do not recommend that you export modules without their dependencies; it may cause the system to malfunction.
Step 15. Translations
In the dialog box that opens (fig. 10), check the Download language packages box if necessary.
Fig. 10. Step 15. Translations dialog box
You can choose component languages from the List of language packages where you can find default languages of the system.
Downloading language packages is necessary if, when creating a
BPM App, it is necessary to export previously
translated configuration files. To do so, check the boxes of the corresponding language packages: German, English (British and American English) and Spanish.
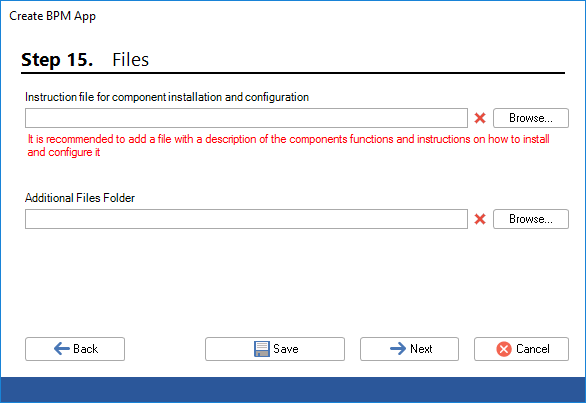
Step 16. Files
In the opened dialog box (Fig. 11) select the file with the component's documentation. You can select a file with any extension. To select a file, click
Browse... To delete the selected file (clear the field), click

.
Fig. 11. Step 16. Files dialog box
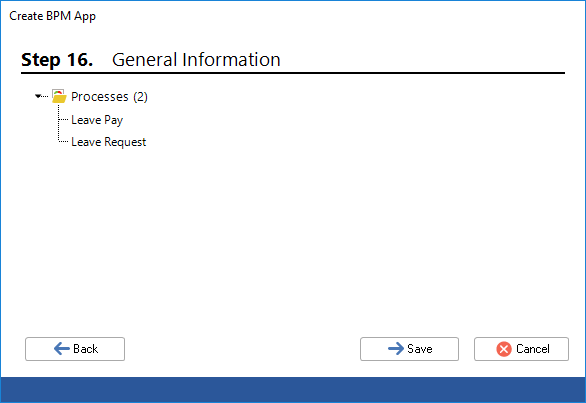
Step 17. General Information
The opened dialog box (Fig. 12) displays all the parameters (objects, document types, project types, etc.), selected while creating the component.
Fig. 12. Step 17. General Information dialog box
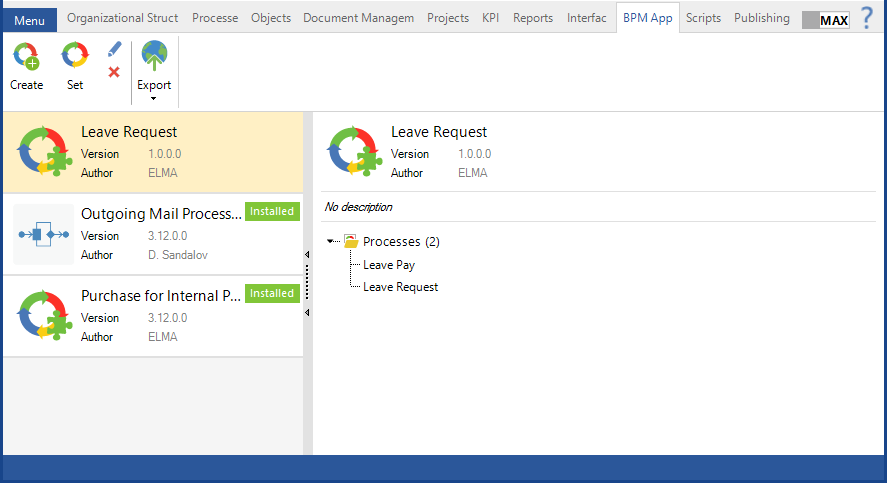
To complete creating the BPM app, click Save (Fig. 12). The BPM Apps tab will open and display the information on the created component (Fig. 13).
Fig. 13. ELMA Designer. BPM Apps tab
Stage 2. Generate an .elma3 export file
At this stage, you can generate the following .elma3 export files:
Complex BPM App – a BPM App component package which contains several components combined based on a specific attribute (for example, several versions of the same reports for different system editions).
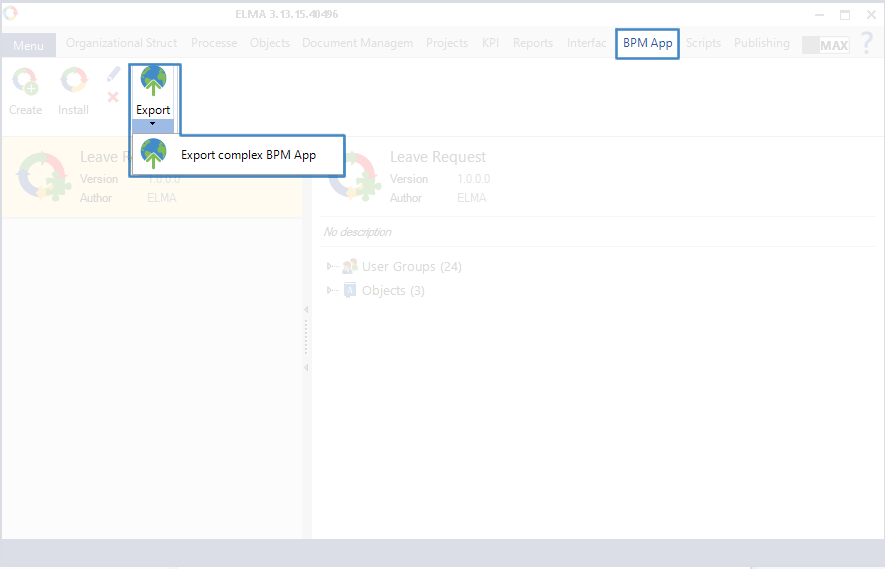
To generate an .elma3 export file, select the required component in the
side toolbar of the
BPM Apps tab and click Export in the
toolbar (Fig. 14).
Fig. 14. ELMA Designer. BPM Apps tab
Export BPM App dialog box will open (Fig. 15). Generating an export file for an ELMA Store component includes a few steps.
Use the
and
buttons to switch between the steps. To cancel BPM App export, click
.
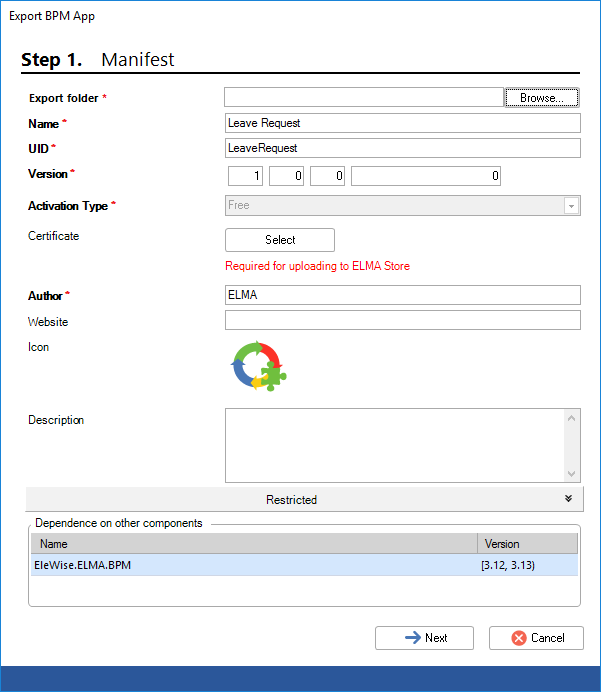
Step 1. Manifest
This dialog box (Fig. 15) is similar to the dialog box displayed at
Stage 1, Step 1. At this step you have to fill in the
Export Folder*,
Version*,
Certificate* (if you need to change the certificate), Description fields and click Next. The other fields have been filled in at
Stage 1 of the component creation and cannot be changed.
Fig. 15. Step 1. Manifest dialog box
Export folder * – select the folder for the exported component file. To do so, click Browse... The ELMA Store component file, with .elma3 extension, will be saved to this folder.
Version * – exported component version. You cannot select an earlier version, if there is a later one.
|
Note
As the component version number, we recommend using the latest ELMA version on which the component was successfully tested. Moreover, the first 2 digits of the component version number must match the version number of the ELMA system in the format <Platform version> <number of the major version>. For example, if the component is compatible with the ELMA version [3.8.0.0; 3.12.0.0), the component must have the version number of 3.11.x.x.
|
Description – brief description of the component.
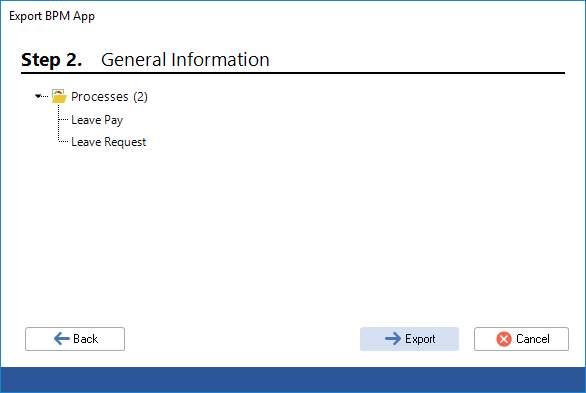
Step 2. General Information
At this step, the dialog box (Fig. 16) displays all the parameters, selected while
creating the BPM App (Stage 1).
Fig. 16. General Information dialog box
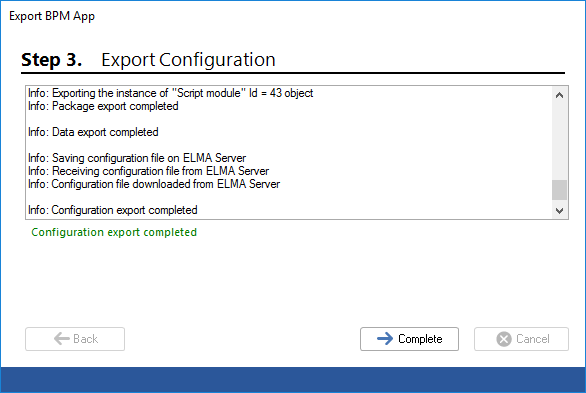
Step 3. Exporting the configuration
At this step (Fig. 17), the system is exporting the configuration – compiles the data, specified at the first step, into a file. This dialog box shows the export progress information.
Fig. 17. General Information dialog box
To complete the component export, click Complete in this dialog box. The .elma3 file will appear in the folder specified in Step 1 of Stage 2.
To generate a complex BPM App package, click Export complex BPM App, available in the Export button extension (Fig. 18).
Fig. 18. ELMA Designer. BPM Apps tab
Complex BPM App export process consists of several steps, some of which are the same as the
common BPM App component export process.
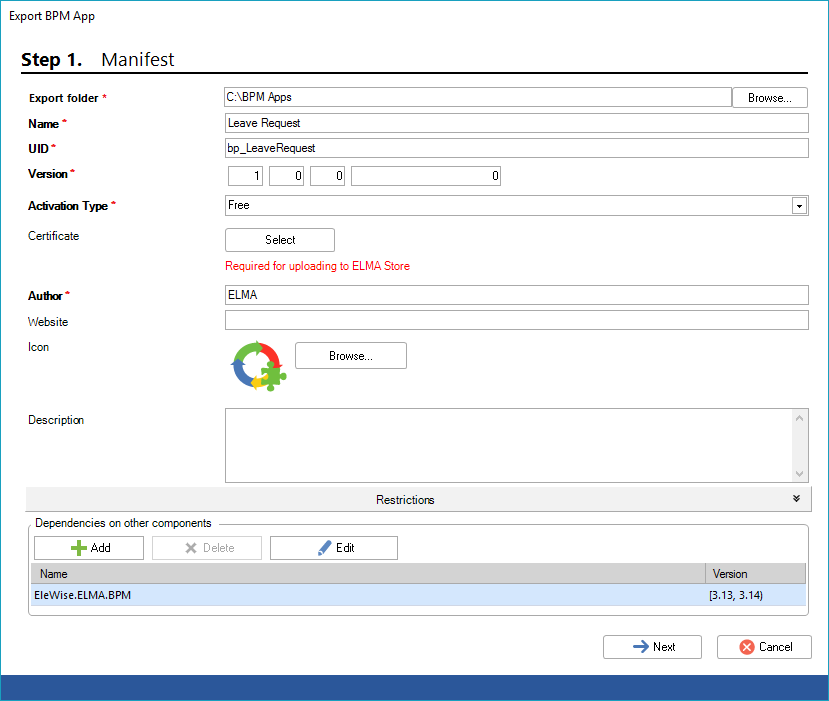
This step (fig. 19) is partly similar to the first step of the
stage 1. The difference is that that in this step there are the fields
Export folder* and
Version*. Fill in the required fields and click
Next.
Fig. 19. Step 1. Manifest dialog box
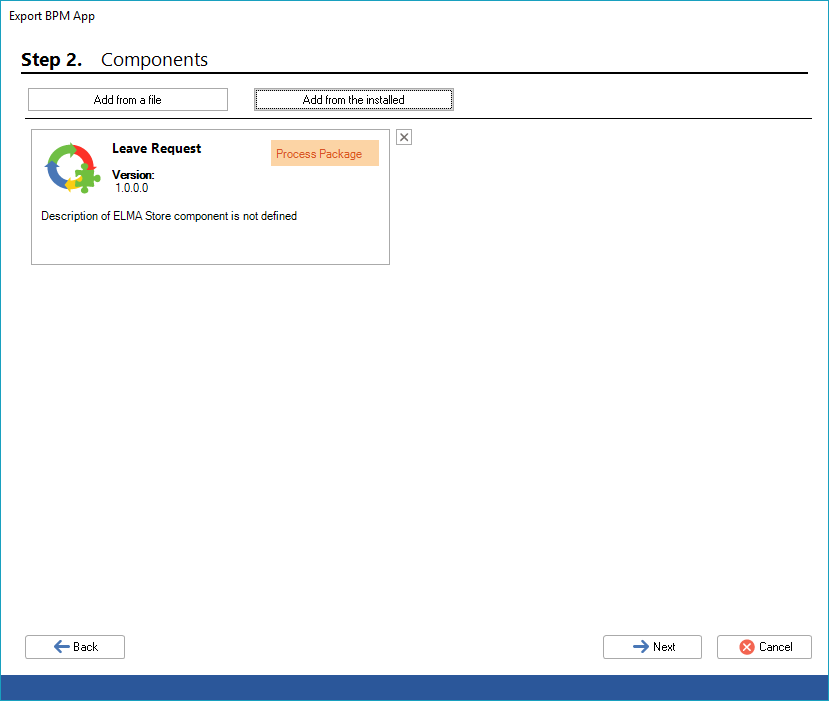
In this step (fig. 20), choose components to export.
Fig. 20. Step 2. Components dialog box
There are two ways to add components:
1. Add from a file. If you need to add a file (of the .elma3 format) from the local computer or external media to the complex BPM App, click Add from a file. In the window that opens, select the required component and click Open.
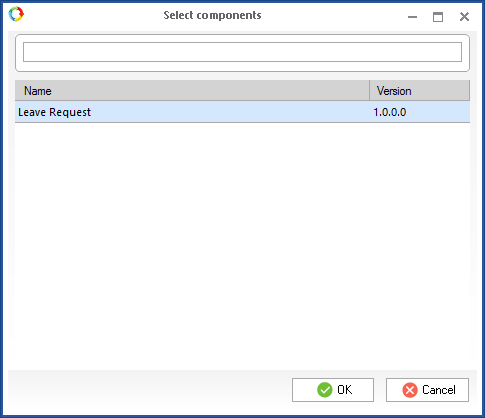
2. Add from the installed. To add components from previously
installed components, click
Add from installed. The
Select component dialog box will open (fig. 21). Components can be selected from the list or by using the search bar. After selecting components, click
OK.
Fig. 21. Select components dialog box
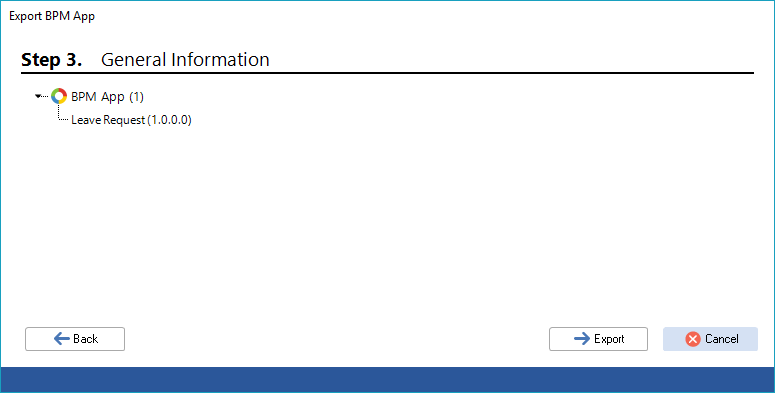
Step 3. General Information
In this step (fig. 22) all the BPM App components are displayed that were selected in
step 2 of the complex BPM App export.
Fig. 22. Step 3. General information dialog box
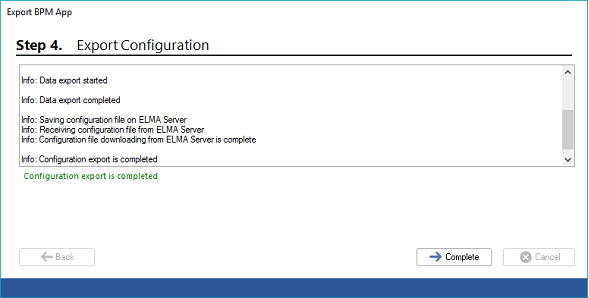
Step 4. Export Configuration
This step (fig. 23) is the same as
step 3 of the generating common .elma3 export file.
Fig. 23. Step 4. Export configuration dialog box
Click
Complete in this dialog box to complete the export component process. After that, the file with the
.elma3 extension will appear in the folder specified in
step 1.
Copyright © 2006–2019 ELMA