In ELMA, it is possible to configure substitution rules to automatically reassign tasks of the substituted
users. These rules set up substitution parameters for a specific user. When creating a substitution with the specified parameters, the substitute will be the user, whose rules will satisfy the substitution conditions.
The substitution rules are applied:
-
To a
"Reassign tasks" task. In this task, in the
Tasks section in the
Executor column opposite the selected tasks, the
substitute users will be displayed in accordance with the established substitution rules.
-
To a
process task. The executor is selected automatically according to the set up substitution rules.
-
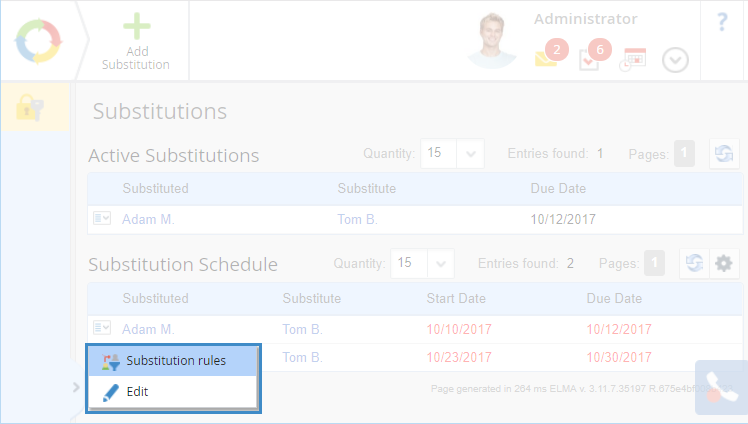
To configure the rules, you must select a substitution in the
Substitution schedule section and in the
context menu, click on the
Substitution Rule item (see Figure 1).
|
|
|
Fig.1 Context menu in the in the Substitution schedule section
|
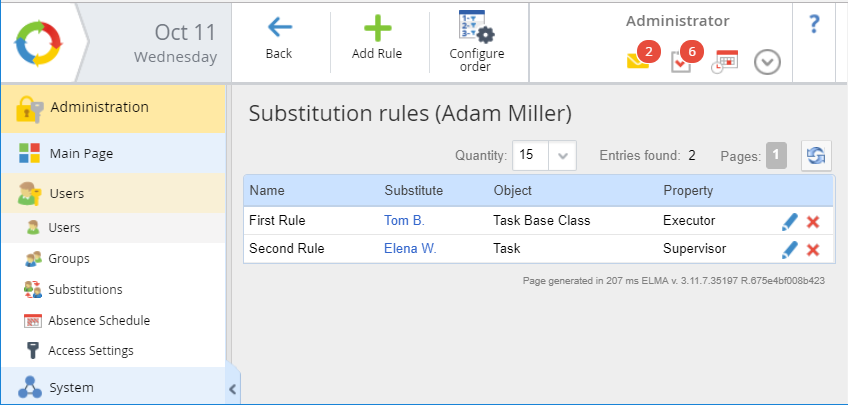
The Substitution page opens (fig. 2).
|
|
|
Fig.2 Substitution rules page
|
On this page, you
create and configure substitution rules for a specific user and set up
rules priority.
To create a new substitution rule, in the toolbar click
Add rule (Figure 2). To edit the rule click the

button to the right of the rule. When you click this button, a form similar to the creation form opens. To delete a rule, click the

button.
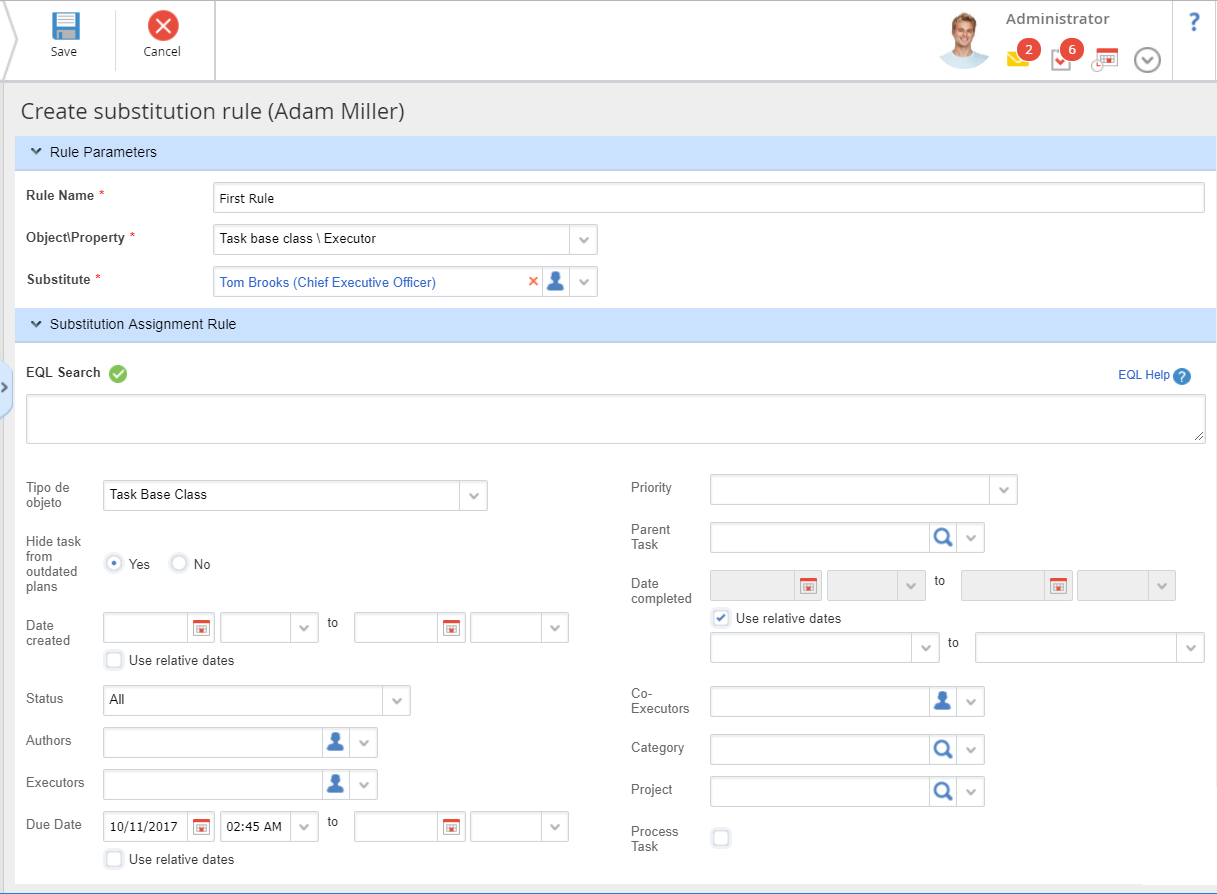
To create a new substitution rule, in the toolbar click Add rule (Figure 2). In the opened form (Fig. 3), fill in the required fields and click Save.
|
|
|
Fig.3 "Create Substitution Rule" Form
|
Rule Parameters Section
Rule name* - the name of the rule to be added.
Object\Property* - a drop-down list of task types with a user-defined property that identifies the user's role in the task. There are two options available in the drop-down list:
Task base class\
Executor and
Task \
Supervisor.
Substitute* - the field for selecting the substitute.
Substitutions Assignment Rule Section
This section contains a certain set of parameters, which is similar to a set of parameters on the
form for advanced task search. When you select an object in the
Object\Property field, the attributes of the section will be changed, depending on the selected object.
Configuring substitution priority
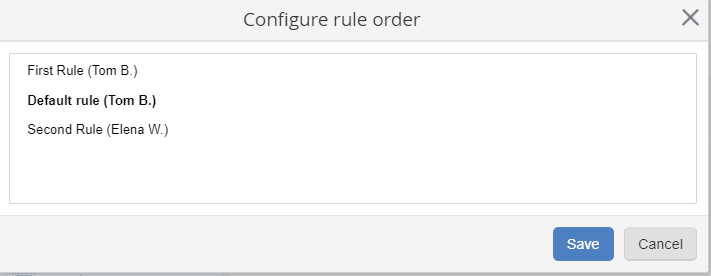
The Configure Order button in the toolbar allows you to arrange the list of rules in accordance with their priority. The rules will be applied in order of priority. This setting is necessary when several substitution rules have partly similar conditions.
To change the substitution rules order, click on the Configure Order button in the toolbar (see Figure 2). A window with a list of created rules will open (Figure 4). Using drag-n-drop technology, change the rules priority. Rules will be applied in the "top-to-bottom" order.
|
|
|
Fig.4 Configuring rules order
|
Once the substitution period is over, the created rules will be saved in the system for further use. These rules will be displayed, if new substitutions for this user are created.
Example of a substitution rule
Consider creating a substitution with the following parameters:
-
User to be substituted -
Miller;
-
For the substituted user we will create several substitution rules. Configure the following rules:
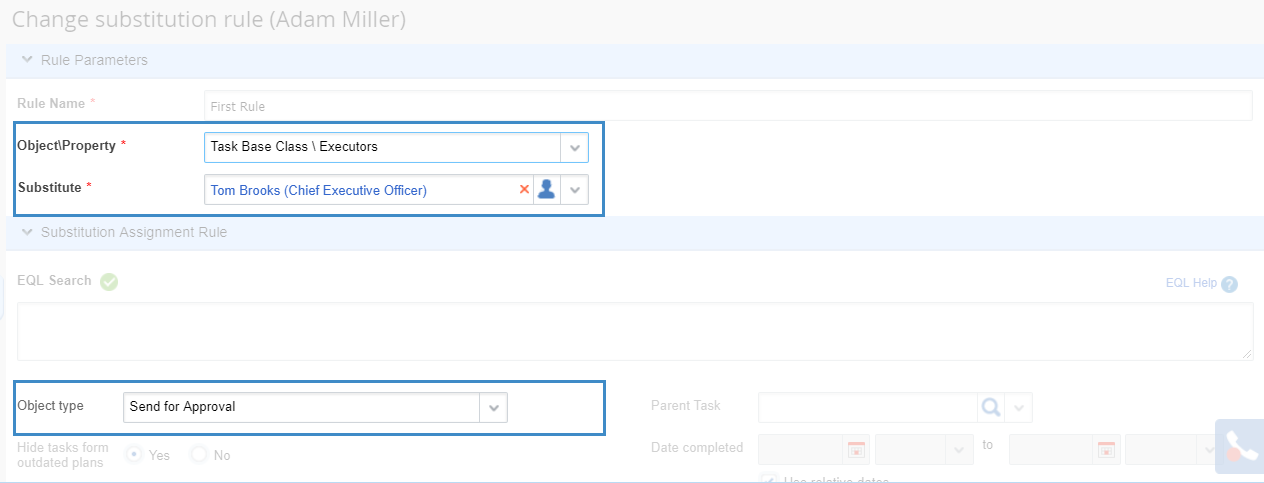
Rule 1 (Figure 5):
-
Object\Property -
Task base class\Contractor;
-
-
Object type -
Document approval task.
|
|
|
Fig.5 Creating Substitution Rules
|
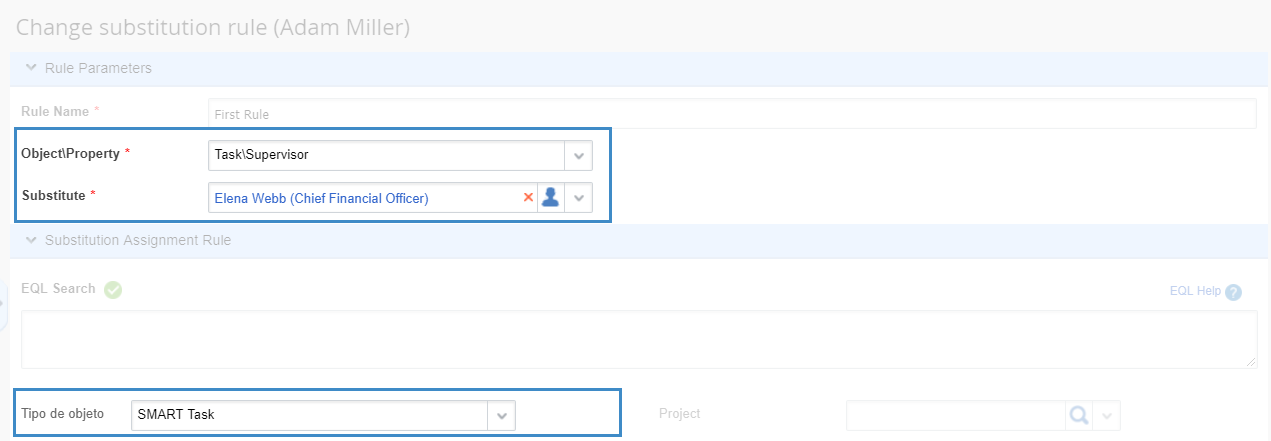
Rule 2 (Figure 6):
-
Object\Property -
Task\Supervisor;
-
-
Object type -
SMART- task.
|
|
|
Fig.6 Creating Substitution Rules
|
When the substitution period starts, the created task will be assigned to a substitute whose parameters meet the substitution rules requirements (provided that the substitution rules
are applicable to this task type ).
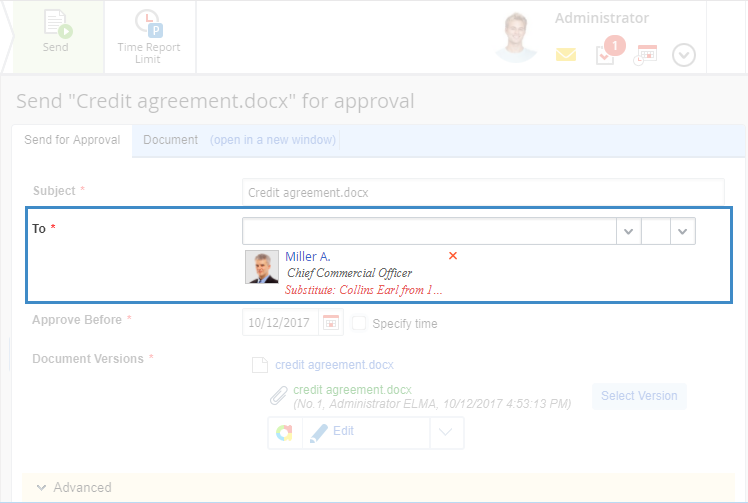
For example, send the document for approval to Miller (Miller is absent, but the substitute user
is assigned for him). In the notification, in the "To" field, Collins will be displayed, as he is a the default substitute (Figure 7).
|
|
|
Fig.7 Sending for approval
|
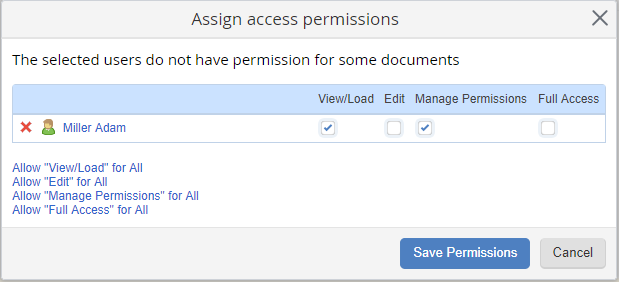
After you click the
Send button, the
Assign Access Permissions dialog box opens (Figure 8). In this window, you must grant document access permissions to the substituted user. To learn more about it, see the
respective Help article.
|
|
|
Fig.8 Assigning access permissions
|
After clicking on the Save permissions button, the document will be sent to the substitute user.
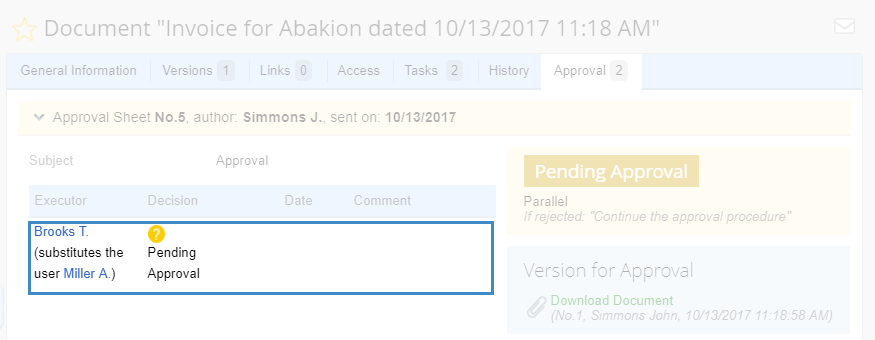
However, in this example, the parameters of the new document approval task match the parameters of the first substitution rule. Therefore, the document will be submitted for approval to Brooks, and not to the default user (Figure 9).
Copyright © 2006–2019 ELMA

