The deal page displays all the information about the deal.
To open a deal page, click on the name of the required deal in the Deals section. Opening a deal page is also available from any other system section, if the name of this deal is displayed as a hyperlink.
Fig. 1 shows an example of a deal page.
Fig. 1. Deal page
Toolbar buttons
When you click Create Task, a page for creating a task opens with the Deal field filled in automatically. The created task will be displayed on the Tasks tab of the deal page.
the Tasks unit (fig. 1), which displays all the tasks on the deal.
The left part of the page contains the information about the deal. The information in some fields is a link, clicking it opens a dialog box with data on this object instance. When you click on the name of a marketing event or a contractor, the respective page of the event or the contractor opens.
Relationships tab
This tab contains a table with all the relationships on this deal, including the overdue ones (in red), and comments to them. This table can be configured.
An example of the Relationships tab is shown in fig. 2.
Fig. 2. Deal page. Relationships tab
This tab is similar to the Relationships tab of a contractor page.
Note, that the information on relationships (including the overdue ones) can also be displayed on the Deals subsection page(fig. 3). For this, add the Next Relationship column to the data table.To learn more, read the respective Help article.
Fig. 3. Deals section. Next Relationship column
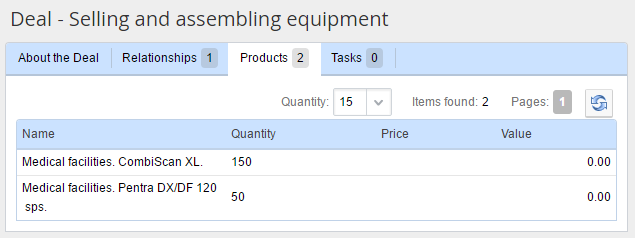
Products tab
This tab (fig. 4) shows the list of products and/or services, involved in the deal.
Fig. 4. Deal page. Products page
To add a product or a service to a deal, click Add Product below the data table. In the opened dialog box (fig. 5), select the required product in the Product *field and enter the quantity in the Amount of Product *field.
Fig. 5. Adding a product
If this dialog box contains the button (available for users with permissions to edit the object), a product and/or service can be added to the Products and Services object. The system administrator assigns access permissions to objects in Administration – Users – Access Settings – Objects.