Configuring Single Sign-on with Additional Application
|
Note
The settings described in this article are configured in Windows Server 2008 Enterprise.
|
To configure single sign on using an additional application, follow these steps.
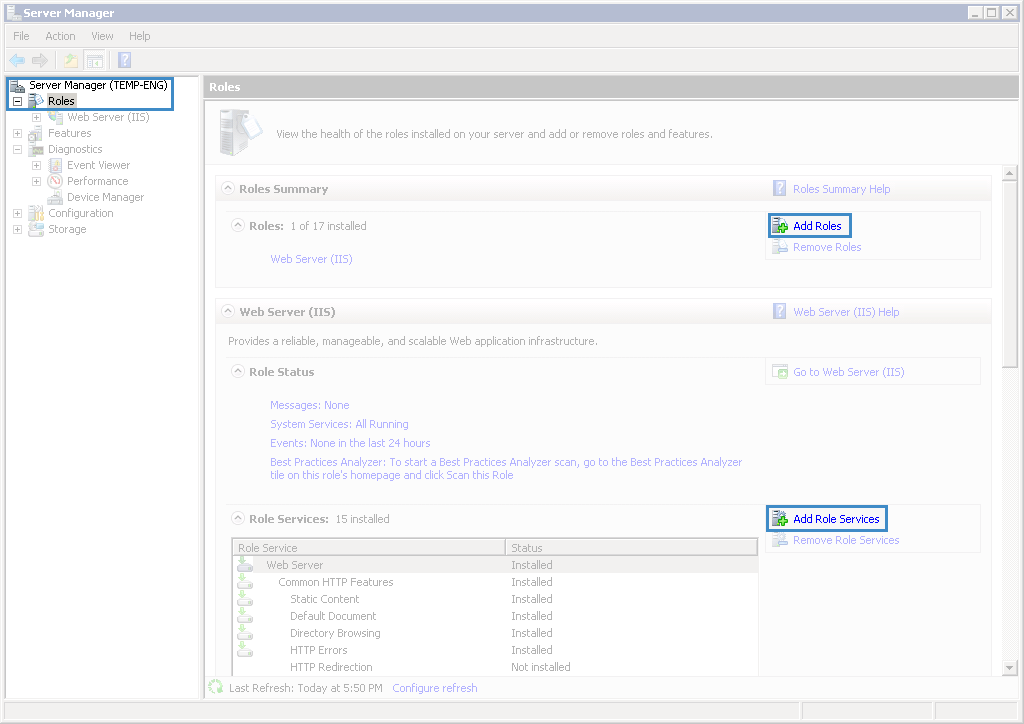
Step 1. Install the Windows – Authentication component. To do so, go to Start – Administrative Tools – Server Manager and in the opened window (fig. 1) switch to Roles and click Add Roles and/or Add Role Services.
Fig. 1. Server Manager. Roles unit. Add Roles and Add Role Services buttons
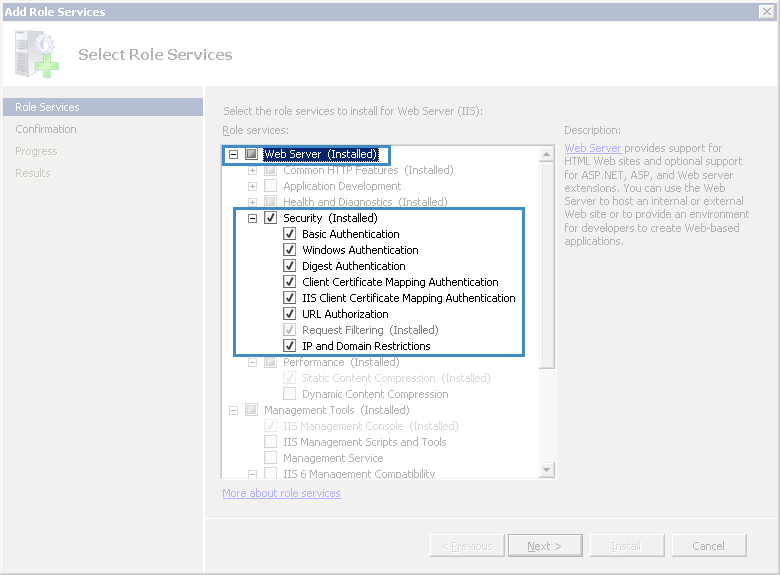
In the opened window (fig. 2) check if the service Web Server – Security – Windows – Authentication is installed. If this service is not installed, check the corresponding box and click Install.
Fig. 2. Add Role Services window. Security unit
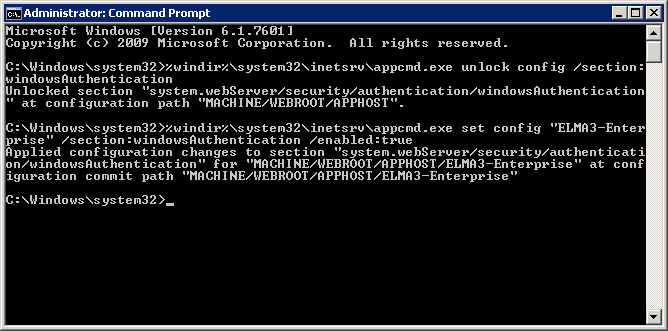
Step 2. Open the command prompt (Start – Run – cmd) as the system administrator and run the following commands (fig. 3):
2.1. %windir%\system32\inetsrv\appcmd.exe unlock config /section:windowsAuthentication
2.2.%windir%\system32\inetsrv\appcmd.exe set config "ELMA3-Enterprise" /section:windowsAuthentication /enabled:true
Fig. 3. Command prompt. Executing commands
|
Note
Step 2.2 provides an example of a command for configuring the ELMA3-Enterprise website, which is created by default in IIS when installing ELMA Enterprise edition. If you are using a different system edition or your website is manually configured, then replace "ELMA3-Enterprise" with the website name, displayed in the list of sites in the IIS Manager.
|
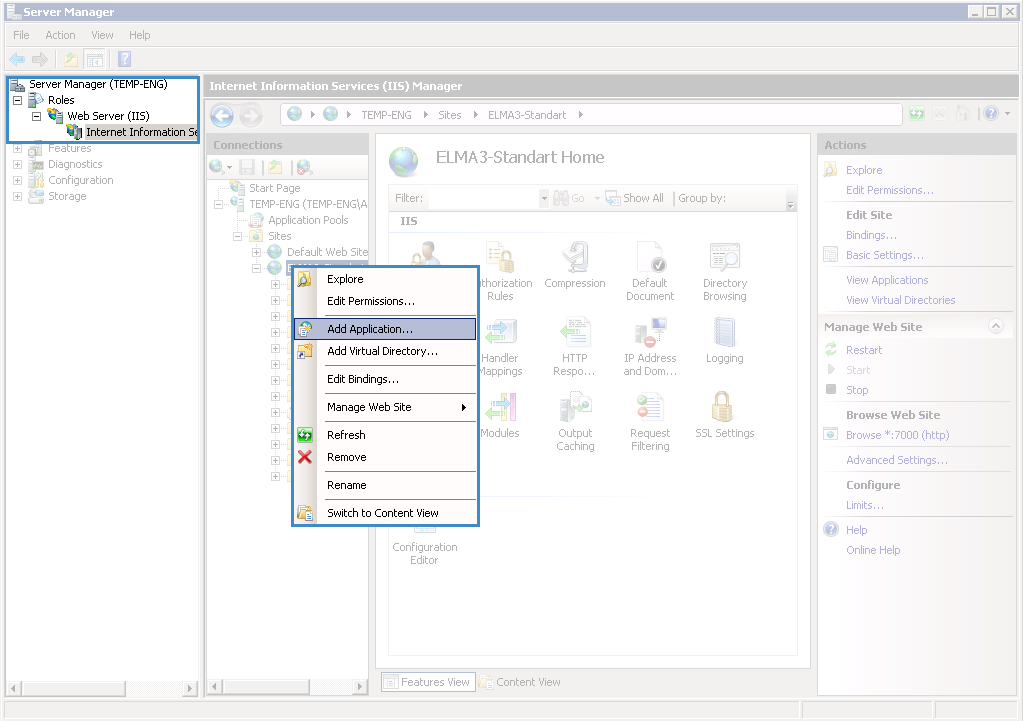
Step 3. Open the Server Manager (Start – Administrative Tools – Server Manager), go to Roles – Web Server (IIS) – Internet Information Services (IIS) Manager and add a new application (fig. 4).
Fig. 4. Server manager. Adding a new application to the IIS Manager
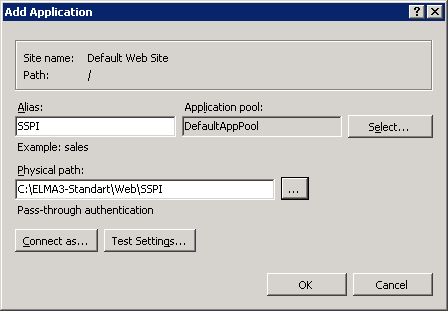
In the opened dialog box (fig. 5), enter SSPI in the Alias field, and in the Physical path field, enter ..\<ELMA folder>\Web\SSPI and click OK.
Fig. 5. Add Application dialog box
Step 4. Open IIS Manager (Start – Administrative Tools – Internet Information Services (IIS) Manager):
-
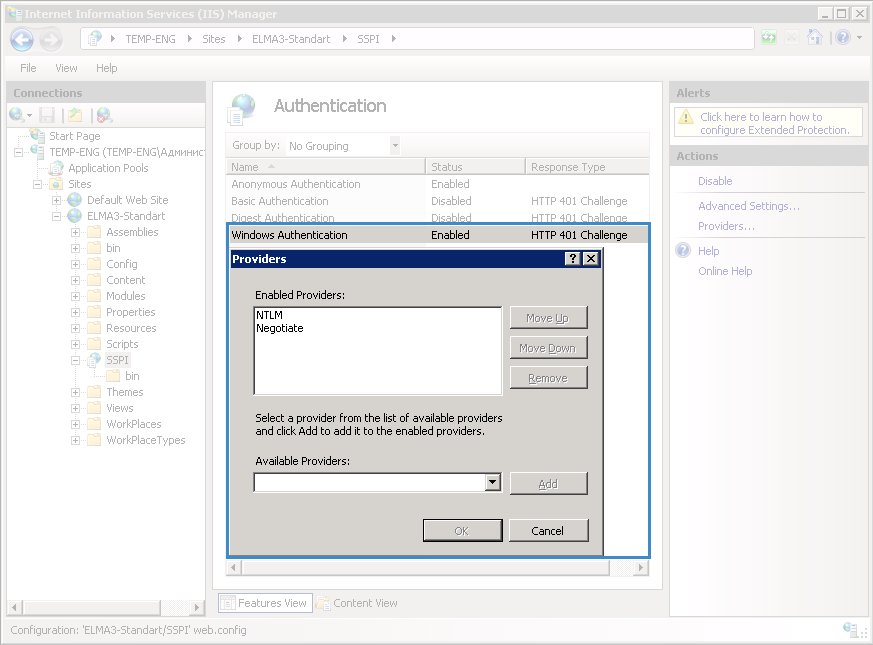
go to the added application SSPI – Authentication and click Providers (fig. 6). In the opened dialog box, move NTLM to the first place and click OK.
Fig. 6. IIS Manager. Windows Authentication. Provider settings
-
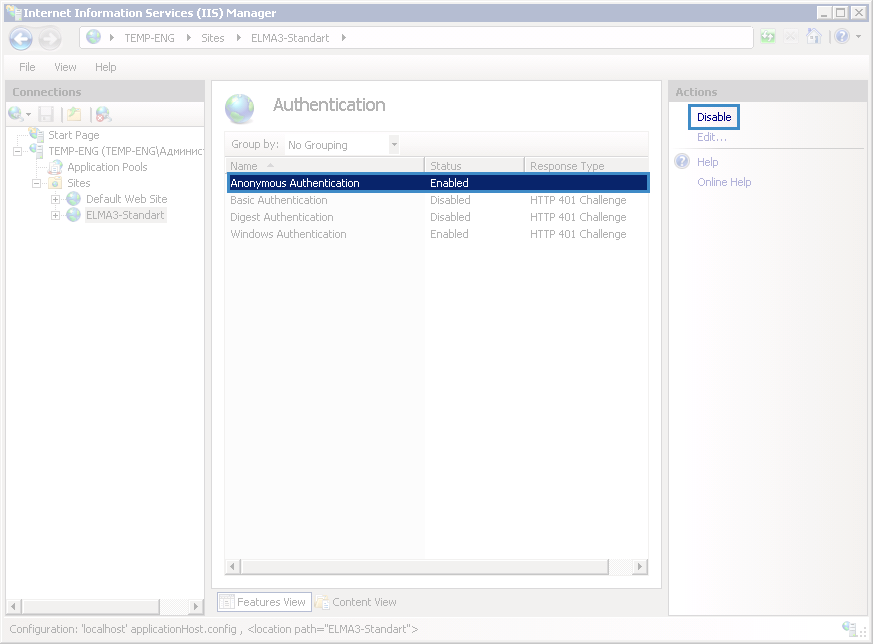
go to the added application SSPI – Anonymous Authentication and click Disable (fig. 7).
Fig. 7. IIS Manager. Anonymous Authentication. Disable button
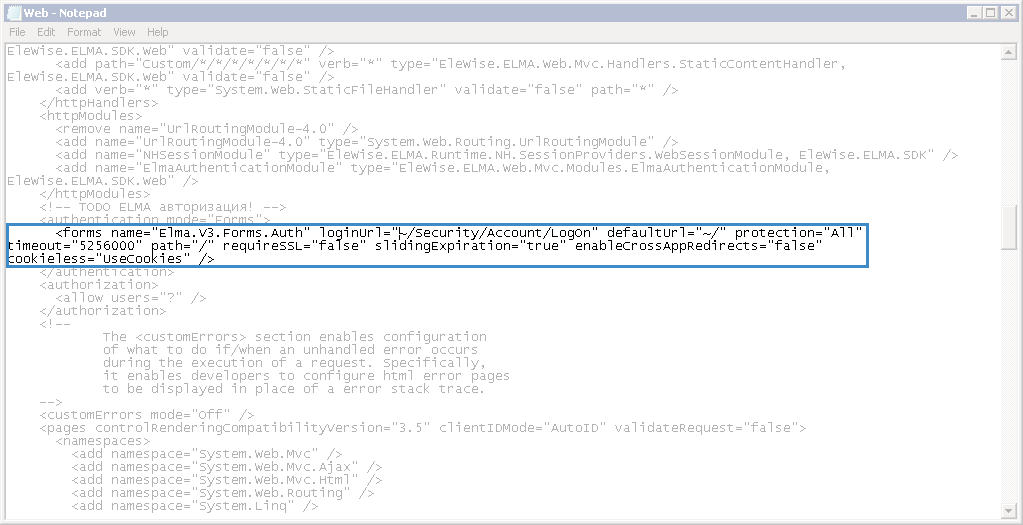
Step 5. In the file Web.config, which is by default located in ../<ELMA folder>/Web, change the loginUrl attribute of the forms tag as follows (fig. 8):
<forms name="Elma.V3.Forms.Auth" loginUrl="~/SSPI/Account/LogOn" defaultUrl="~/" protection="All" timeout="5256000" path="/" requireSSL="false" slidingExpiration="true"
enableCrossAppRedirects="false" cookieless="UseCookies" />
Fig. 8. Editing the Web.config file
Step 6. Next, in the web browser add the ELMA server to the Local Intranet and Trusted Sites zones and set low security level. Note, that you should apply this setting to all workplaces (user PCs) in the domain, where single sign on is configured. To do so, in:
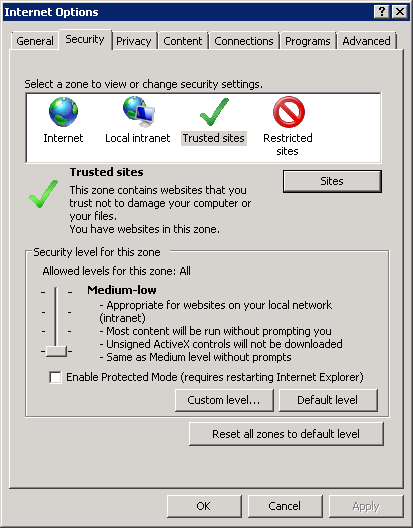
go to the browser settings (Gear icon – Internet Options). In the opened dialog box (fig. 9), open the Security tab and set the security level to Below Average for the Local Intranet and Trusted Sites zones.
Fig. 9. Internet Options dialog box. Security tab
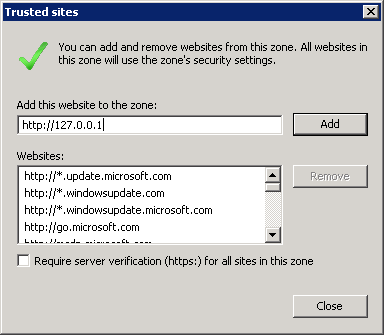
Next, add the ELMA server to trusted sites. For this, on the Security tab click Sites and in the opened dialog box (fig. 10) click Add, and uncheck the box Require server verification (https:) for all sites in this zone. To save the changes click Close.
Fig. 10. Internet Options dialog box. Security tab. Trusted sites dialog box
go to the web browser settings (Customize and control Google Chrome – Settings – Advanced) and in the System unit click Open Proxy Settings. The opened dialog box (fig. 9) and the further actions are similar to the ones described for Internet Explorer.
-
Mozilla Firefox: enter "about:config" in the URL bar and press Enter. On the opened page, click I accept the risk. On the opened page, in the search string enter "network.negotiate-auth.trusted-uris" and press Enter. Next, double-click on the found line and in the dialog box enter the ELMA server name (without http), e.g. "127.0.0.1:8000".
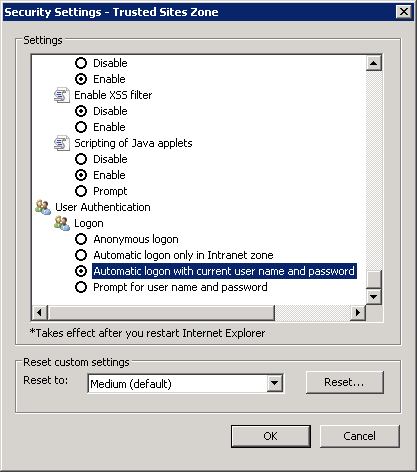
Also, in the Internet Explorer and Google Chrome browsers allow Automatic logon with current user name and password. To do so, on the Security tab click Custom… and in the Security Settings – Trusted Sites Zone dialog box (fig. 11) find the User Authentication unit and set the switch to Automatic logon with current user name and password. To save the changes, click OK and confirm the changes in the opened window.
Fig. 11. Internet Options dialog box. Security tab. Security Settings – Trusted Sites Zone dialog box
Step 7. Tweaking (optional).
The file Settings.config contains some settings, pertaining to the SSPI authentication:
-
SSPI.SecurityKey – a AES-256 key in the Base64 format;
-
SSPI.SecurityVector – AES-256 security vector in the Base64 format;
-
SSPI.CookieName – cookie name;
-
SSPI.TicketLifetime – cookie lifetime in seconds (optional parameter, default value – 60s).
Key generator website: http://www.digitalsanctuary.com/aes-key-generator.php (at the bottom of the page).
Starting with version 3.11, single sign-on is available only for the users of the LDAP system authentication module. If you need single sign-on to work for the users of a different LDAP authentication module, you need to:
1. Open the file Settings.config, located in ../<ELMA folder>/Web.
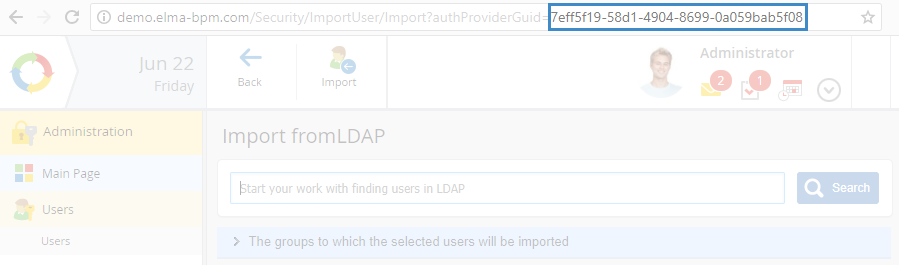
2. Uncomment the line < add key="SSPI.InstanceUid" value="7EFF5F19-58D1-4904-8699-0A059BAB5F08" />, and change the value attribute to the local number of the required LDAP authentication module. Save the changes. The unique number of each authentication module is displayed in the browser URL bar (fig. 12), when you open the user import page from the module (Administration – Users).
Fig. 12. Browser URL bar
Note, that only one LDAP module, whose number is specified in the settings (see step 2), can work with single sign-on. For other modules, single sign-on will be unavailable.
To return to the standard authentication module settings, comment out the line < add key="SSPI.InstanceUid" value="7EFF5F19-58D1-4904-8699-0A059BAB5F08" />.
|
Attention!
For the single sign-on to work correctly after updating ELMA, open the folder ../<ELMA folder>/UserConfig and create a new WebApplication folder, and in this folder, create a file web.config.xslt with the following content:
<?xml version="1.0" ?><xsl:stylesheet xmlns:xsl="http://www.w3.org/1999/XSL/Transform" version="1.0">
<xsl:output indent="yes" />
<xsl:template match="node()|@*">
<xsl:copy>
<xsl:apply-templates select="node()|@*"/>
</xsl:copy>
</xsl:template>
<xsl:template match="authentication">
<authentication mode="Forms">
<forms name="Elma.V3.Forms.Auth" loginUrl="~/SSPI/Account/LogOn" defaultUrl="~/" protection="All" timeout="5256000" path="/" requireSSL="false" slidingExpiration="true" enableCrossAppRedirects="false" cookieless="UseCookies"/>
</authentication></xsl:template>
</xsl:stylesheet>
|
Copyright © 2006–2019 ELMA