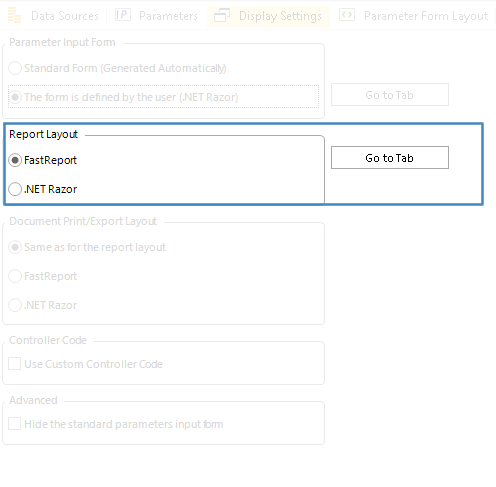
Select the required option in this section (fig. 1) and click Go to Tab to open the layout tab.
Fig. 1. Report Layout unit
You can create a report layout, using:
|
|
|
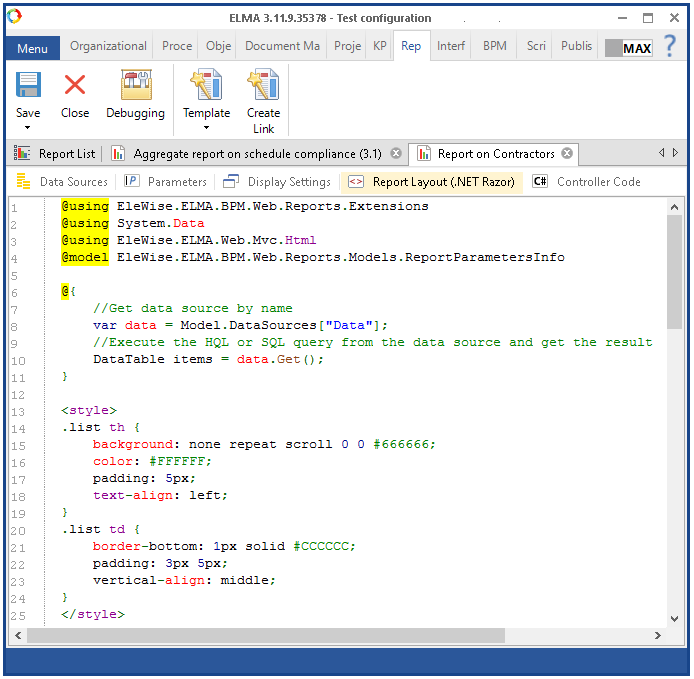
Fig. 2. "Report layout (.NET Razor)" tab
|
Toolbar buttons
|
|
Click the Save button to save changes made to the report.
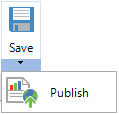
Click the Publish button, you save and publish changes made to the report. After publishing, these changes will be available in Web Application.
|
|
|
Close the current report and do not save changes.
|
|
|
Click Debugging to open a current report in the browser in the debugging mode. You can enter parameters and generate the report to see what it looks like in Web Application.
|
|
|
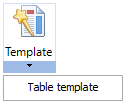
Click the Template button, to open the window where you can create a report layout without showing the table settings panel.
|
|
|
Click to open a window for creating a link to certain system objects or reports.
|
To create a link on the Razor form, click Create Link (fig. 2) in the toolbar of the Report Layout (.NET Razor) tab. After that, fill in the required fields in the opened dialog box and click OK.
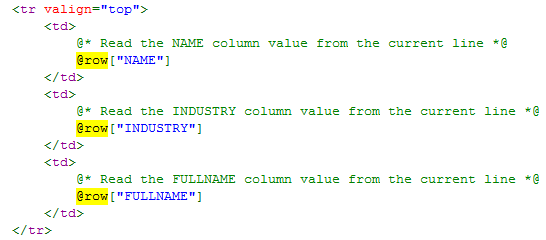
To create a link to a system object, place the cursor where you need to add the link. For Web Application to correctly display the link, add it instead of one of the @row["…"] lines, within this piece of code:
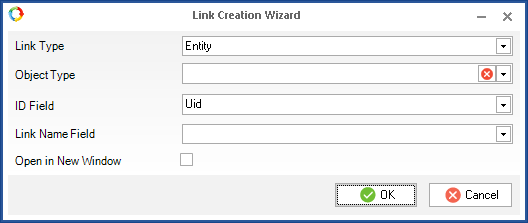
To add a link to a system object, click Create Link in the toolbar of the Report Layout (.NET Razor) tab. Fill in the required fields in the opened dialog box (fig. 3).
|
|
|
Fig. 3. "Link Creation Wizard" dialog box. "Entity" link type
|
Link Type – select the link type from the drop down list:
|
|
Entity – link to a system object.
|
|
|
|
Object Type – select the object type, to add the link to. This drop down list displays the ELMA object type tree.
ID Field – select one of the ID fields, specified on the Data Sources tab. Select the ID, whose data you want to use when opening the created link.
Link Name Field – select one of the field IDs, specified on the Data Sources tab. Select the ID, to paste the link to.
Open in New Window – if this checkbox is selected, a new browser tab or window will open in Web Application, when you click the link. If this box is not selected, the information will be shown on the same tab.
To apply changes and add the link, click OK.
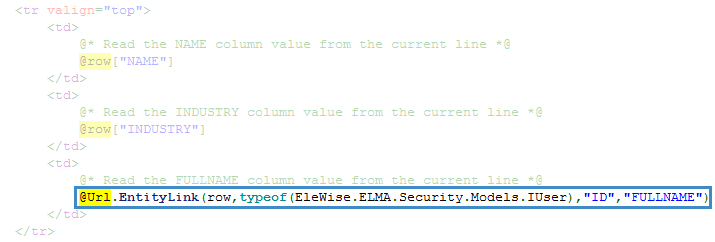
The following link code will be added to the layout code (fig. 4):
In this case, the report will look like this (fig. 5) in Web Application:
|
|
|
Fig. 5. Report in the web application. Link
|
The name of the responsible user is a link to their profile.
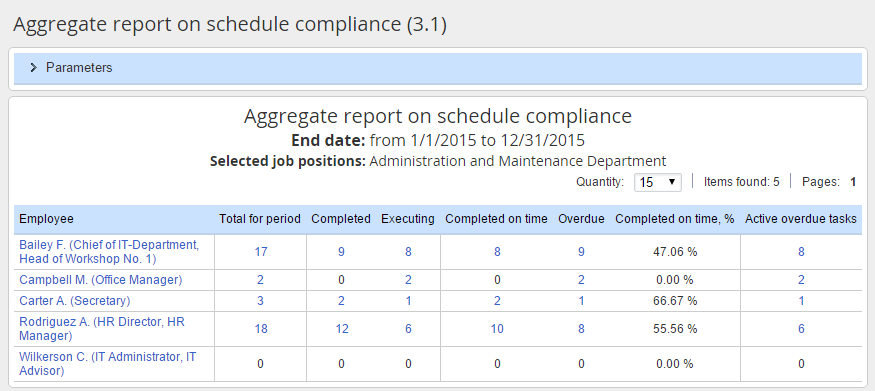
Some report items can contain links to other reports. It may be necessary for quickly loading another report in Web Application.
|
|
|
Fig. 6. Web application. Aggregate report on schedule compliance
|
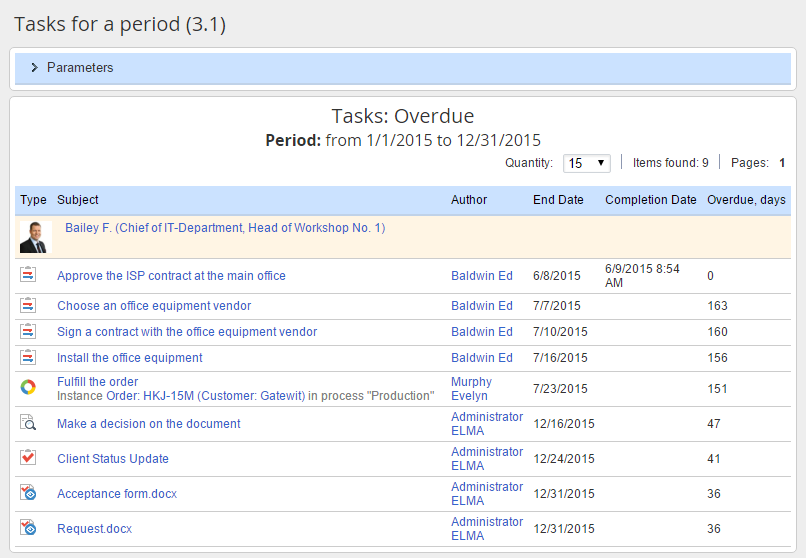
When you click one of the numbers, the "Tasks for a period" report opens (fig. 7) with the full information on the selected number of tasks.
|
|
|
Fig. 7. "Tasks for a period" sub-report
|
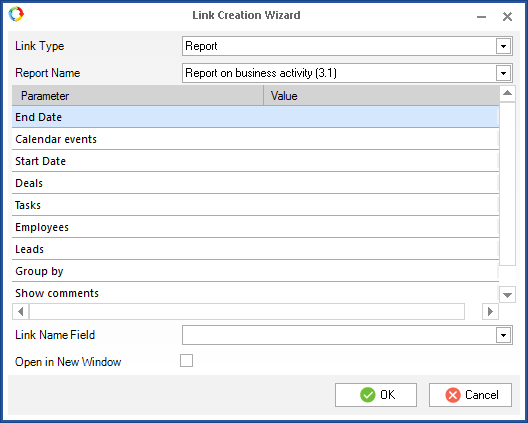
To add a link to another report, click Create Link in the toolbar of the Report Layout (.NET Razor) tab. In the opened dialog box (fig. 3) select Report in the Link Type field (fig. 8):
|
|
|
Fig. 8. "Link Creation Wizard" dialog box. "Report" link type
|
Link Type – select the link type from the drop down list:
|
|
|
|
|
Report – link to a report.
|
Report Name – select the report to use as a sub-report. This field displays all the reports in the system.
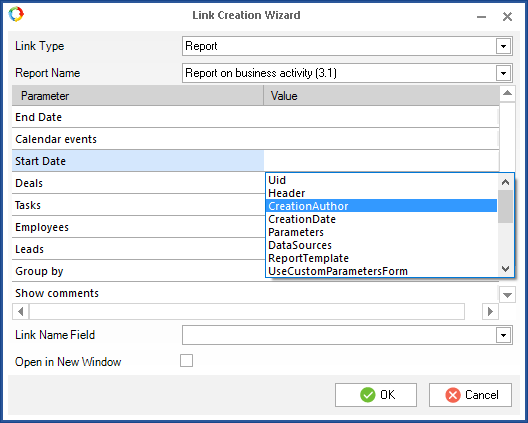
After you have selected the sub-report, the list of report parameters will be displayed below the Report Name field. Select column values (of the select operator in data sources) for each parameter. Thus, the parent report values will be transferred to the sub-report for correctly selecting data.
To select the value, double click the  button to the right of the parameter (fig. 9). The parameter and the value must be of the same type.
|
|
|
Fig. 9. "Link Creation Wizard" dialog box. Selecting a report
|
Link Name Field – select one of the field IDs, specified on the Data Sources tab. In this field, select the field name, to insert the link to.
Open in New Window – if this checkbox is selected, a new browser tab or window will open in Web Application, when you follow the link. If this box is not selected, the information will be shown on the same tab.
To apply the changes and add the link, click OK.
The following code will be inserted to the layout code (fig. 10):
Copyright © 2006–2019 ELMA

