Adding a Form to a Button
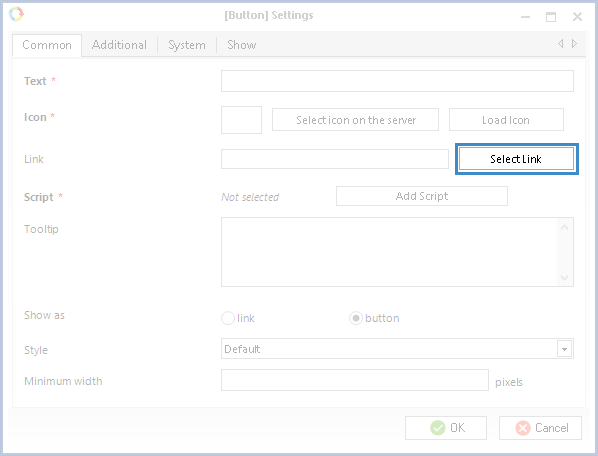
Fig. 1. Button settings window. Common tab
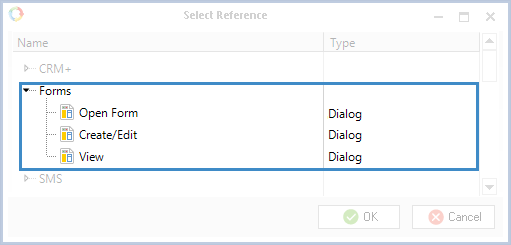
A dialog box for selecting an action from the ELMA register will open. Select the Forms action (fig. 2).
-
To use an existing form of the current object, select it from the list (e.g. Create, Edit, View) and click OK. The name of the selected form will be displayed in the Link field of the button settings window on the Common tab.
-
If you click Open Form, you will be able to select the form type. After you click OK the form selection wizard will open.
Fig. 2. Link selection dialog box
Step 1. Form type selection
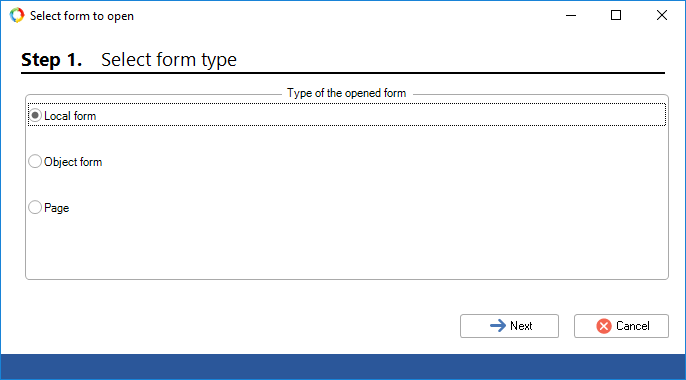
At the first step of the wizard, select the form type (fig. 3) and click Next:
-
Local form – a form of the currently edited object. Includes all the object forms. You can adjust the selected local form.
-
Object form – a form of an object, which was added as a property to the current object. Note, that for the object form to display correctly, the following conditions must be met:
-
-
this property must be added to the main edited form.
-
Fig. 3. Adding a form. Step 1. Selecting the form type
The following steps depend on the selected form type.
Step 2. Selecting a form
This step features two tabs (regardless of the selected form type): Form and Advanced.
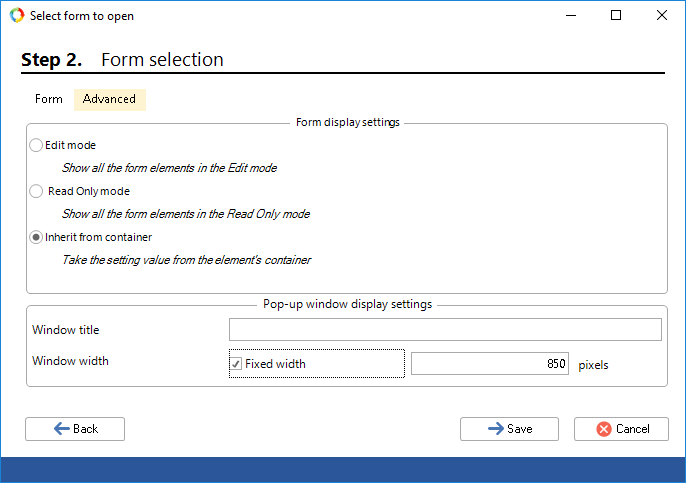
The Advanced tab (fig. 4) is the same for all the form types. This tab contains the following units: Form display settings and Pop-up display settings.
Fig. 4. Adding a form. Step 2. Advanced tab
In the Form display settings unit, you can select the form elements display mode:
-
Editing mode – display all the form elements in the editing mode;
-
Read Only mode – display all the form elements in the view mode (editing elements is unavailable);
-
Inherit from container – display of the form element is inherited from the main form.
In the Pop-up display settings you can specify the pop-up header in the Window Header field and the pop-up width in pixels, by checking the Fixed Width box. By default, this box is checked and the maximum width is set to 850 pixels. For the pop-up to be displayed correctly, take into account the fact that the pop-up width cannot be less than its contents.
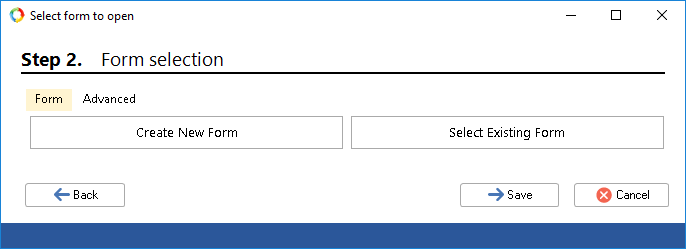
The Forms tab at this step and the following steps are different, depending on the selected form type.
Fig. 5. Adding a form. Step 2. Local form. Forms tab
To finish adding a form, click Save.
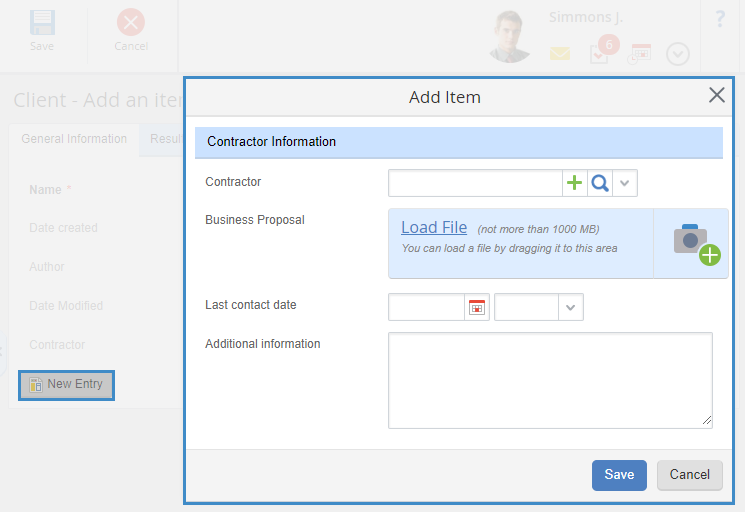
Fig. 6 shows what a local form added to a button looks like in Web Application.
Fig. 6. Local form display in ELMA Web Application
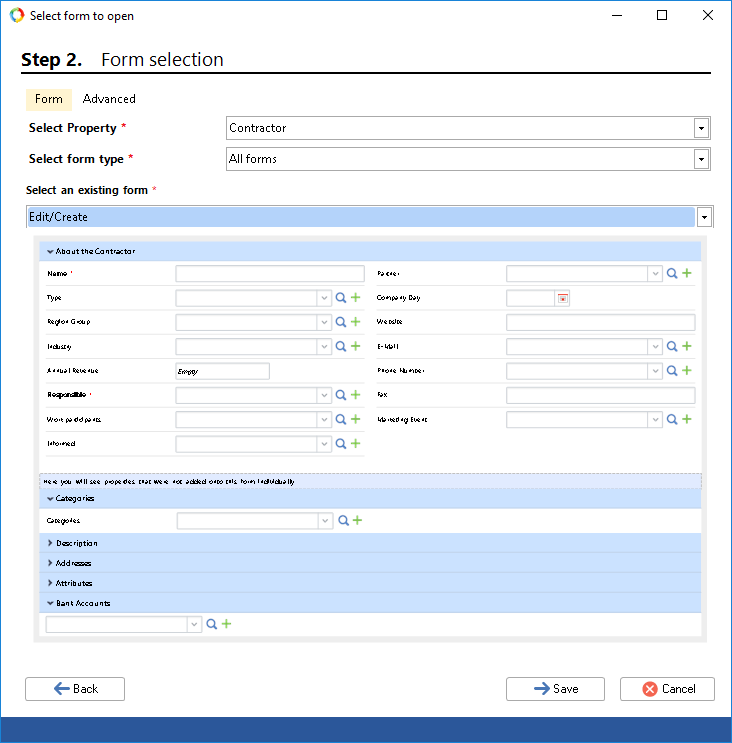
To use the form of another object (e.g. Contractor editing form), which was added as a property to the currently edited object, select Object form (fig. 3).
At the second step, on the Form tab (fig. 7), select from drop-down lists:
-
-
-
-
All forms – all the forms of this object;
-
The form thumbnail will be displayed only if All forms is selected.
Fig. 7. Adding a form. Step 2. Object form. Form tab
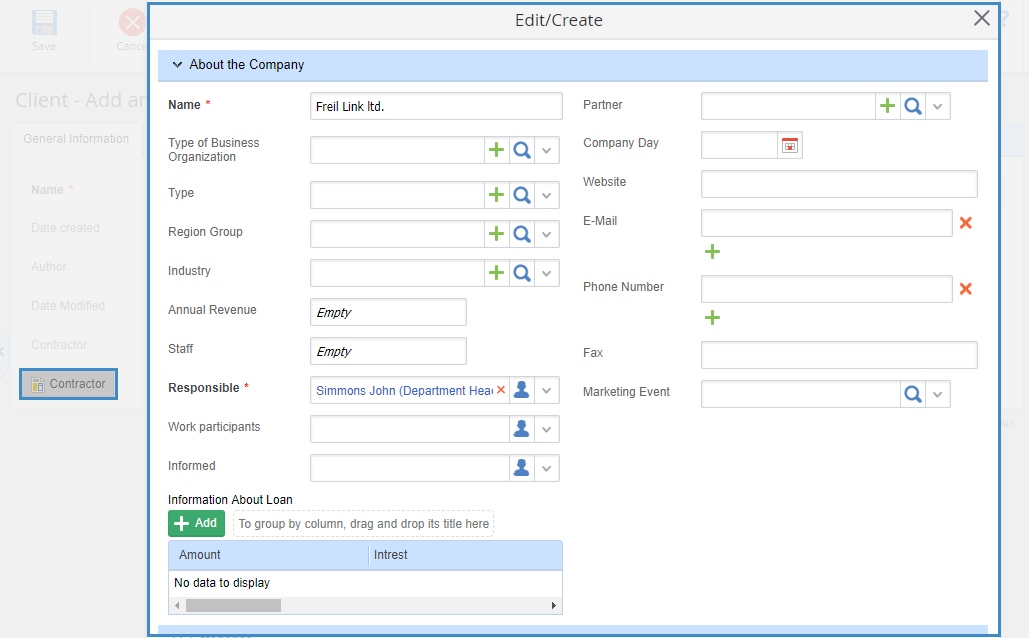
Fig. 8 shows what a Contractor editing form will look like in Web Application.
Fig. 8. Contractor form in ELMA Web Application
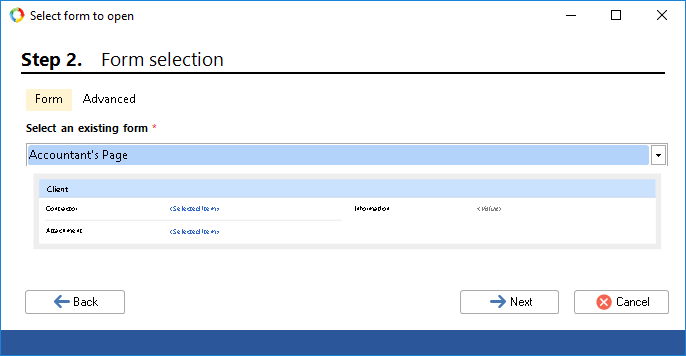
To add a page form, select Page at the first step (fig. 3).
Fig. 9. Adding a form. Step 2. Page. Form tab
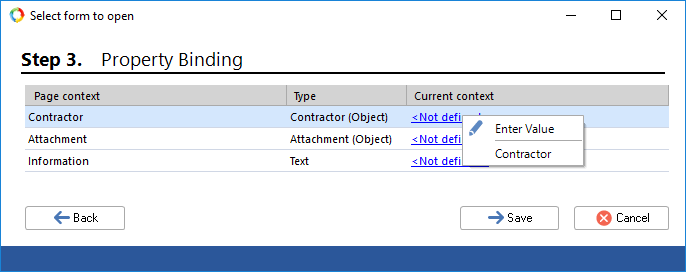
Step 3. Binding properties
This step is available only when adding a page to the form. At this step you need to match context variables of the page with the current context variable. By doing so you making possible to open a page with earlier selected values. To bind current context variables with page context variables, use the context menu (fig. 10).
Fig. 10. Adding a form. Step 3 – Binding properties. Page
To finish adding a form, click Save.
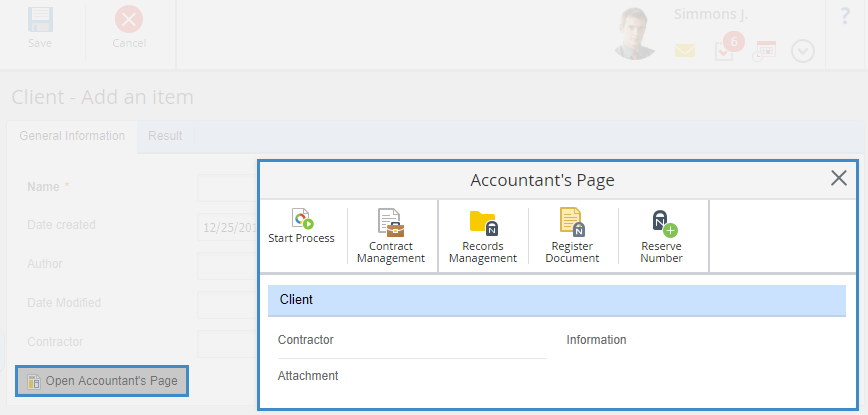
Fig. 11 shows what a page added to a button will look like in Web Application.
Fig. 11. Page display in ELMA Web Application
Copyright © 2006–2019 ELMA

