Escalation means automatically quitting a process activity when a timer goes off or when an error or a script condition occurs. Operations in ELMA have the following types of escalation:
-
N/A – User quits the task by clicking a corresponding button in Web Application;
-
Timer – User quits the task when the timer goes off;
-
Exception Handling – If a script is interrupted because of an error, the selected users receive a notification. This escalation type is available only for an outgoing script connector;
-
Script – Quitting the task is possible depending on the result returned by the script;
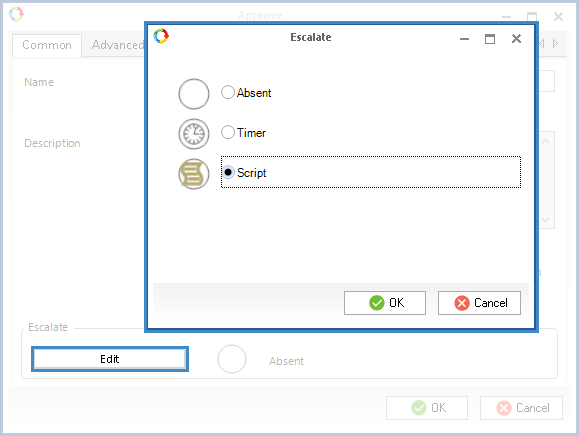
Escalation is configured in connector settings. By default, escalation is disabled. To open the settings window, double-click on the connector in the graphic model or select Settings in the connector's context menu. Click the Edit button to select the required type of escalation (Fig. 2, 9, 13).
Escalation is used in the following activities:
BPMN activities
Document Management activities
-
-
-
-
-
-
-
-
-
Assign decision-based Tasks
-
Execution and control of decision-based tasks
When setting up escalation, make sure that the activity has at least one connector that is activated without escalation.
|
Note
All the operations listed above (except for User Task), which require creating escalation, must have at least one outgoing connector that is activated without escalation. You can use only one connector with escalation as an outgoing connector for the User task operation.
|
|
|
|
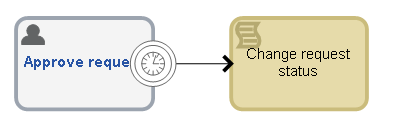
Fig. 1. Escalation by timer
|
To open the settings window, double-click on the connector in the graphic model or select Settings in the connector's context menu.
Tabs in Settings of Connector with Escalation by Timer
Common tab
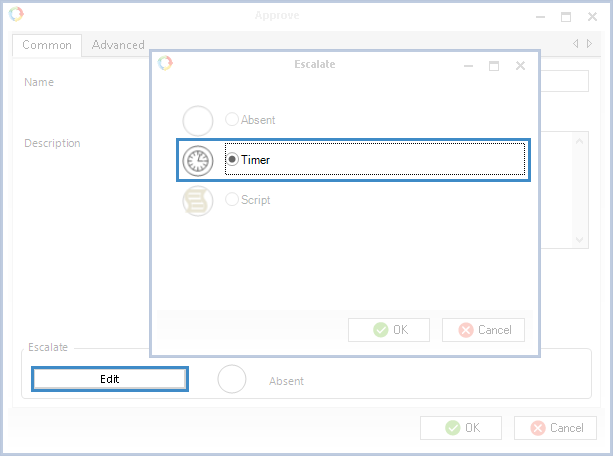
To set up escalation by timer, click Edit in the Escalation section of this tab and select the "Timer" escalation type (Fig. 2).
|
|
|
Fig. 2. Connector settings
|
Once the timer is activated, the Timer Settings and Notifications tabs appear in the settings window.
Timer Settings tab
On this tab you can specify the time when the timer should go off and escalate the activity (the process flow will take the path that you are currently configuring). These settings are handled like the event timer settings.
Timer Start Type
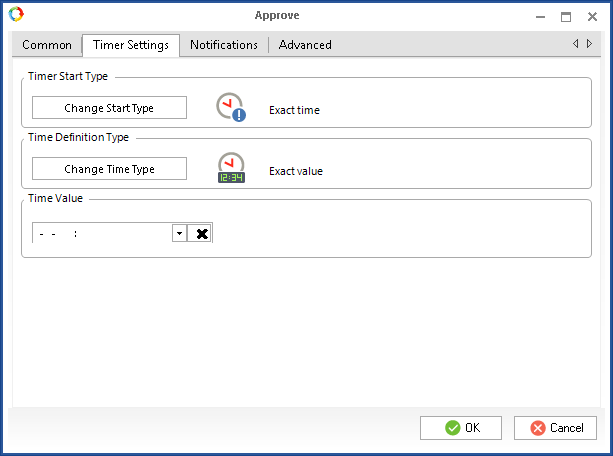
Exact time – you can specify the exact time when the timer must go off. If the process flow reaches this activity later than specified in the Time Value field or the context variable, the escalation triggers automatically.
|
|
|
Fig. 3. Connector settings. Timer Settings tab. “Exact Time” timer start type
|
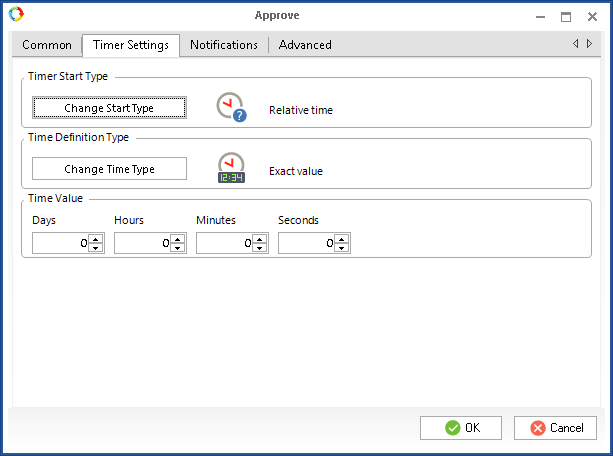
Relative time – here you can specify a time interval, which, once over, triggers escalation.
|
|
|
Fig. 4. Connector settings. Timer Settings tab. “Relative Time” start type.
|
Start Loop allows you to set a regular timer according to the calendar. Unlike the Exact Time type, if this timer cannot go off at the specified time (for example, if the server was shut down), it will wait for the next loop to trigger escalation.
|
|
|
Fig. 5. Connector Settings. Timer Settings tab. “Loop Start” start type.
|
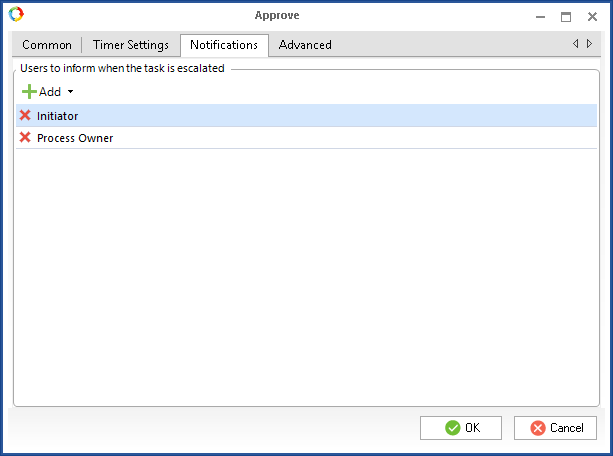
Notifications tab
On the Notifications tab, you can specify the users who will receive notifications when the escalation goes off.
|
|
|
Fig. 6. Connector settings. Notifications tab.
|
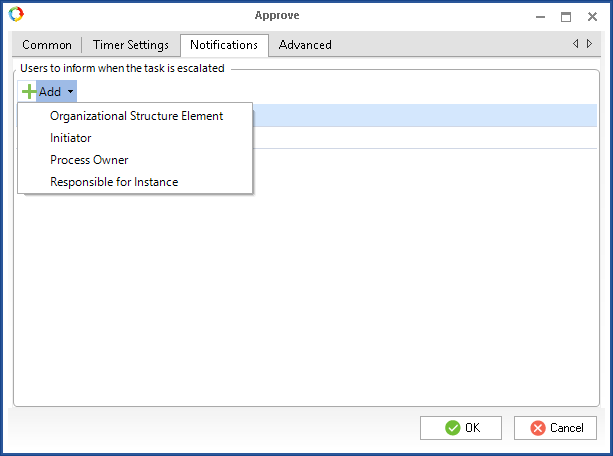
To add a user, click Add and select elements of the organization structure or process roles (Fig. 6). They represent the employees who will receive notifications when the escalation goes off.
To delete a user from this list, click the  button next to the element's name.
|
|
|
Fig.7. Connector settings. Notifications tab. Add button.
|
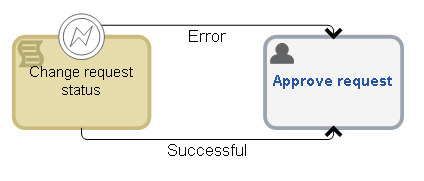
In the process graphic model, the connector with Exception Handling is depicted with the  icon (Fig. 8). This type of escalation is only available for an outgoing script connector.
|
|
|
Fig. 8. Exception Handling
|
To open the settings window, double-click on the connector in the graphic model or select Settings in the connector's context menu.
Tabs in Settings of Connector with Exception Handling
Common tab
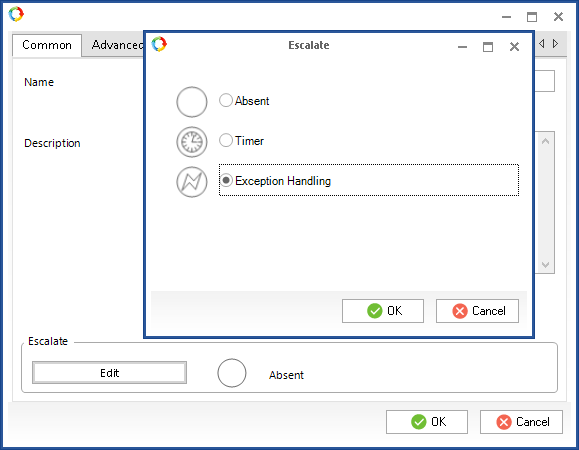
To set up Exception Handling click Edit in the Escalation section of this tab and select the "Exception Handling" escalation type (Fig. 9).
|
|
|
Fig. 9. Connector settings
|
When Exception Handling is active, the additional Settings and Notifications tabs appear in the settings window.
Settings tab
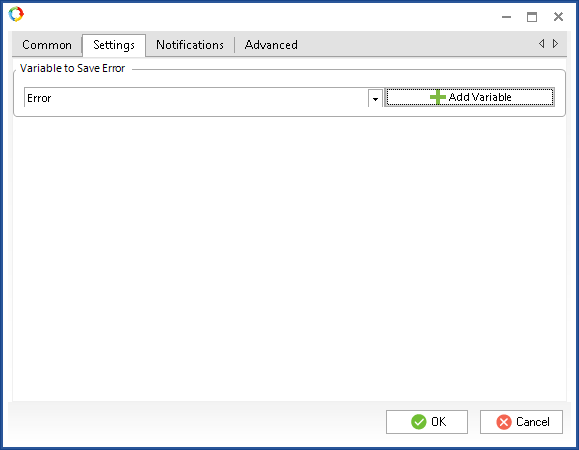
On this tab (Fig. 10) you can add and/or select the context variable of the Script Error type. Should an error occur in the script, the error text will be saved in this variable.
|
|
|
Fig. 10. Connector settings. Settings tab.
|
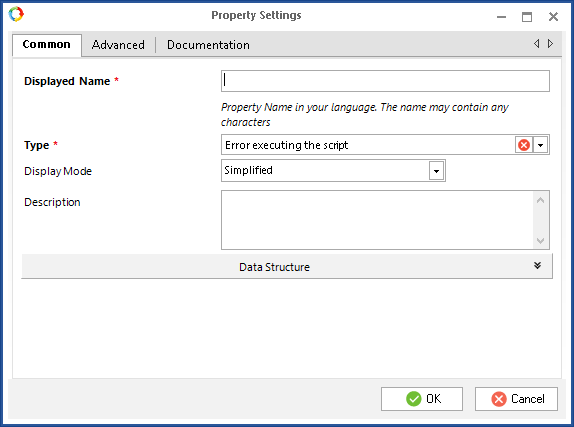
This variable (Fig. 11) is used later in the process to implement error handling logic. In variable type settings, you can specify how the error is displayed: either in a simplified mode (giving a brief description of the error) or in full mode (giving a full description).
|
|
|
Fig.11. Connector settings. Settings tab. Context variable of the "Error Executing the Script" type.
|
Notifications tab
The contents and controls of this tab are similar to those of the Notifications tab (Fig. 6) in the Timer Escalation dialogue box.
Advanced tab
To trigger escalation by script you have to specify the script and the script check period. The script must return either the true or false value (here and elsewhere we refer to the bool type of the C# language, which is used to write scripts in ELMA). When the process instance reached the activity with the configured escalation, the script specified in the Script Settings is activated at specified intervals. If the script returns the true value, the activity is escalated by the connector that you are currently configuring.
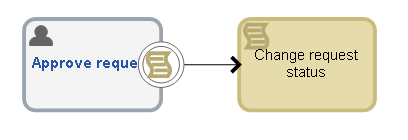
In the process graphic model, the connector with escalation by script is depicted with the  icon (Fig. 12).
|
|
|
Fig. 12. Escalation by script
|
To open the settings window, double-click on the connector in the graphic model or select Settings in the connector's context menu.
Tabs in Settings of Connector with Escalation by Script
Common tab
To enable the script escalation, click Edit in the Escalation section of this tab and select the "Script" type (Fig. 13).
|
|
|
Fig. 13. Connector settings
|
When the script escalation is enabled, the additional Script Settings and Notifications tabs appear in the settings window.
Script Settings tab
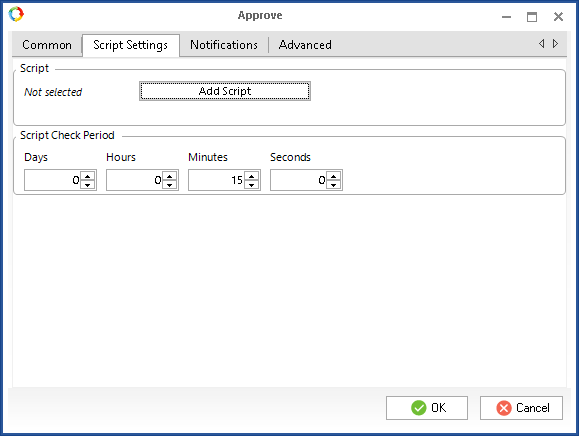
On the Script Settings tab you can specify the script that will check if it is necessary to escalate an activity. You can also specify the script check period.
The script must return the true or false value.
|
|
|
Fig. 14.Connector settings. Script Settings tab.
|
Script Check Period - the interval at which the script is triggered. By default, this interval is 15 minutes.
To select a script, click Add Script.
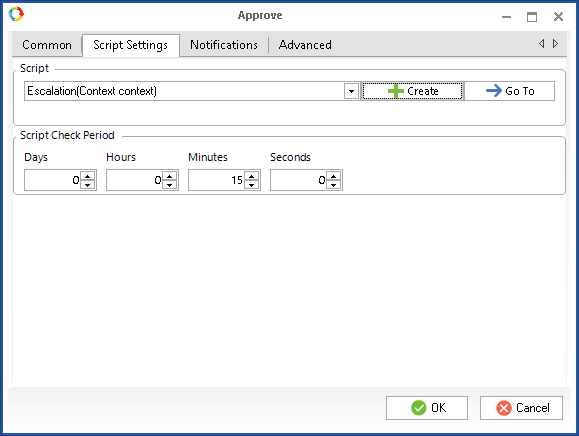
When the script module is loaded, you can select a script from the drop-down list (Fig. 15).
If the process scripts do not feature the escalation check function, you can add it by clicking the ( ) button. The Go To button takes you to the selected script on the Scripts tab of the process. This tab features script writing tools, such as syntax highlighting, IntelliSence (completion of functions and variables), and links to assemblies and web services.
|
|
|
Fig. 15. Connector settings. Script Settings tab. Script selection.
|
Example of Escalation by Script
Escalation means automatically quitting a process activity when a timer goes off or when an error or a script condition occurs.
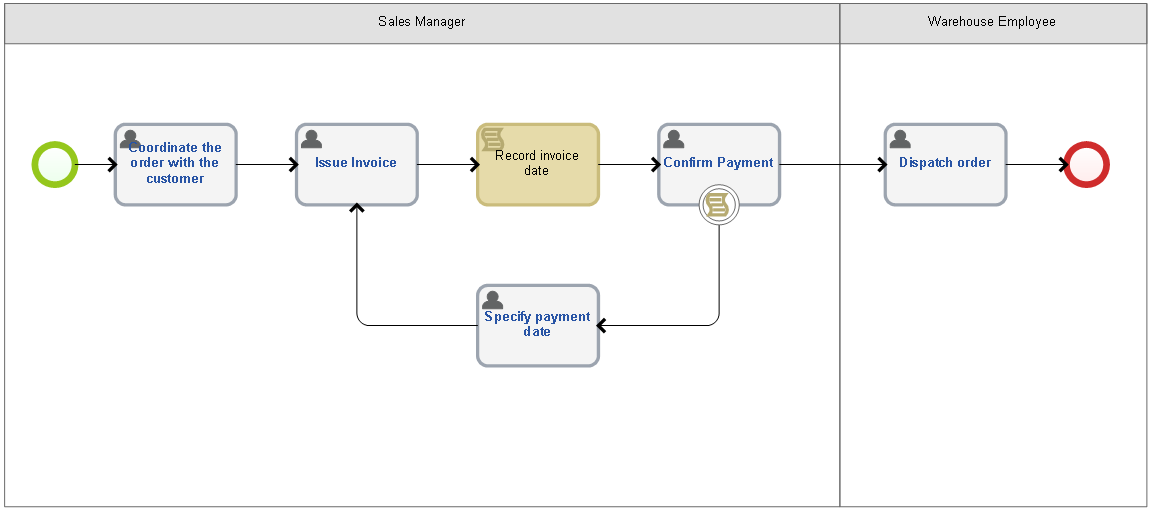
Consider the "Sales by order" process, where the sales department employee must contact the customer, issue an invoice and confirm payment. By default, an invoice is valid for three days. However, the sales employee can arrange for a specific date when the customer is able to pay the invoice. If the invoice cannot be paid on time, the sales employee has to specify the date when it will be paid. This process contains five tasks: “Coordinate the order with the customer”, “Issue invoice”, “Confirm payment”, “Specify payment date”, “Dispatch order”, and a script that states the invoice issue date (Fig. 16).
|
|
|
Fig. 16. Example of a process featuring escalation by script
|
In “Record invoice date”, use the current date as the date when the invoice is issued:
public void SaveBillDate(Context context)
{
context.InvoiceIssueDate = DateTime.Now;
}
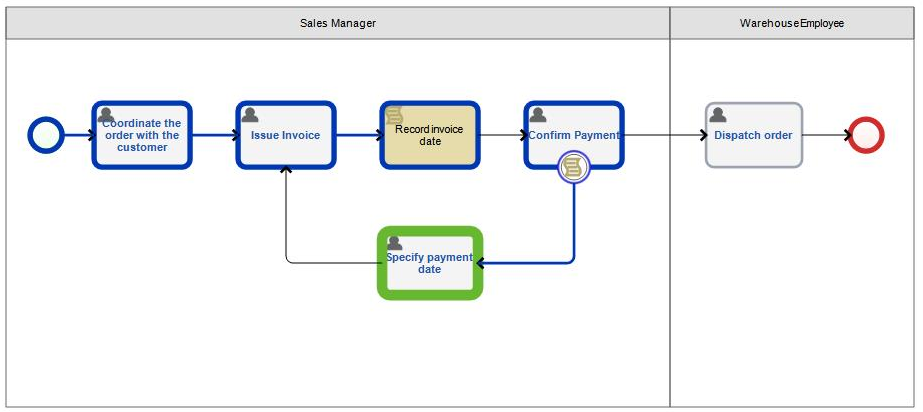
The flow goes from the “Confirm payment” activity to the “Specify payment date” activity automatically in three days, if the exact payment date is not specified. Otherwise, the activity is escalated the day after the exact payment date. Once payment is received, the warehouse worker receives the “Dispatch order” task. The script for this process will look as follows:
public bool CheckDate(Context context)
{
if ((context.ExpectedPaymentDate != null) && (DateTime.Now >= context.ExpectedPaymentDate.Value.AddDays(1)))
{
return true;
} else if (DateTime.Now >= context.InvoiceIssueDate.Value.AddDays(3))
{
return true;
} else
{
return false;
}
}
|
|
|
Fig. 17. Example of a process featuring escalation by script. Process map at the point after escalation.
|
Copyright © 2006–2019 ELMA

