Document routes in ELMA
In ELMA it is possible to create routes for document management.
Document routes are processes composed of a sequence of tasks during which the document is directed to several executors. Document routes are created in ELMA Designer and linked to a document type.
Let's see how a document route is created. By default, any document can be sent for approval or acquaintance. For that, in the top menu of the document page, click Send - Send for approval or Send - Send for acquaintance.
.png)
Fig. 1. Drop-down menu of the Send button
You can send a document for approval or consideration to several users at a time. Also, you can specify additional parameters, for example, make the approval parallel or consequent.
Creating a document route
Creating a document route is similar to creating a business process. You can read more about business processes in ELMA Help.
To create a new document route, go to the Processes tab of ELMA Designer and click Add.
Introduce the name of the new process, for example, Approve application and click Next. You will then have to select elements of the organizational structure that will be represented in the swimlanes. In our case, it is the Procurement department specialist and CFO. If you wish you can add edit the swimlanes later on.
In a document routing process, the document is the core element, and it must be specified in the context as the main attribute. For that, open the Context tab, click Add, enter the name of the variable, for example, Application and select its type. It can be the base type, Document (Platform objects -> Document), or a more specific document type, for example, Loan application (Documents -> CRM -> Loan application).
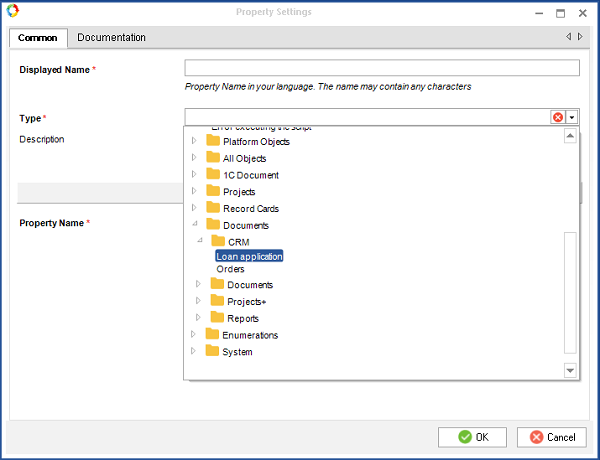
Fig. 2.Selecting document type
Click ОК, then check the Input box of the document.

Fig. 3. List of context variables
The graphical model of the document's route is created with BPMN elements, just like a regular business process model. You can use user tasks but we recommend using specialized document management activities such as Create Document, Approve Document and Register Document since they are more efficient for working with documents.
These activities are located in the left menu of the graphical map. Open the Document Management section and you will see the activities grouped by their type: Approval, Acquaintance, Consideration, and Operations with Document.
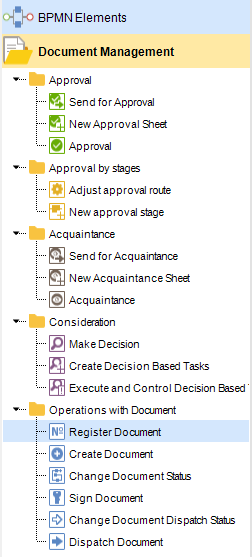
Fig. 4. Document management activities in ELMA Designer
Approval
There are three approval activities: Send for Approval, New Approval Sheet, Approval.
Send for Approval
Send for Approval task allows the user to select the approvers and to specify if approval must be parallel or consequent.
In ELMA Designer, go to settings of this task and open the Documents tab. There, select the variable with the document that must be sent for approval. In our case, it is the Order.
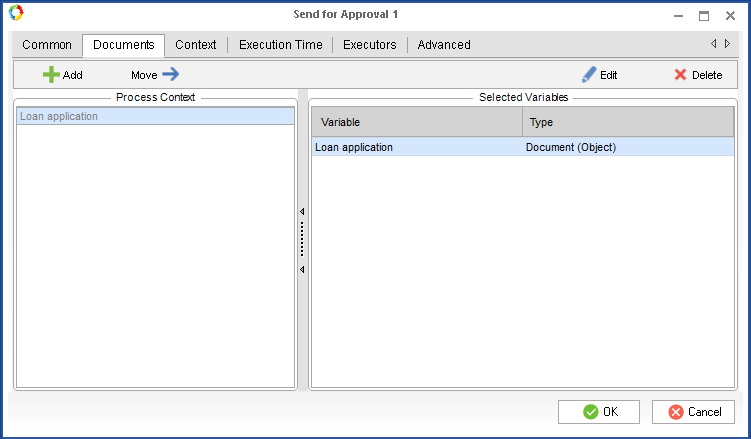
Fig. 5. Settings of Send for Approval activity
In the form of the Send for Approval task, the user can select the task executors and approval end date. Also, it is possible to specify the subjects of the task and attach a document version.
.png)
Fig. 6. Send for Approval task in Web Application
New approval sheet
The New approval sheet activity allows you to send the document for approval with predefined parameters, for example, if the approval sheet is defined by a script. You can read more about scripts in ELMA Help.
A new approval sheet, in this case, is created automatically and users do not receive a task to create one.
Approval
The Approval activity is a task to approve the document. In its settings, you have to specify the Document variable and select the label specified in the New approval sheet or Send for approval. The label is the link between the Approval Sheet or the Send for Approval activity and the Approval task. Labels are used to separate several approval sheets in a document route.
In the Web Application, the user is assigned a standard task to approve the document and can view the document version, list of approvers, and make Approve or Reject the document.
.png)
Fig. 7. Approval task in Web Application
The result of the approval is then shown on the Approval tab of the document and in the approval sheet.
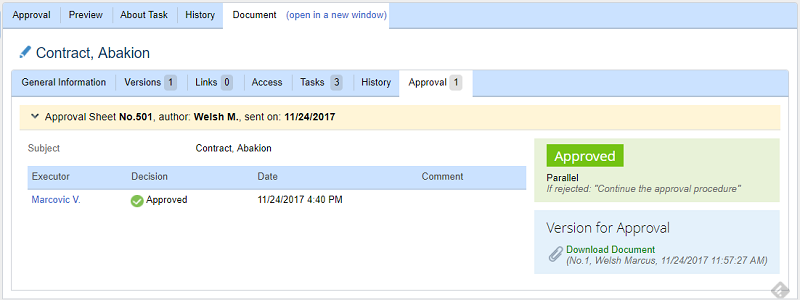
Fig. 8. Approval tab of the document page
The approval sheet can be downloaded as a .pdf document. For that, click Actions - Generate approval sheet.

Fig. 9. Generated approval sheet
Acquaintance
Acquaintance activities are similar to approval activities.
The acquaintance results are shown in the Acquaintance tab of the document and the acquaintance sheet.
.png)
Fig. 10. Acquaintance tab of the document page
The acquaintance sheet is also formed in a manner similar to that of the approval activity.
Consideration
Consideration results in a document-based decision and corresponding tasks.
The main task of the Consideration activity is Make a Decision. On the task form in Web Application, the user sees the document and a field to write the decision.
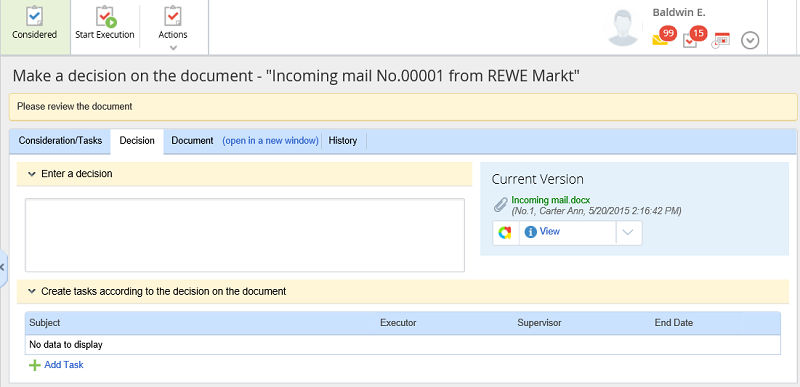
Fig. 11. Decision tab of the consideration task
The Create Decision-based Tasks activity is similar to the Make Decision activity, only it allows the user to create a set of tasks based on the document-based decision and assign executors.
.png)
Fig. 12. List of document-based tasks
You can read more about document-based tasks in ELMA Help.
Operations with Document
Create Document
This is a standard document creation tasks. In the settings, you need to specify the document type and the context variable that will automatically store the new document. In Web Application, the user will see a standard document creation form.
Change Document Status
This activity automatically changes the document status. You can read more about document lifecycle and statuses in ELMA Help.
Sign Document and Register Document
These activities allow you to use respective tasks in document routes.
In case of the Register Document activity, in the Additional tab of the Settings window, select the document flow or registration variant to minimize any manual operations.
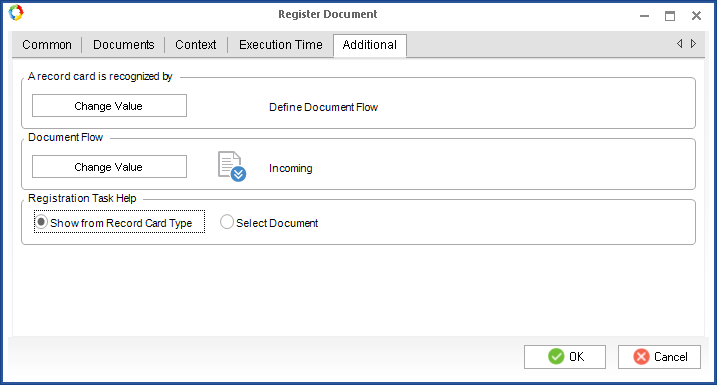
Fig. 13. Document registration settings
In Web Application, these tasks are the same as the standard sign and registration tasks.
Example of a document route
Here is an example of a simple document route:
.png)
Fig. 14. Graphical model of a document route
In this route, the initiator sends a document for registration. Then the registered document is sent to a responsible employee for consideration and decision-making. After that, the decision-based tasks are assigned to their executors and the document is sent for acquiantance.
Adding a route to a document
To make a route available for a document, you need to link them in ELMA Designer. Open the Document Management tab, select the required document type and click Add on the Business Processes tab.
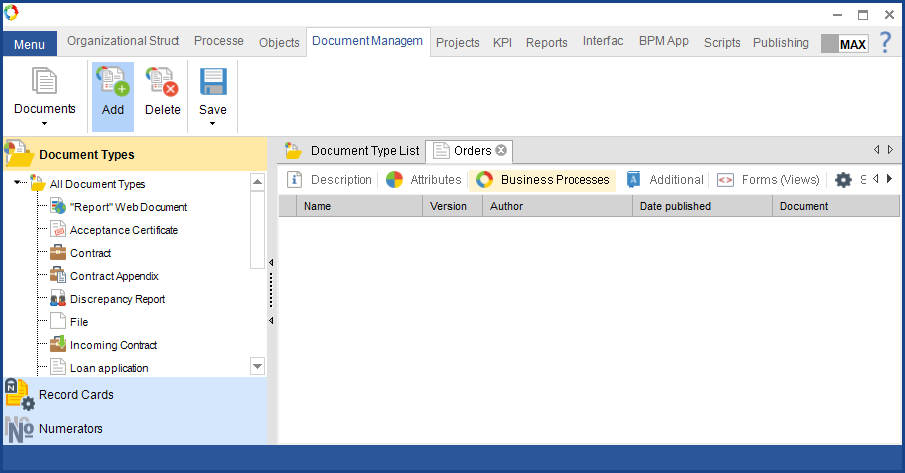
Fig. 15. Add button on the document type page
In the appeared window, select the new route and click OK. The new route will be added to the list.
Next, publish the document type by clicking Save - Publish.
After that, the route will be available in Web Application. To end a document by a route, open the document and click Send by route in the top menu.
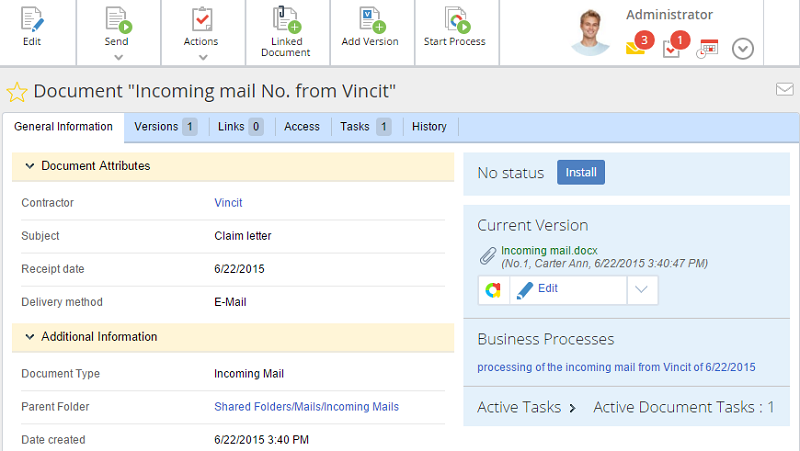
Fig. 16. Document page in Web Application
In the appeared window, you can select the route from the list of available routes.
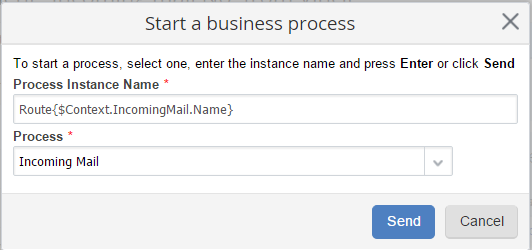
Fig. 17. Dialogue box for sending a document by a route
Click Send to send the document by the route. ELMA will execute the process and assign all corresponding tasks.