The form of the Adjust Approval Route task in Web Application looks like this (fig. 1):
Fig. 1. Task page. Adjust approval route tab
This task contains four tabs: Adjust approval route, Context, About Task, History, and a task description section (if this description has been added when configuring the route).
Adjust Approval Route tab
This tab includes a drop-down list with earlier created routes for sending a document for approval. Approval routes are created in the Approval Route object in the Objectssection and/or on the task page when adjusting an approval route.After selecting one, you can set up the approval route details: stage number, approval due date, approver/group of approvers/organizational structure item, use of the "First Response" feature, approval type at each stage and stage name (fig. 2).
Fig. 2. Adjust approval route tab. Selecting and setting up an approval route
If you need to create a new document approval route, click in the selection field.
If necessary, the selected route can be edited and saved in the Approval Route object with the Save in the object button. Note that to save a route the user must have respective permissions.
Name* - this required field contains the name of the selected document approval route.
The approval stage table includes the following elements:
– use this button to change the order of stages.
Stage number – order number of the created stage.
Approve before – time allotted for the document approval at this stage, in days and hours.
Users – system user or users responsible for the document approval at this stage.
User groups – a user group responsible for the document approval at this stage.
Organizational structures – organizational structure item responsible for the document approval at this stage.
First response – use the First Response feature for user groups and organizational structure items. More information here.
Approval type – select an approval type for this stage – parallel or serial. More information here.
Stage name – name of the stage.
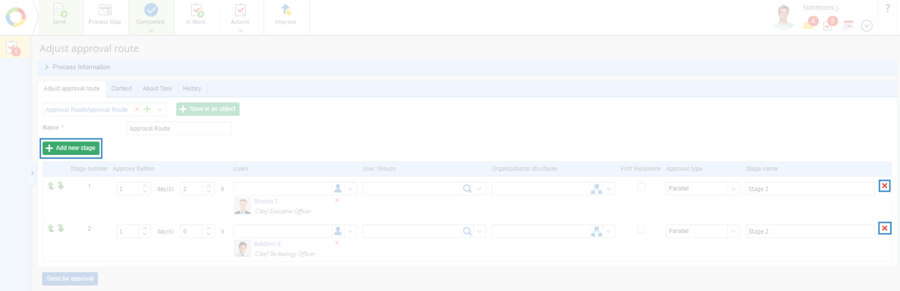
You can add new stages to the route using the Add new stage button, and delete existing stages using the button in the right part of the route stage table (fig. 3).
Fig. 3. Buttons for adding and deleting route stages
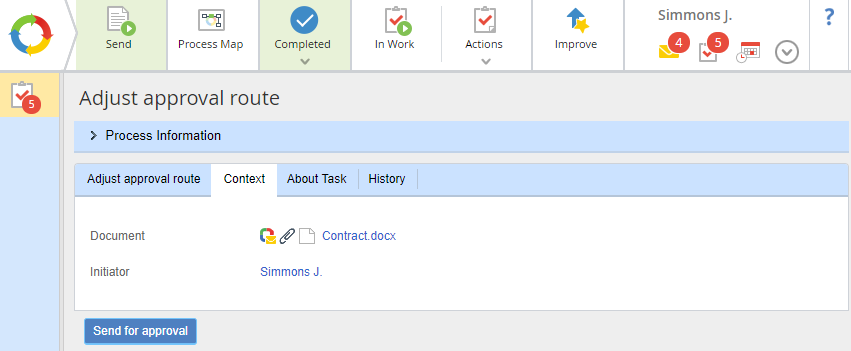
Context tab
This tab (fig. 4) displays the process input data as well as the data that can be added or edited during the execution of process stages.
Fig. 4. Context tab
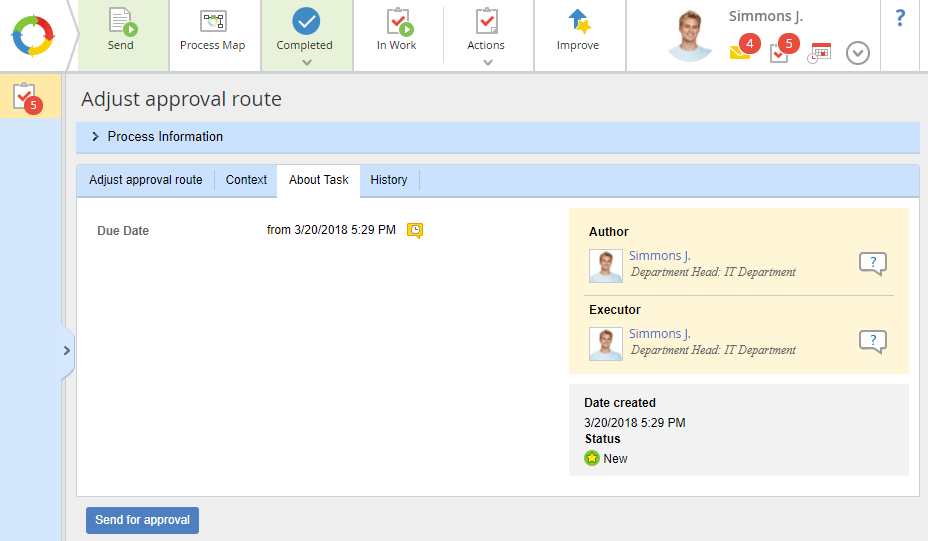
About Task tab
This tab displays details on this task (fig. 5).
Fig. 5. About Task tab
History tab
This tab (fig. 6) lists the actions performed with this task.