An approval task form has five tabs:
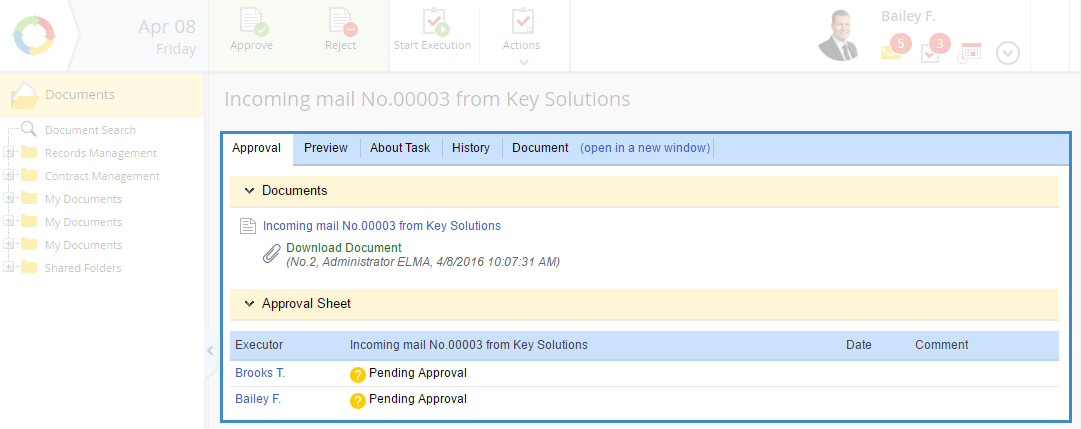
Approval – this tab contains two sections.
The Documents section allows you to:
-
-
-
edit the document via ELMA Agent (if installed); This feature is available while the document is pending approval, or if settings in Administration – Document Management – General Settings of "Document Management" Section – Document Task Settings allow editing documents after approval
-
add a new document version (fig. 2).
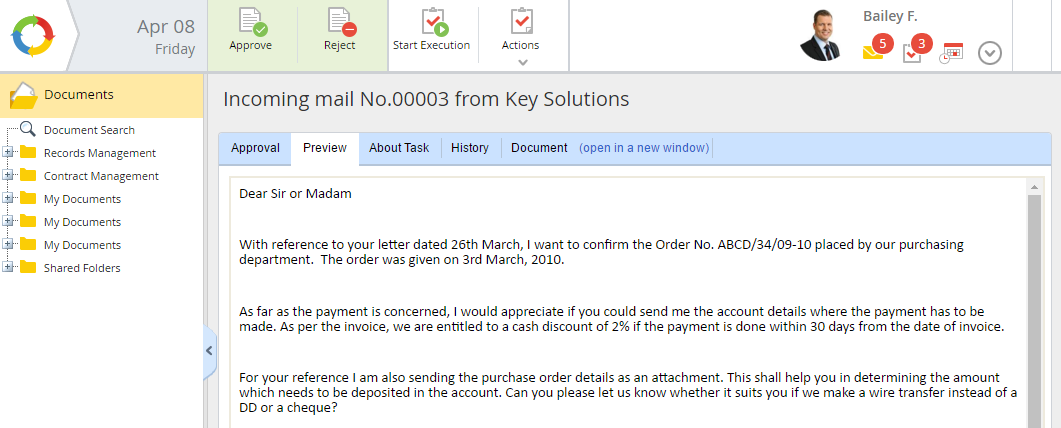
Preview – this tab allows previewing the current document version without downloading it to your PC. If the document version extension does not support the preview function, this tab is not displayed (fig. 3).
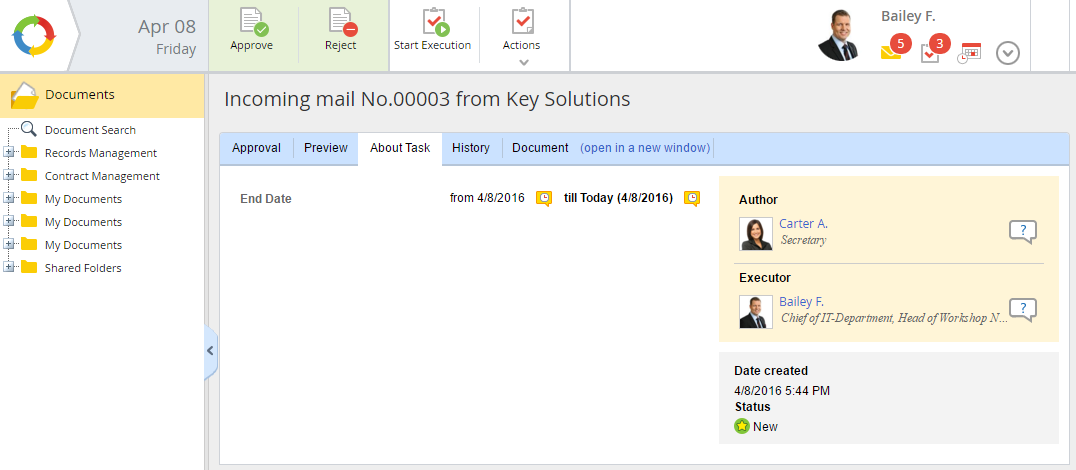
About Task – this tab contains information about the task: end date, author, executor, creation date and status (fig. 4).
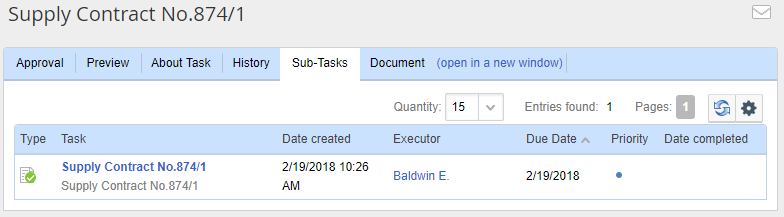
Sub-Tasks – this tab displays all the sub-tasks created in this approval task. This tab is displayed only if at least one sub-task has been created.
Time Report – this tab displays all the time reports submitted on this task. This tab is displayed only if at least one time report item has been submitted.
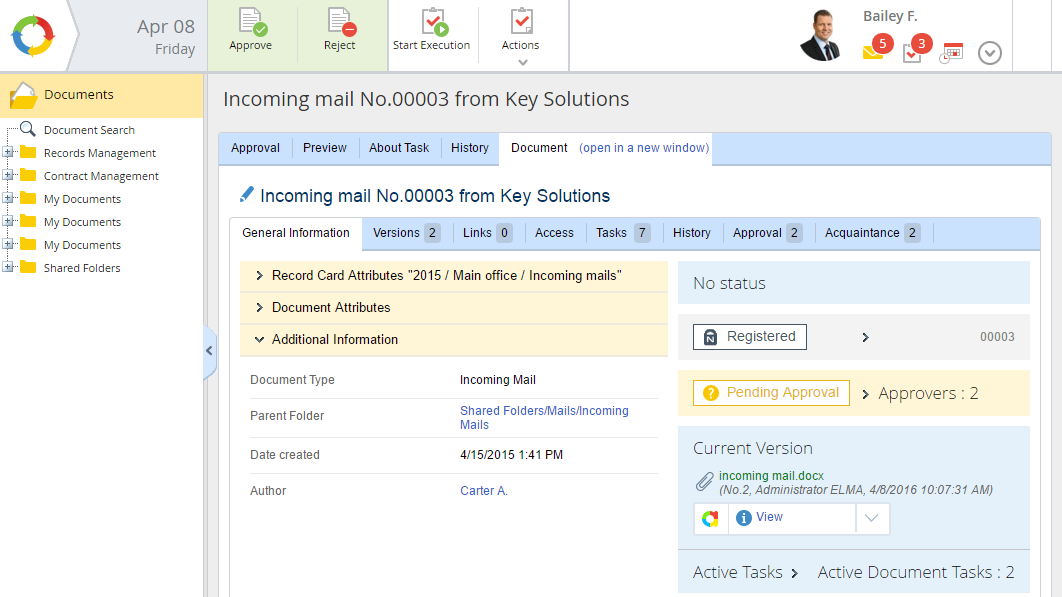
Document – this tab shows the document page. To edit the document page, click open in a new window (fig. 5)
The top menu of the approval task page includes the following buttons:
|
|
Approve the document and complete the task. When you click this button, a form opens, where you can add a comment and click Save. Depending on the settings the Comment field may be a required one. The comment will be added to the document page. The Approved status will be displayed next to the user name in the approval sheet
|
|
|
Reject the document and complete the task. When you click this button, a form opens, where you can add a comment and click Save. Depending on the settings the Comment field may be a required one. The comment will be added to the document page. The Rejected status will be displayed next to the user name in the approval sheet
|
|
|
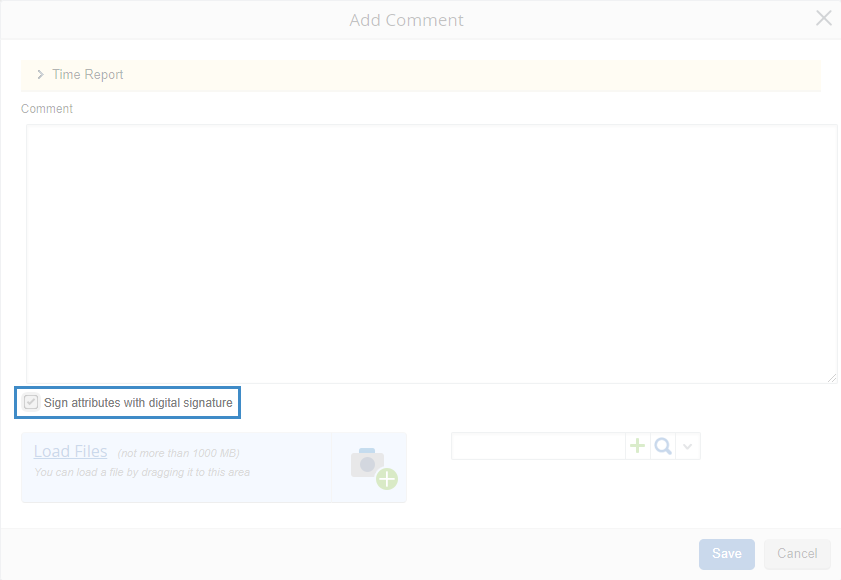
Click this button to start the task execution. In the opened dialog box you can add a comment or upload a file.
|
|
|
-
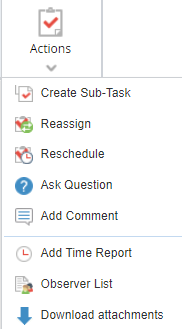
Reassign – reassign the task to another user. If the user to whom the task is reassigned is already in the approval sheet, the duplicated user can be deleted from the approval sheet and the reassigned task will be deleted from their task list. Alternatively, the user can remain in the approval sheet and will receive two or more identical tasks. The approval sheet may include this user two or more times. Besides, when the executor of an approval task reassigns it, the approval sheet will display not only the name of the new executor, but also the first executor (in parentheses).
-
Reschedule – reschedule the end date of the task. The task author and executor will receive a notification about it.
-
-
-
Add Time Report – allows adding a time report on this task.
-
-
Download attachments - you can download the files attached to the task (including the files attached in a comment).
|
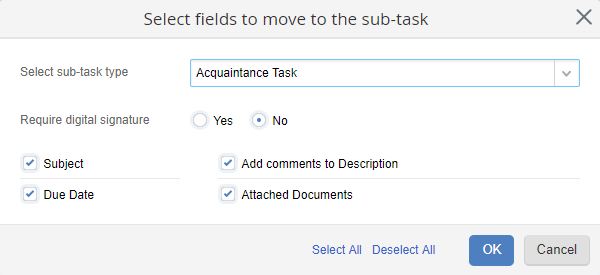
To create a sub-task, click Actions and select Create Sub-Task. In the opened dialog box (fig. 8) specify the following parameters:
Click OK.
|
|
|
Fig. 7. Selecting fields to move to the sub-task
|
|
|
|
Fig. 8. Approval task completion form
|
Note, that when creating a sub-task, you cannot change the document version. The document version from the parent task is automatically attached to the sub-task. If the document version has been changed before the sub-task was created, the version that was originally sent for approval will be attached to the sub-task.
After filling in all the required fields, click Save or Send in the toolbar, depending on the sub-task type you have selected. The task will be assigned to the executor. Note, that the sub-task due date is limited by the due date of the parent task.
All the created sub-tasks are displayed on the
Sub-Tasks tab of the approval task (fig. 8) and on the
Tasks tab of the
document page.
|
|
|
Fig. 9. Approval task. Sub-Tasks tab
|
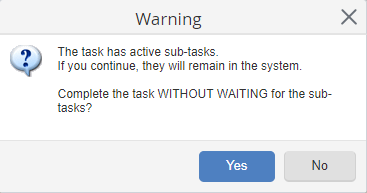
When you attempt to complete a task with active user sub-tasks or acquaintance sub-tasks, a warning dialog box will open notifying you that there are active sub-tasks (fig. 9). If you click Yes, active sub-tasks will remain in the system.
Fig. 10. Warning dialog box for user and acquaintance sub-tasks
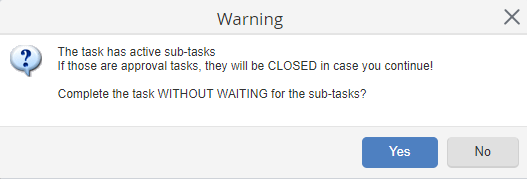
When you attempt to complete a task with active approval sub-tasks, a warning dialog box will open notifying you that there are active sub-tasks (fig. 10). If you click Yes, active sub-tasks will be completed and removed from the approval sheet.
Fig. 11. Warning dialog box for approval sub-tasks
The sub-task approval sheet has indentation in the Executor column, visualizing the sub-task hierarchy (fig. 11). Note, that nesting of sub-tasks is not limited.
Fig. 12. Approval sheet with sub-task hierarchy
Copyright © 2006–2019 ELMA