How to Work with Dashboard Tree
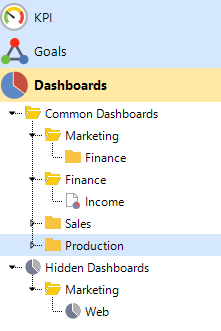
The dashboard tree consists of two subsections (fig. 1) –
Common Dashboards and
Hidden Dashboards.
Fig. 1. Dashboard tree
Common Dashboards Subsection
Two types of dashboards are displayed in this subsection:
-
Dashboards created in
ELMA Designer. These dashboards are
created and
configured in ELMA Designer. In the web application, these dashboards are available only for viewing. They have the icon

next to them.
-
Dashboards created in
the web application in the
KPI – Dashboards section. In ELMA Designer, these dashboards are displayed as links, and the diagrams of such dashboards are unavailable for viewing or editing. In ELMA Designer, only system properties (name, description, width of a diagram) of such dashboards can be changed.
In order to change the properties of such a dashboard, double-click on the required dashboard or choose Edit Properties in the context menu. The
Edit a dashboard box will open which is similar to the
Create Dashboard window. These dashboards have the icon

next to them.
Hidden Dashboards Subsection
In this subsection you can find hidden dashboards (they are not displayed in the web application, but can be viewed and edited in ELMA Designer). This subsection is used to
hide out-of-date dashboards or the ones which are currently being developed.
Only the dashboards created in ELMA Designer can be hidden.
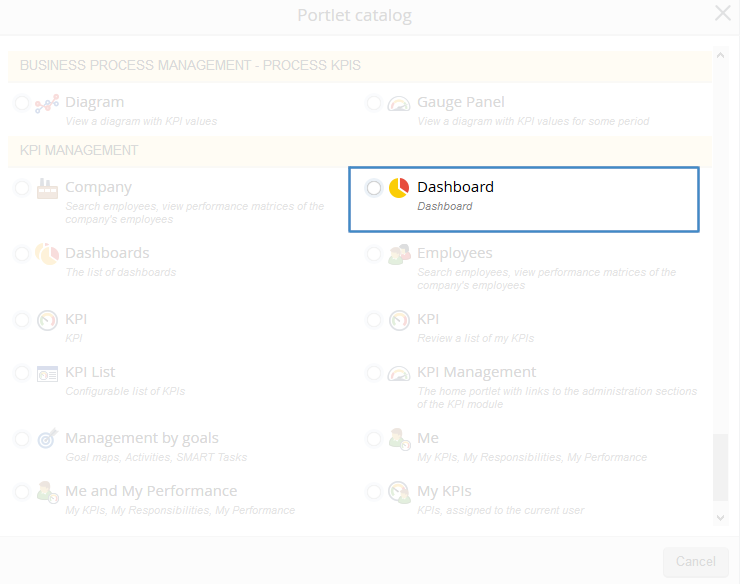
In order to display a hidden dashboard in the web application,
create a portlet page,
add the
Dashboard portlet from the
KPI Management section, and in the portlet settings choose a hidden dashboard (fig. 2).
Fig. 2. Portlet catalog. KPI Management section. Dashboard portlet
There are two ways to move dashboards and folders across the dashboard tree:
-
With the buttons

in the top menu. To do so, point and click on a dashboard or folder and click the necessary button. Please note that this way helps to move dashboard tree elements only within one
section.
-
With the mouse cursor. To do so, left-click on the chosen element in the dashboard tree and drag and drop it to the necessary place in the tree. This way helps to move elements from
Common Dashboards to
Hidden Dashboards sections and back.
This is how you can create a dashboard and folder hierarchy in the Dashboards section.
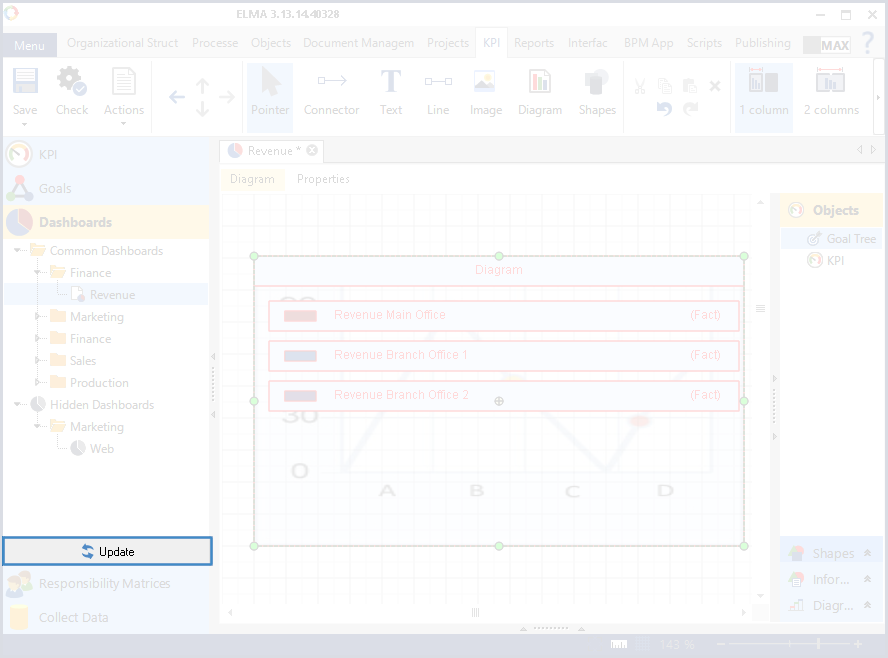
Click Update (fig. 3) at the bottom of the dashboard tree to synchronize dashboards in the web application and ELMA Designer.
Fig. 3. Update button
When you click this button, the dashboard tree in ELMA Designer will be updated according to the dashboard tree in the web application.
How to work with folders
Dashboards can be grouped into folders.
Creating a folder
To create a folder, do the following:
-
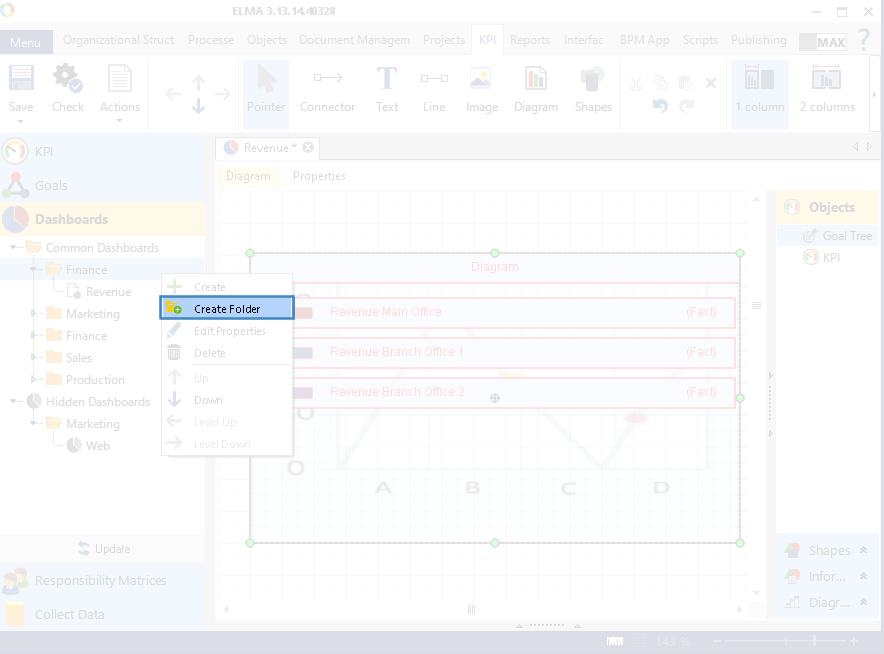
in the context menu of the existing folder, chose
Create Folder (fig. 4). The folder will be placed one level below the object whose context menu was opened;
-
in the context menu of one of the
sections of the dashboard tree, choose
Create Folder. The folder will be placed at the end of the chosen section.
Fig. 4. Object context menu. Create folder item
In the dialog box that opens, key in the folder name and click
OK (fig. 5).
Fig. 5. Create dashboard folder box
Editing a folder
If necessary, any added folder can be edited. To edit a folder, double-click on its name or choose
Edit Properties in the context menu of the chosen folder. A window similar to the
Create Folder window will open. Key in the required changes and click
OK.
Deleting a folder
|
Attention!
When deleting a folder, all dashboards in this folder will be deleted as well.
|
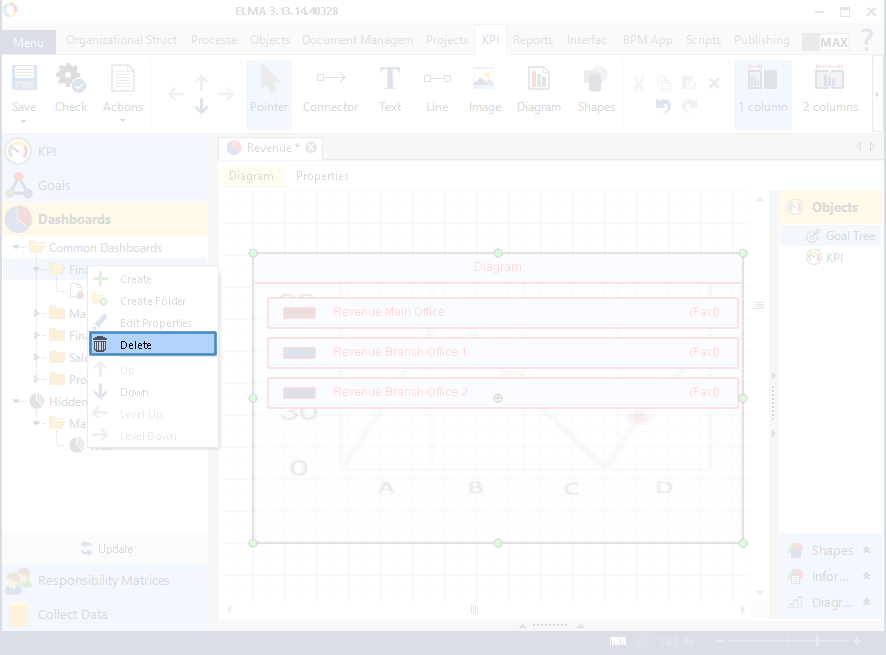
Select the folder you want to delete and press Delete on your keyboard. You can also click Delete in the context menu of the chosen folder (fig. 6).
Fig. 6. Folder context menu. Delete item
If a folder was mistakenly deleted, you can restore it by clicking
Actions – Undo changes in the top menu. To learn more about undoing changes, read the
respective Help page.
Copyright © 2006–2019 ELMA

 in the top menu. To do so, point and click on a dashboard or folder and click the necessary button. Please note that this way helps to move dashboard tree elements only within one section.