Exporting and Importing Project Plan
When working with projects in ELMA, you can use project plan export or import. You can export the a project plan to an .xml file, compatible with MS Project. You can edit and save the exported project plan in MS Project (to an .mpp file). You can import .xml and .mpp files to ELMA.
There are several ways to import a project plan to ELMA:
-
|
|
|
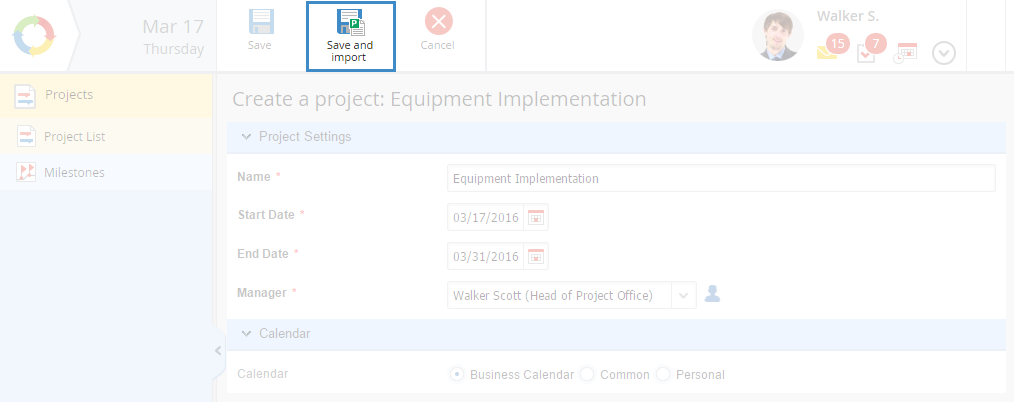
Fig. 1. Project creation form. Save and import button
|
-
|
|
|
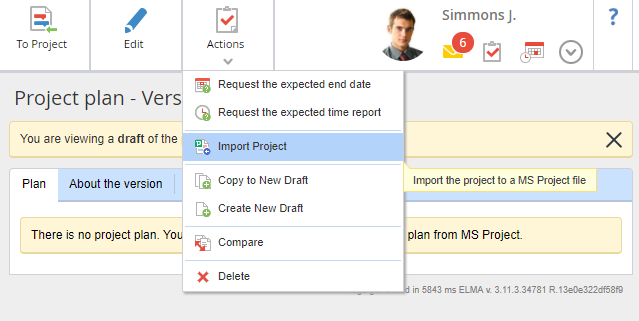
Fig. 2. New project plan version. Import Project button
|
-
in the project plan, select any
plan version and click
Actions - Import Project on its page (fig. 2). At the third import step, the system will show a notification (fig. 3), that the data will be imported to a new project plan version.
Fig. 3. Project plan version. Step 3
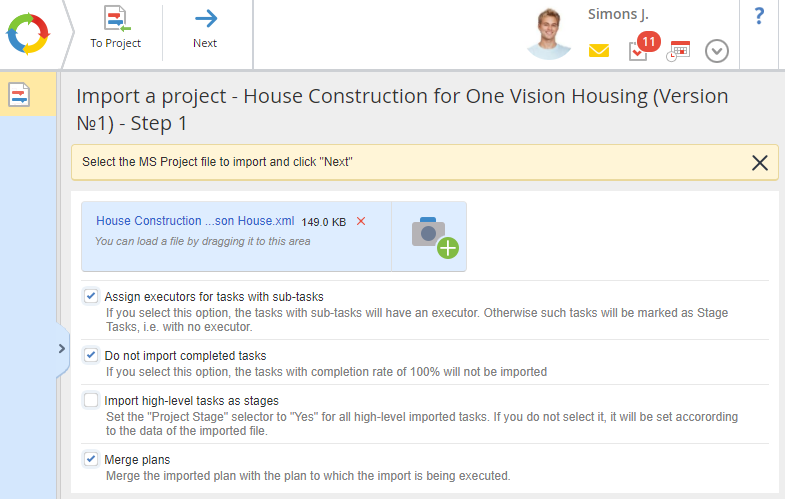
Project plan import from .xml or .mpp files includes several steps. To switch between the steps, use the Next and Back buttons in the top menu.
Step 1. On the opened page (fig. 4) select the required .xml or .mpp file, by clicking Load File. The requested file can also be placed to this area. The name of the selected file and its extension will be displayed inside the area highlighted in blue.
|
|
|
Fig. 4. Project plan import page. Step 1
|
Assign executors for tasks with sub-tasks – when this box is checked, the tasks with sub-tasks will have executors. When the box is not checked, the tasks with sub-tasks will be stage tasks.
Do not import completed tasks – when this box is checked, the completed tasks will not be imported to the project plan.
To continue, click Next.
Import high-level tasks as stages - Set the "Project Stage" selector to "Yes" for all high-level imported tasks. If you do not select it, it will be set according to the data of the imported file.
Merge plans - Merge the imported plan with the plan to which the import is being executed. If the checkbox is deselected (the default option), the project will be imported to the new project plan version (Figure 3). Note that this setting is only displayed when importing the project plan from the page of the existing plan or when editing it.
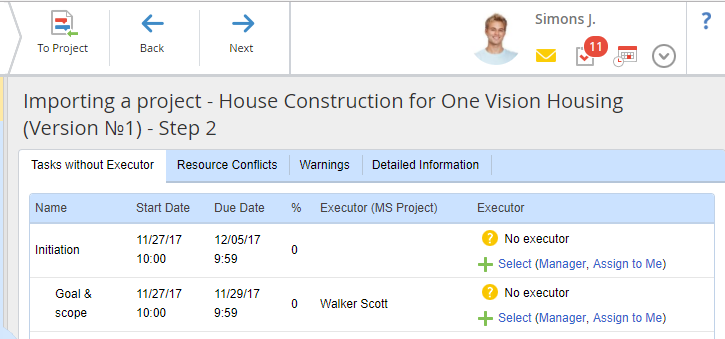
Tasks without Executor tab
This tab (fig. 5) displays the table with the list of all the imported tasks, without an executor. This means, that the Executor field value in MS Project did not match any of the ELMA users.
An example of this tab is in fig. 5.
|
|
|
Fig. 5. Tasks without Executor tab
|
Each task has a start date, due date, completion rate, executor from MS Project and executor from ELMA. To add an executor from ELMA, click Select. When you click Manager the project manager is selected as the executor. When you click Assign to me the current user is selected as the executor.
Below is an example of the Resource tab (fig. 6).
|
|
|
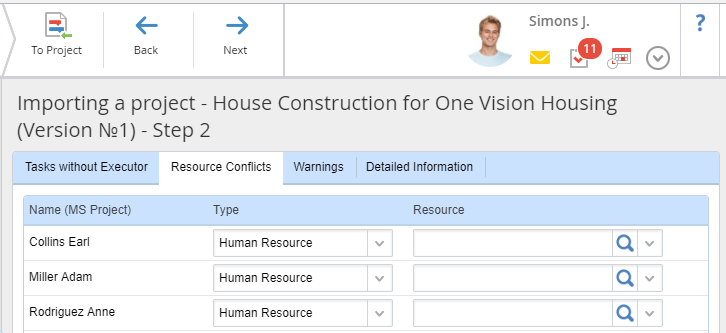
Fig. 6. Resource Conflicts tab
|
This tab compares the executors from MS Project with the resources of the ELMA system. In the Type column there are resources from MS Project that need to be mapped to the resources in ELMA. It is necessary to select a resource type (human and / or technical) from the drop-down list and match it with the user and / or equipment in the Resource column.
An example of this tab is in fig. 7.
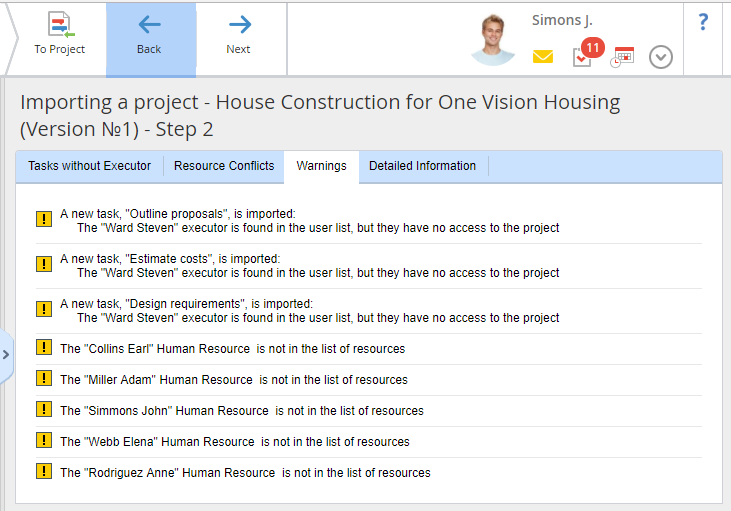
This tab displays all the warnings, generated when checking the imported file. For example, in Fig. 6, you can see notifications that the human resources from MS Project were not found in the list of ELMA resources. Missing resources can be added at this import step on the Resource Conflicts tab, if you have the appropriate access permissions, and after completing the import of the project plan in the relevant objects.
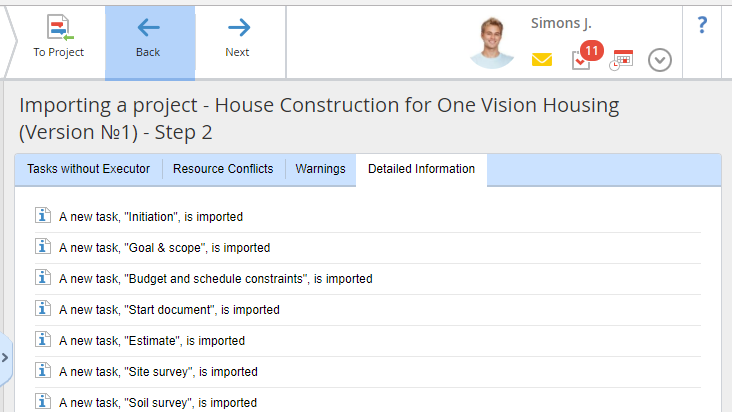
An example of this tab is in fig. 8.
|
|
|
Fig. 8. Detailed Information tab
|
This tab displays the list of system messages, generated during the project plan import.
To continue, click Next.
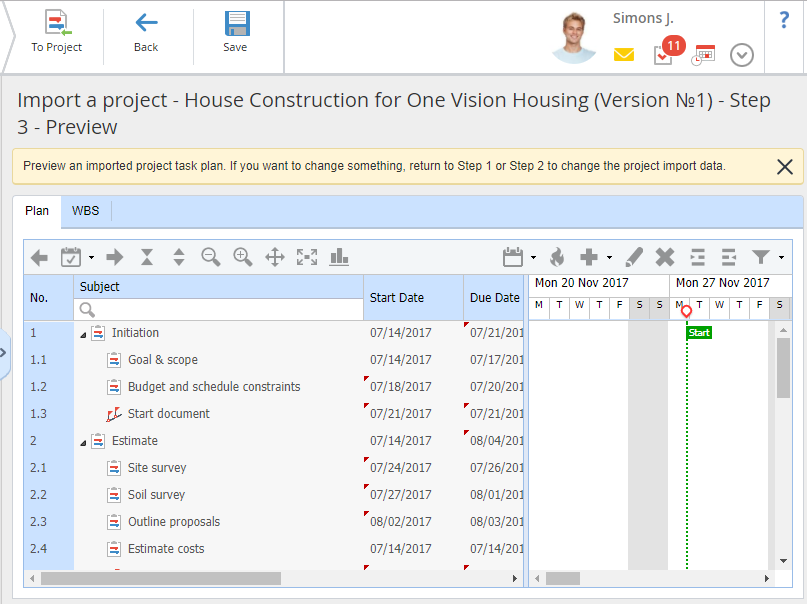
Step 3. At this step (fig. 9), you can preview the imported project plan.
|
|
|
Fig. 9. Project plan import page. Step 3
|
To complete import procedure, click Save in the top menu. If you need to make changes to the project plan, click Back and return to the required step.
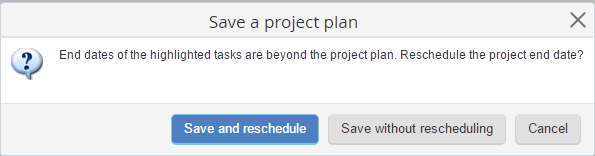
If end dates of the imported tasks exceed the project plan when you click Save, the system will display a dialog box with a notification about it (fig. 10) where you have to select an action:
-
Save and reschedule – save the project plan and reschedule its end date;
-
Save without rescheduling – save the project plan without rescheduling its end date;
-
Cancel – close the dialog box and return to step 3.
|
|
|
Fig. 10. Save a project plan dialog box
|
After saving, the project plan will be imported to the project. The page of the imported project plan will open. To apply the changes, you have to publish the project plan.
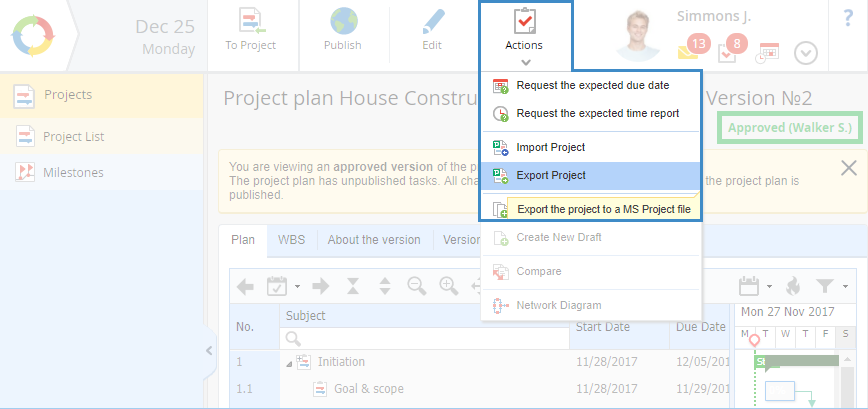
You can export a project plan from one of these pages:
To export a project plan, click Actions - Export Project on one of these pages (fig. 11).
|
|
|
Fig. 11. Project plan page. Actions - Export Project button
|
When you click this button, downloading of the project plan file starts. Depending on the browser you use, a dialog box may open, where you have to select an action with the file.
Copyright © 2006–2019 ELMA