After
sending a request for expected task due date, the executor receives the
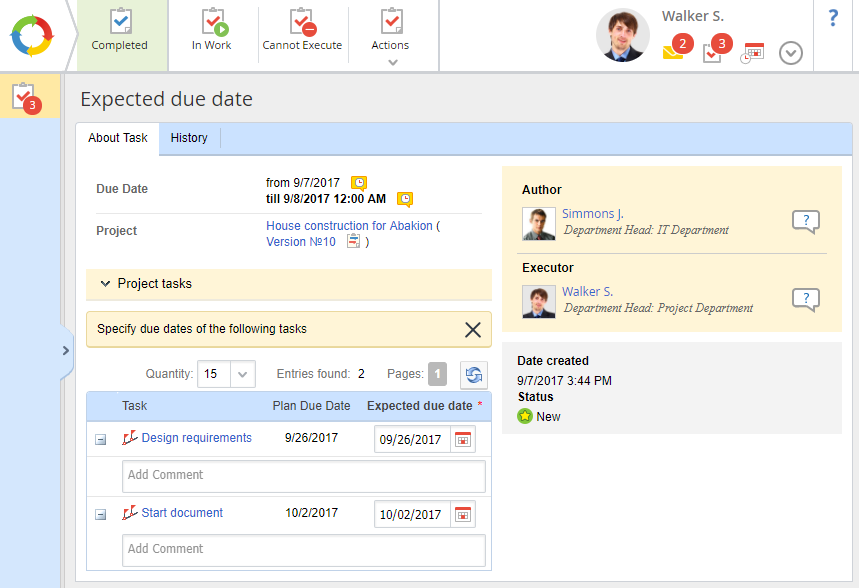
Expected due date task (fig. 1), where they need to forecast the due date of one or several tasks.
Fig. 1. Expected due date task
About Task tab
This tab (fig. 1) displays all the information on the current task (due date, project, author and executors).
The
Project tasks panel contains a table with the project tasks. The executor needs to specify the expected due dates for these tasks. This table features planned due date of each task. By default, these due dates are copied to the
Expected due date * column. To change the specified dates, click

and select the required dates.
In the
Add Comment field you can
comment a task. To hide the comment field, click

.
History tab
Top menu buttons
If the executor does not specify the expected due dates, the task will not be completed after clicking Complete. A notification will be displayed (fig. 2).
Fig. 2. Warning dialog box
After specifying due dates for all the tasks, click
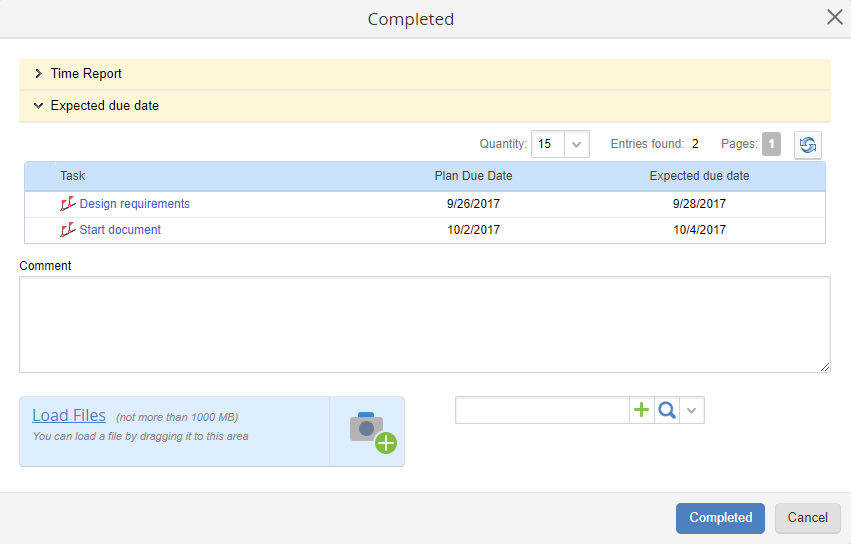
Complete in the top menu. A dialog box will open (fig. 3) with the following panels:
Time Report and
Expected due dates. You can add a comment and/or attach a file. To finish the work, click
Complete. To learn more about completing tasks, see the
respective Help section.
Fig. 3. Dialog box for completing a task
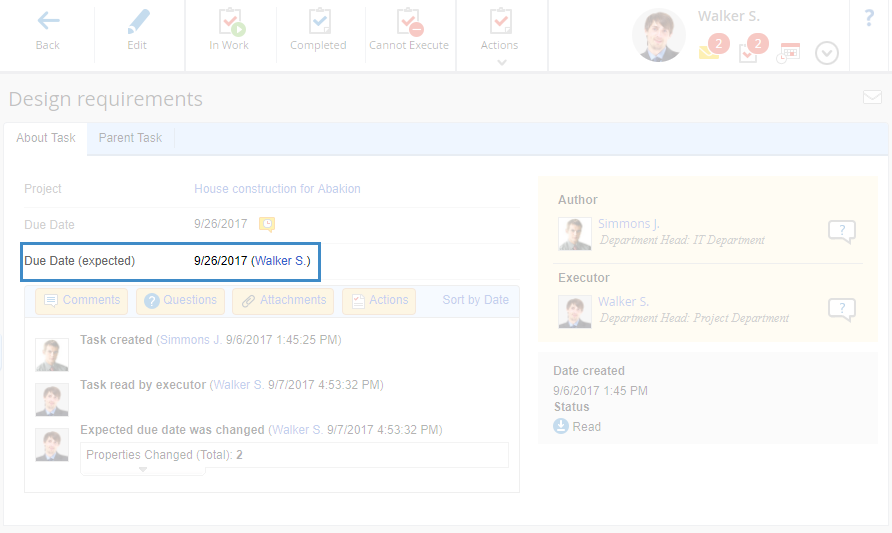
The specified expected due dates will be added to the
project plan and displayed on the pages of the respective tasks (fig. 4).
Fig. 4. Project task page
Copyright © 2006–2019 ELMA


