Updating a custom component (module)
Each component (e.g. an ELMA Store component) and any other self-developed module has limited compatibility with versions of ELMA system.
Due to this fact, if you have additional components installed and plan to update ELMA, you should keep in mind the compatibility with the ELMA version you intend to install.
In case you use self-developed components and plan to update to the next major version of ELMA, first you need to update the components.
- Updating components and ELMA on your own may result in errors!
- Before updating ELMA, create a backup copy of the database.
If you have issues with updating a component or ELMA, please contact the technical support service or call us: +352 (2) 030 1140.
To update a component, follow the instructions below.
For example, you have a component, which at the moment is compatible with ELMA [3.8; 3.9). While ELMA will be updated from version 3.8.x to version 3.10.x.
To update a component and its compatibility to version 3.10:
1. Clean-install ELMA 3.10.x on a test server. It is recommended that you use a new database and avoid having additional components.
2. Open the required component project in Visual Studio.
3. Update the old references in the project to the new ones. There are two ways to do that:
а) main ELMA assemblies (the ones that start with EleWise.ELMA…) can be updated via the plugin. For this, in the Solution Explorer, right-click on References and select Add ELMA Packages.
.png)
In the opened window, on the ELMA Packages tab, select the required packages and click Add.
.png)
б) if the required packages are not available on the Packages tab, right click on References in the Solution Explorer and select Add Reference… . The Reference Manager will open. Click Browse… and select the files to add references to. To apply the changes, click Add – OK.
.png)
4. Build the solution. Right click on the solution in the Solution Explorer and select Build.
.png)
The solution will be checked for errors before building.
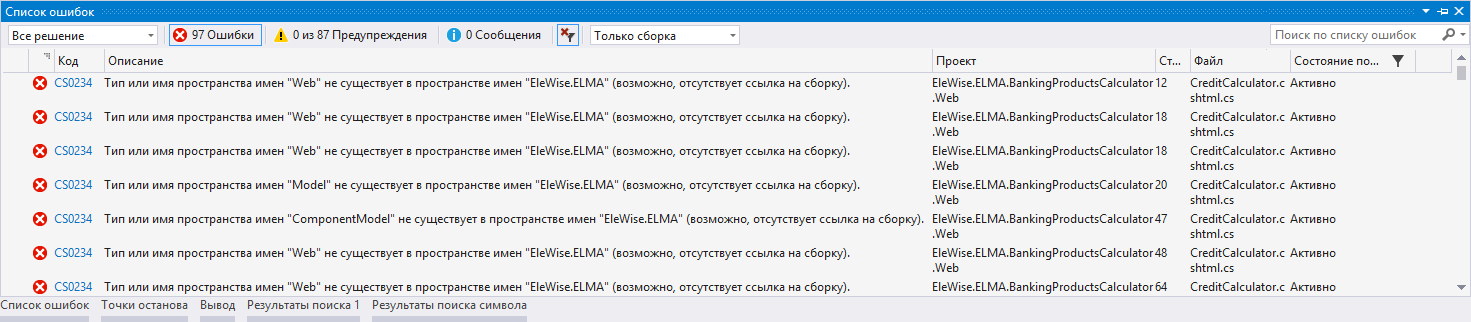
If errors are found, eliminate them and build the solution again.
.png)
5. Assemble ELMA packages (for the solution). For this, select in the toolbar ELMA – ELMA Packages Assembling Manager.
.png)
The packages assembly wizard will open. To switch between the wizard steps, use the Next and Back buttons.
- At the first step, select the projects, to assemble packages for. To select, check the boxes in the Assemble column.
.png)
- At the second step, select the folder for saving packages. Also specify the next package version (the previous package version can be found in ELMA web application, in Administration – System – Components). Also, check the boxes as in the figure below.
.png)
- The third step shows the package assembly progress and the results. To finish the assembly, click Complete.
.png)
If errors are detected at this step, eliminate them and start the package assembly again.
6. Assemble the ELMA component. For this, select in the toolbar ELMA – ELMA Store Component Assembling Manager.
.png)
The ELMA Store component assembly wizard will open. To switch between the wizard steps, use the Next and Back buttons.
- At the first step, specify the general information. This dialog box is similar to the component creation step 1 in ELMA Designer.
.png)
In the Dependencies unit, select the required component and click Edit. Specify component versions and click OK.
.png)
- At the second step, select the required projects and dependencies by checking the boxes next to them.
.png)
- At the third step, select the folder to save the component to.
.png)
- At the last step, the configuration is being exported – the data selected in previous steps are written to the export file. This dialog box displays the data export progress.
.png)
Once the data are exported, click Complete.
After that, a component with the .elma3 extension will appear in the specified folder.
7. The created component must be installed on the test server.
8. After successfully installing and testing the component you can update ELMA on the production server. This procedure is described in this article.