Windows Server 2008. Creating and configuring a certification authority
Requirements for working with Digital Signatures in ELMA:
- installed Internet Explorer;
- installed CAPICOM application;
- activated ELMA ECM+ application;
- in Web Application, in Administration – System – System Settings in the Digital Signature settings unit, Internal encryption provider must be selected;
- in Web Application, in Administration – Document Management – Digital Signature Templates, all the signature templates must be filled in and saved;
- a user must have access to signing documents. Permissions are assigned by the system administrator in Administration – Document Management - Permissions for Accessing "Documents" Section.
Main system requirements:
- You must work with certificates in Internet Explorer.
- To be able to configure a certificate template, add roles and set up additional system parameters, the user must be a member of the Domain Administrators, Enterprise Administrators or similar groups.
- To be able to work with digital signatures in ELMA, all the Windows users must be in the same domain.
Creating and configuring the certification center consists of several steps.
Adding roles Windows Server
Adding roles consists of several steps.
1. Start the Server Manager. Go to Start – All Programs – Administration – Server Manager.
2. In the console tree (in the left part of the window), right-click on Roles and select Add Roles (fig. 1).
.png)
Fig. 1. Console tree. Add Roles context menu option
3. In the opened Add Roles Wizard (fig. 2), click Next.
.png)
Fig. 2. Add Roles Wizard
4. In the Select Server Roles (fig. 3) window check the box Active Directory Services. After that additional wizard steps will be added. To continue, click Next.
.png)
Fig. 3. Select Server Roles
5. At the Introduction to Active Directory Certificate Services step (fig. 4), click Next.
.png)
Fig. 4. Introduction to Active Directory Certificate Services
6. At the Select Role Services step (fig. 5), check the box Certification Authority Web Enrollment. Required role services and components (such as IIS) will be identified automatically and the wizard will suggest adding them.
.png)
Fig. 5. Select Role Services
When you select the box Certification Authority Web Enrollment a dialog box will open (fig. 6), where you need to click Add Required Role Services. After that, click Next in Select Role Services.
.png)
Fig. 6. Adding required role services
7. At the Specify Setup Type (fig. 7), select Enterprise and click Next.
.png)
Fig. 7. Specify Setup Type
8. At the Specify CA Type step (fig. 8), select Root CA and click Next.
.png)
Fig. 8. Specify CA Type
9. At the Set Up Private Key step (fig. 9), select Create a new private key and click Next.
.png)
Fig. 9. Set Up Private Key
10. At the Configure Cryptography for CA step (fig. 10) click Next.
.png)
Fig. 10. Configure Cryptography for CA
11. At the Configure CA Name step (fig. 11), enter the required name and click Next.
.png)
Fig. 11. Configure CA Name
12. At the Set Validity Period step (fig. 12), specify the required period and click Next.
.png)
Fig. 12. Set Validity Period
13. At the Configure Certificate Database step (fig. 13), specify the required location for storing certificates and click Next.
.png)
Fig. 13. Configure Certificate Database
14. At the Confirm Installation Selections step (fig. 14), check the selections and click Install. If necessary, you can change the selections by going back to the required steps.
.png)
Fig. 14. Confirm Installation Selections
15. The installation progress will be displayed (fig. 15).
.png)
Fig. 15. Installation Progress
After the installation is finished, click Close (fig. 16).
.png)
Fig. 16. Installation Results
16. The console tree now contains Active Directory Certificate Services (fig. 17) with a certification center installed.
.png)
Fig. 17. Console tree
17. Next, connect extensions in the created CA settings. For this, right click on the CA and select Properties. Open the Extensions tab, and in the certificate revocation list select http://<ServerDNSName>/CertEnroll/<CaName><CRLNameSuffix><DeltaCRLAllowed>.crl and check all the available boxes for it (fig. 18).
.png)
Fig. 18. Extensions tab
Next, in the certificate revocation list select file://<ServerDNSName>/CertEnroll/<CaName><CRLNameSuffix><DeltaCRLAllowed>.crl and the boxes 3 and 4 (fig. 19).
.png)
Fig. 19. Extensions tab
To save the changes, click Apply. In the opened dialog box (fig. 22), click Yes.
.png)
Fig. 22. Certification Authority dialog box
After restarting the certification service, click OK. Restart your computer to apply the changes made.
Creating a certificate template
To create a certificate template, follow these steps.
- In the Server Manager go to Certificate Templates, right-click on an existing template and select Copy Template (fig. 21) (e.g. copy the User template.
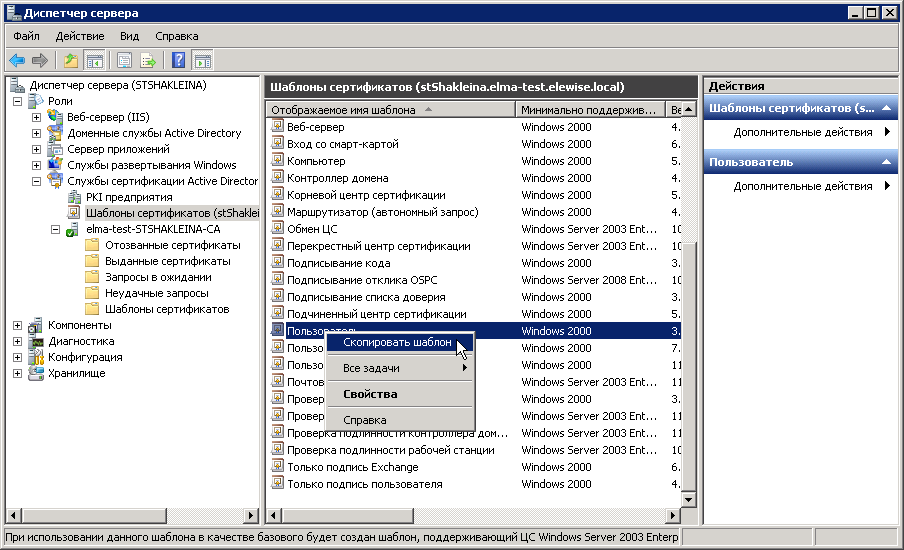
Fig. 21. Server manager. Certificate Templates. Copy template
2. In the opened dialog box (fig. 22) select Windows Server 2003 Enterprise. To confirm, click OK.
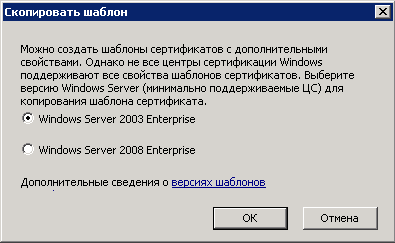
Fig. 22. Copy template dialog box
3. In the opened template properties (fig. 23), on the General tab specify the template name and uncheck the Publish certificate in Active Directory box.

Fig. 23. Template properties. General tab
4. Open the Request Handling tab (fig. 24) and in the Purpose field select Signature.
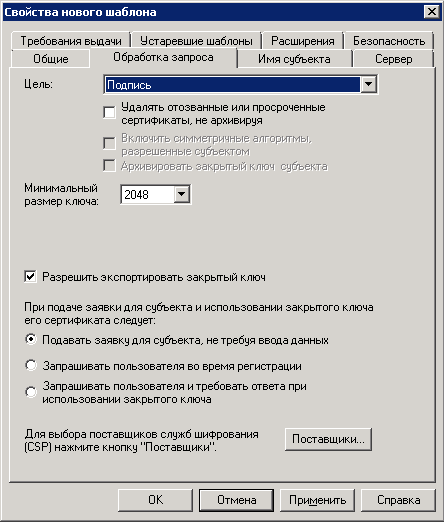
Fig. 24. Template properties. Request Handling tab
5. Open the Subject Name tab (fig. 25) and make sure that everything is selected as in the figure below.

Fig. 25. Template properties. Subject Name tab
6. Open the Security tab (fig. 26) and check the Enroll box in the Allow column for the Authenticated Users group.
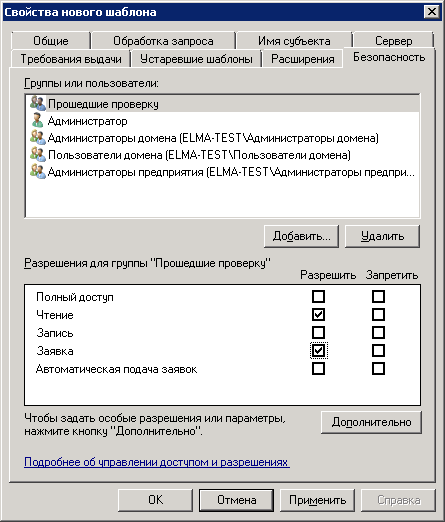
Fig. 26. Template properties. Security tab
7. Go to the Extensions tab (fig. 27) and change the settings of the Application Policies. To do so, click Change.
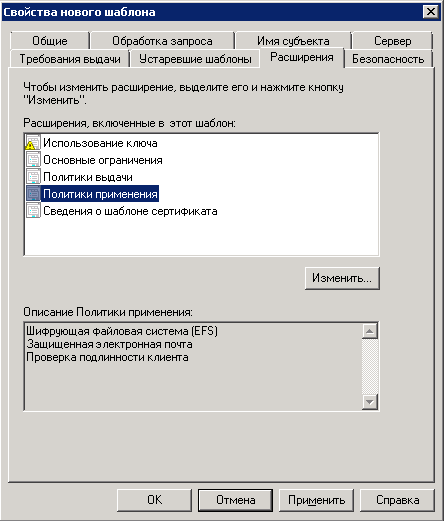
Fig. 27. Template properties. Extensions tab
8. In the opened dialog box (fig. 28) select Document Signing and click OK. If there is no such item, click Add.

Fig. 28. Editing application policies
9. In the opened dialog box (fig. 29) select Document Signing and click OK.
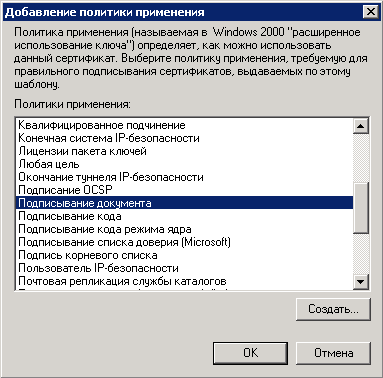
Fig. 29. Adding an application policy
10. After configuring all the settings, click Apply – OK (in the template creation window).
Next, add the template to the certification center:
1. In the Server Manager, open the context menu of the Certificate Templates, and select New – Certificate Template to Issue (fig. 30).

Fig. 30. Server Manager. Template Certificates. Context menu
2. In the opened dialog box (fig. 31), select the created template and click OK.
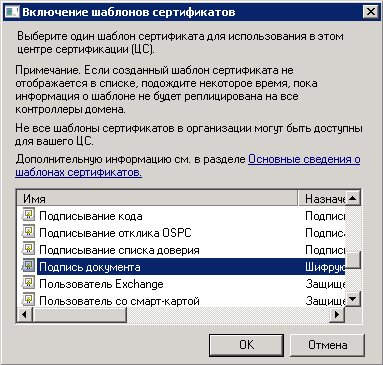
Fig. 31. Enable Certificate Templates
The certificate template is installed and configured.
Next, check the status of the ASP. NET State Service (fig. 32). This service must be running. If it is stopped, Start it.
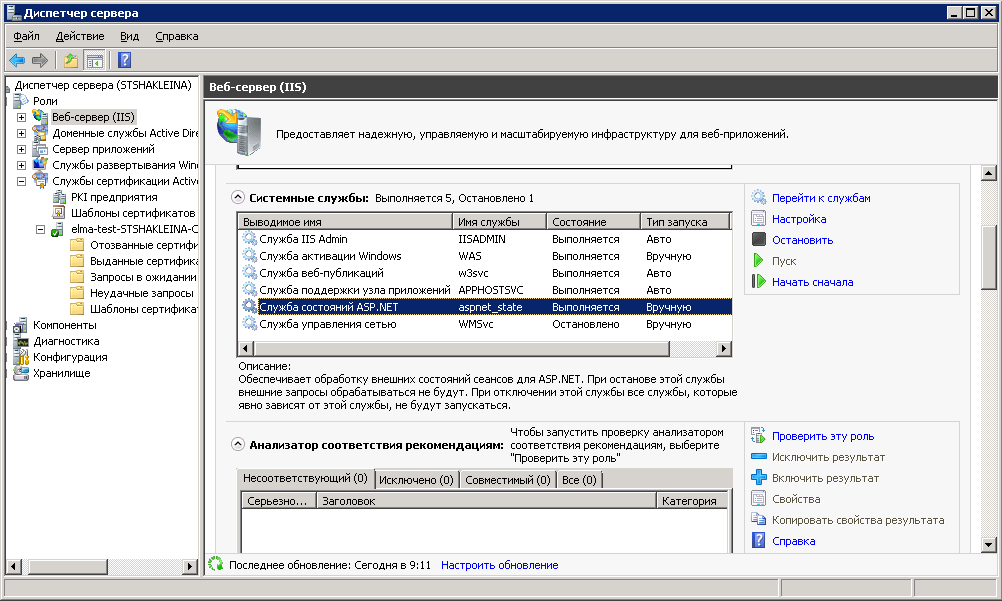
Fig. 34. Server Manager. ASP.NET State Service
Checking the certification authority
For the initial check of the CA, start the Certification Authority (Start – Administrative Tools – Certification Authority). If everything is configured correctly, the following window will be displayed (fig. 33).
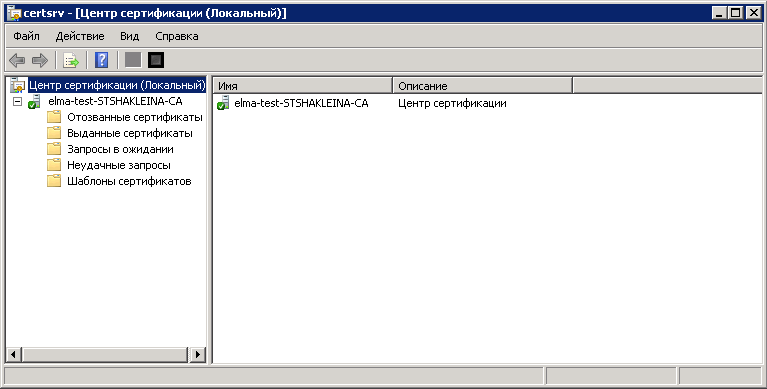
Fig. 33. Certification Authority
Obtaining the root certificate
Launch Internet Explorer, and enter the following URL: http://server_name/certsrv , where server_name – is the CA server name. If you connect from the same machine where the CA is installed, you can enter http://localhost/certsrv. The certification authority main page will open (fig. 34).
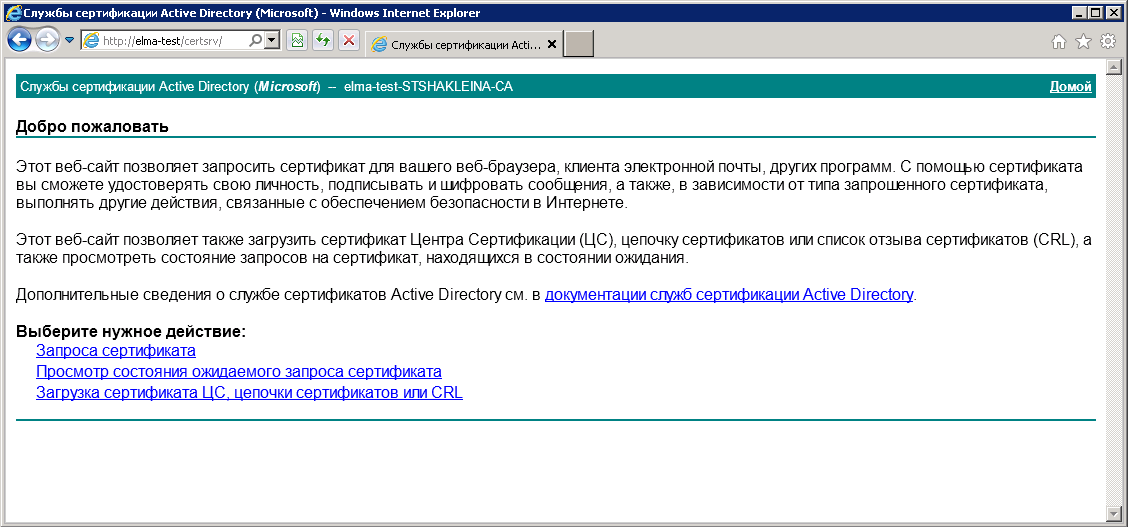
Fig. 34. Certification authority main page
First, you need to download a CA certificate and put it into the trusted root certification authorities storage. If your network has several CA, download and install a chain of certificates. To do so, select: Download CA certificate, certificate chain or CRL, then select Download CA certificate and save the certificate to any directory on this computer.
Now you can install the certificate. In the context menu of the certificate, select Install Certificate (fig. 35). The import wizard will open.
.png)
Fig. 35. Certificate context menu. Install Certificate
In the opened dialog box (fig. 36) click Next.
.png)
Fig. 36. Certificate Import Wizard
In the opened dialog box (fig. 37) select Place all certificates in the following store and click Browse….
.png)
Fig. 37. Selecting a certificates store
In the opened dialog box (fig. 38), select Trusted Root Certification Authorities and click OK.
.png)
Fig. 38. Select Certificate Store
In the Completing the Certificate Import Wizard (fig. 39) click Finish.
.png)
Fig. 39. Completing the Certificate Import Wizard
A notification with the import results will open (fig. 40). Click OK.
.png)
Fig. 40. Import results notification
Now this PC will trust all the certificates, issued by CA.
Obtaining client certificate
To get the client certificate, open the CA in Internet Explorer and select Request Certificate – Advanced certificate request – Submit a certificate request.
When you attempt creating a certificate request, a warning may be displayed (fig. 41). Click OK. In this case, you need to add the current site to the Trusted sites zone and set a lower security level for the zone.
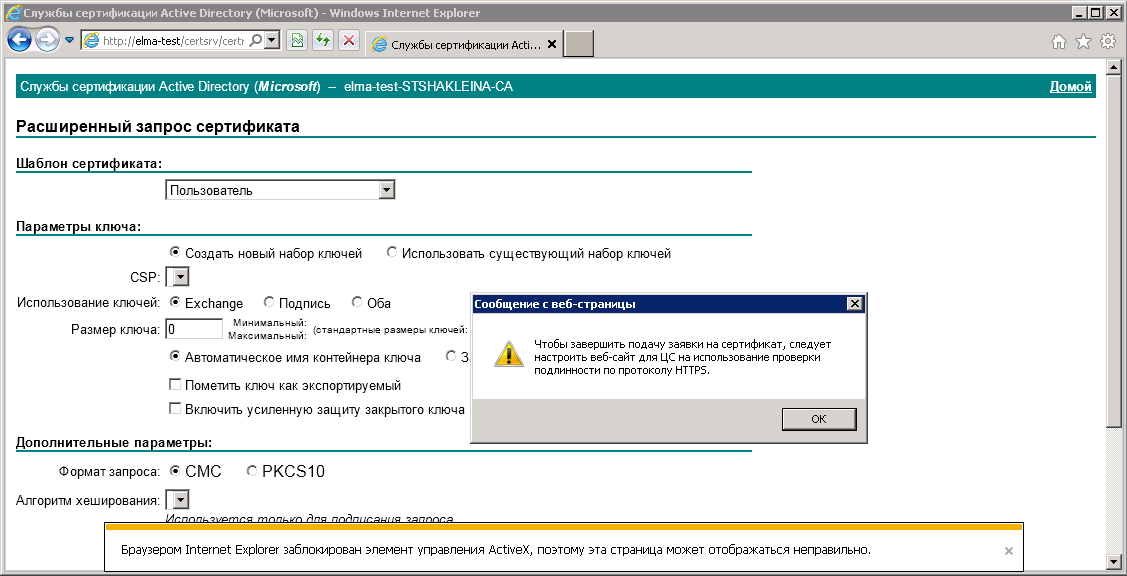
Fig. 41. Notification
To do so, open the Internet Explorer settings and click Internet Options (fig. 42).
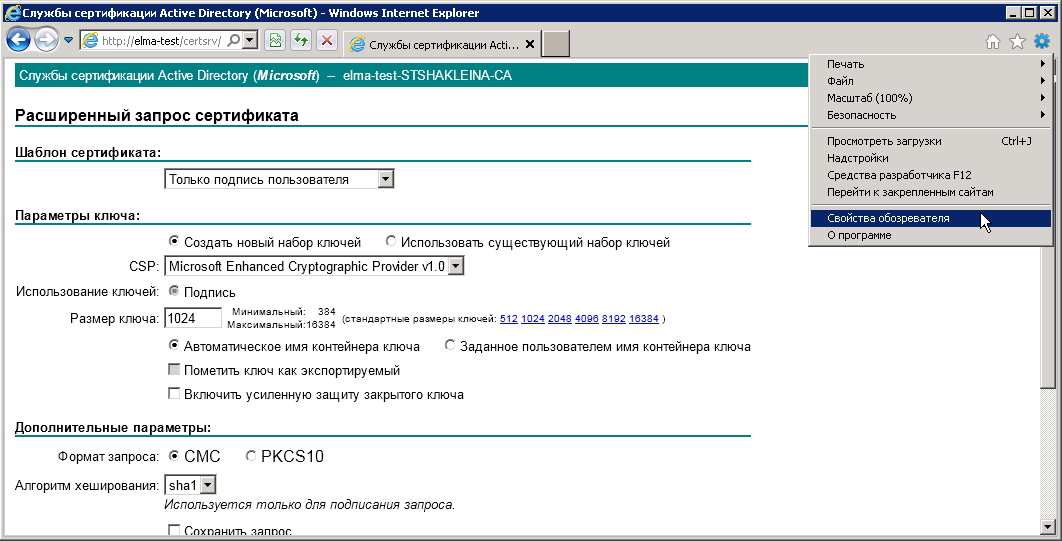
Fig. 42. Internet Explorer settings. Internet Options
In the opened dialog box (fig. 43), go to the Security tab and set Medium Low in the Trusted sites zone.
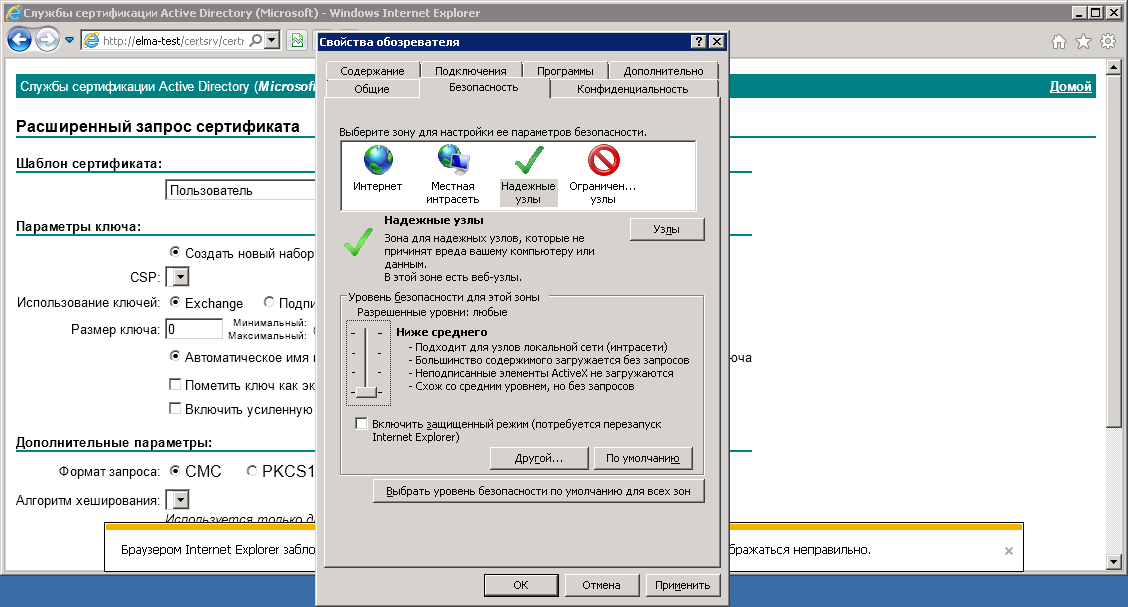
Fig. 43. Internet options dialog box. Security tab
Next, add the current site to trusted sites. On the Security tab, click Sites. In the opened dialog box (fig. 44) click Add, and uncheck Require server verification (https:) for all sites in this zone. To save the changes, click Close.
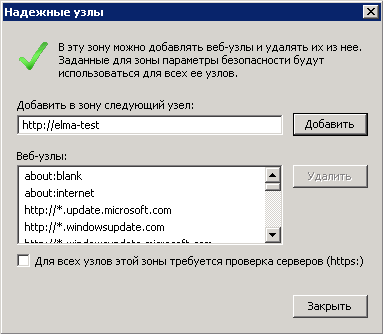
Fig. 44. Internet options. Security tab. Trusted sites
You also need to enable downloading of unsigned ActiveX. For this, on the Security tab click Custom level… In the Security Settings window (fid. 45) find the group ActiveX controls and plug-ins and set all the switches to Enable. To save the changes, click OK.
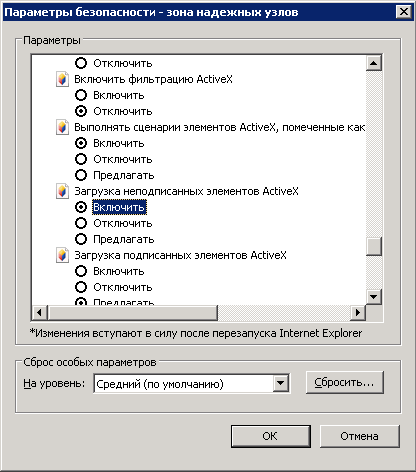
Fig. 45. Security Settings
A warning will be displayed (fig. 46), where you need to click Yes.
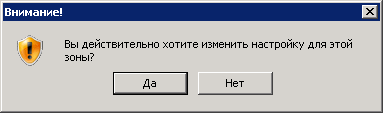
Fig. 46. Warning
Next, click Apply – OK.
Go to Internet Explorer and fill out the request form (fig. 47).
In the Certificate Template field, select Only user signature and click Issue.

Fig. 47. Internet Explorer. Advanced certificate request
A certificate issued message will be displayed (fig. 48), where you need to click Install this certificate.
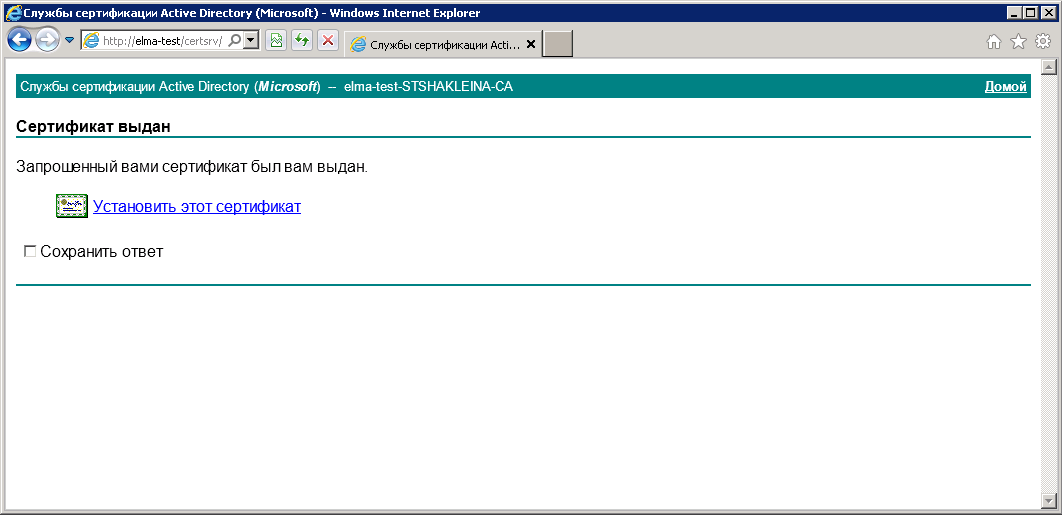
Fig. 48. Internet Explorer. Certificate issued message
Certificate installed message will be displayed (fig. 49).

Fig. 49. Internet Explorer. Certificate installed message
Note that after the client certificate expires, you need to delete and then obtain and install it again.
If everything is correct, the certificate will be successfully installed in the personal certificate store. All the issued certificates are displayed in the Certification Authority, Issued Certificates (fig. 50).
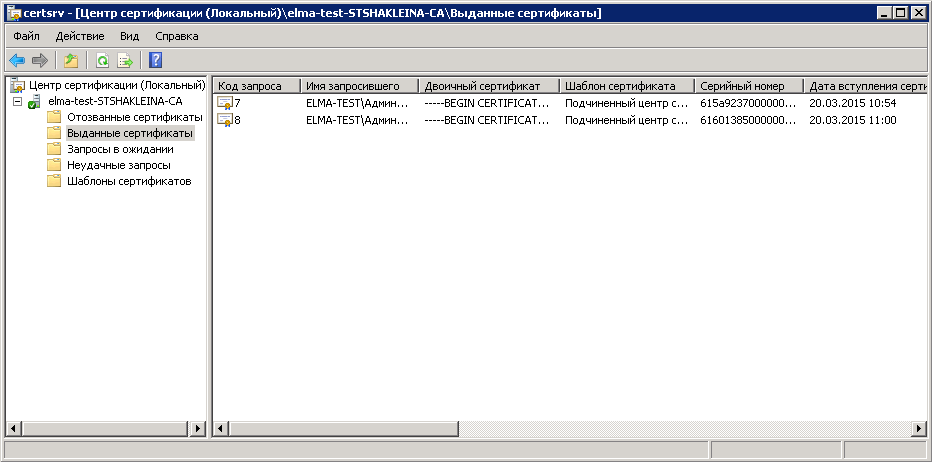
Fig. 50. Certification Authority. Issued Certificates
If necessary, all the issued certificates can be revoked.
To view all the obtained personal certificates in Internet Explorer, open the settings and select Internet options (fig. 51).
Fig. 51. Internet Explorer settings. Internet options
In the opened dialog box (fig. 52), open the Content tab and click Certificates and the Certificates unit.
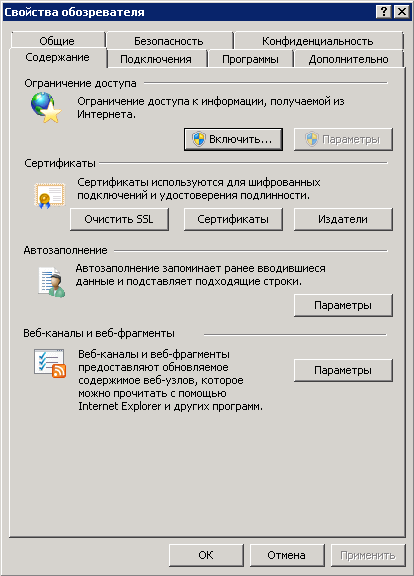
Fig. 52. Internet options. Content tab
In the opened dialog box (fig. 53), the Personal tab will display all the personal certificates, issued to the current user.
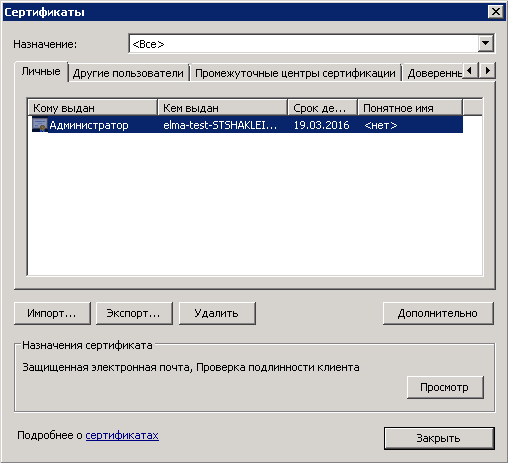
Fig. 53. Certificates dialog box
After configuring all the settings, download CAPICOM from the official Microsoft website. This software will be required to sign documents using a digital signature in ELMA Web Application.