Using ELMA with slow Internet connection
Data compression settings in the server part. IIS + gzip.
If the server, on which ELMA is installed, has a slow Internet connection, then you can use data compression with gzip library, which is included in the MS FrameWork package. This article implies that ELMA is installed on the IIS web server.
File compression difference between IIS 6 and IIS 7.
IIS 6 allows compressing files by the file types.
In IIS 7, files are compressed not by types but by MIME types. This can be done in IIS Manager, or by changing the website configuration file (web.config) and the IIS configuration file, or using scripts (appcmd.exe). In IIS 7 you can temporary forbid compressing files if the server CPU is overloaded.
Both IIS 6 and IIS 7 still have 11 possible compression levels (from 0 (disabled) to 10).
Compression in IIS.
Compression can be static and dynamic.
Static compression uses a simple mechanism: the file is compressed, cached and then taken from the cache, to avoid loading the CPU with compressing files that have already been compressed.
In case of dynamic compression, content cannot be predicted, therefore a file will be compressed each time when requesting the file, a page, a response, etc.
.png)
Server settings.
On the Compression tab of the IIS Manager you can enable dynamic and static compression, and configure static compression:
- Set the minimum file size, upon exceeding which compression will be enabled
- Specify a folder, to which compressed files will be saved
- Specify the space limit on the disk for compressed files
These settings are required only for static files, which do not change. It is necessary to cache static files and not compress them again.
By default, a dynamic compression module is not installed in IIS. Therefore, you need to install it.
Using the dynamic compression module may also increase the load on the CPU and reduce the server performance, which is logical, since all the files, pages, responses, etc. will be compressed each time they are requested. Therefore, one way or another it will affect the system performance.
Enabling the dynamic compression module in Windows Server 2008 R2 Enterprise.
To enable the dynamic compression module in Windows Server 2008 R2 Enterprise, go to Start – Administration – Server Manager. Select Roles – Web Server (IIS) and add the role service.
.png)
Click Next and finish the installation.
Enabling the dynamic compression in Windows 10.
To enable the dynamic compression in Windows 10, go to Start – Control Panel – Programs and features – Turn Windows features on or off
.png)
After that, click OK and install the component.
Compression module settings.
To configure the compression module, open the IIS Manager – Configuration Editor.
Then go to system.webServer/httpCompression

Now you need to configure dynamic types (dynamicTypes). In IIS 7, settings are made by MIME-types, therefore you need to add the required MIME-types. You can find information about MIME-Types here.
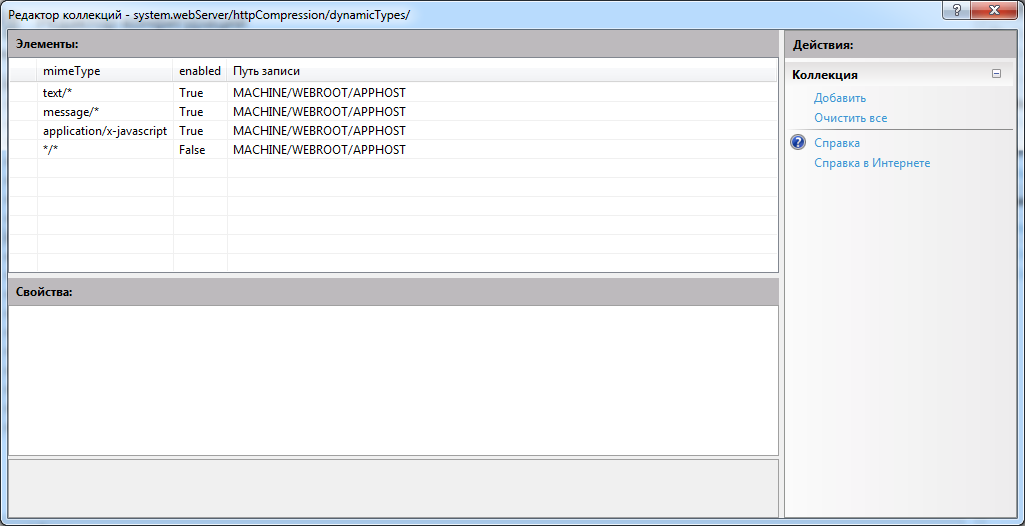
When adding, only two fields are filled in: enabled and mimeType. After that, close the collection editor and click Apply on the Actions panel of the configuration editor. After applying, a path will be generated automatically.
Now you need to check the collection itself, whether the compression for dynamic and static files, forms, etc. is enabled and set the required compression level.
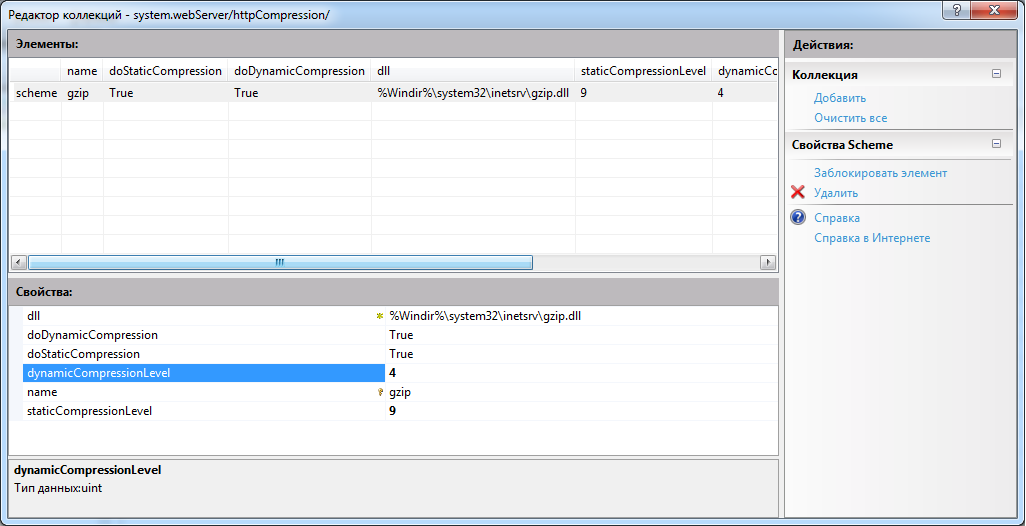
After all the actions, close the collection editor and apply the changes in the configuration editor. We have added the dynamic form compression module, configured the compression level and specified the mime types to apply it to.
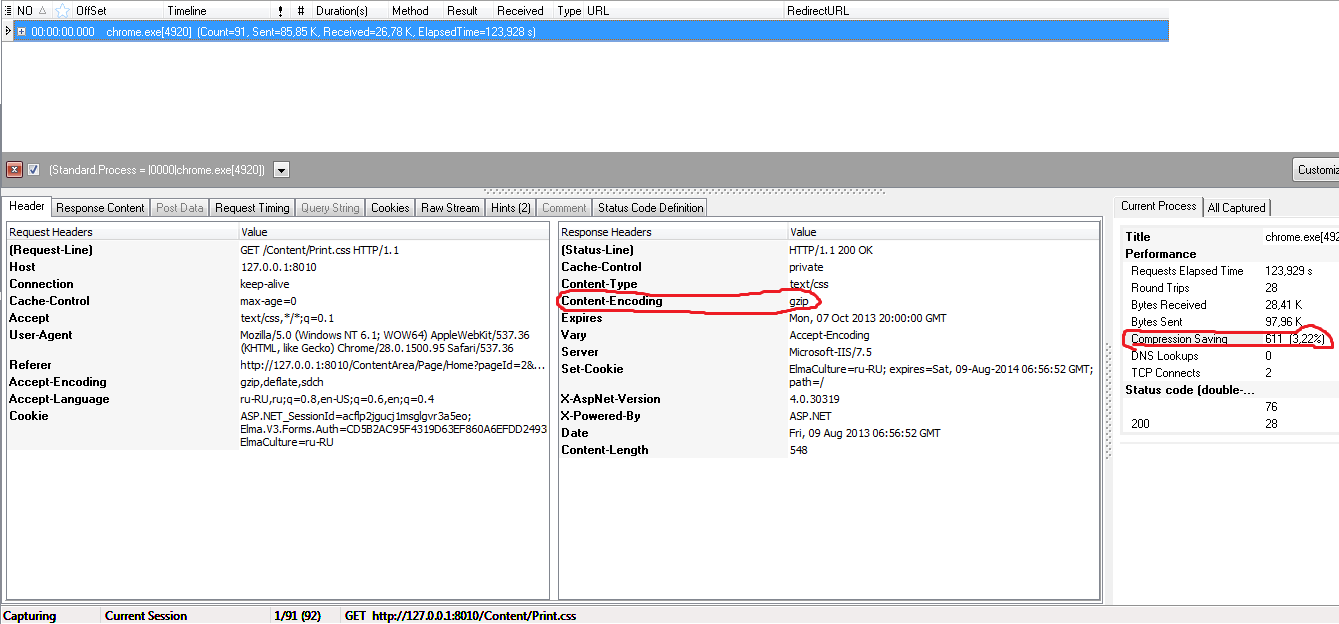
Example of gzip+IIS
In this picture you can see that during the current session the chrome.exe process (Google Chrome) has processed = 91 request, sent = 85,85 KB, received = 26,78 KB, elapsed time = 123, 928 s.
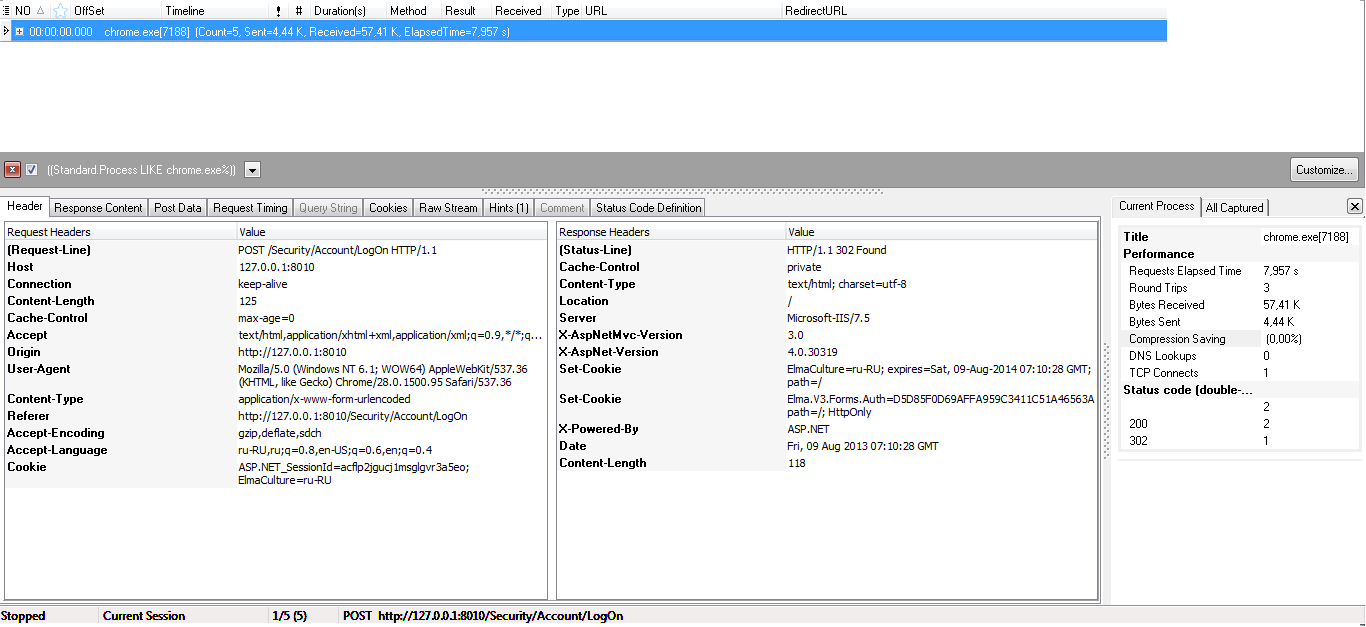
Without compression
In this picture you can see that during the current session the chrome.exe process (Google Chrome), has processed = 5 requests, sent = 4,44 KB, received = 57,41 KB, elapsed time = 7, 957 s.
For this test, the same action was performed - user authentication in ELMA.
Compressors
Toonel.net
The client side of the Java application is a local proxy server. If you specify it in the browser settings, you can redirect the data of the client side of toonel.net, which requests the required data via a special server and gets them compressed. Having unzipped the information, toonel.net returns it to the browser. In a similar way, you can compress other TCP/IP protocols: FTP, SMTP, etc. On the average, using toonel.net requires 2-2.5 times less data, then direct connection. This application is free, however, its servers are public and may be unavailable.
.png)
On the Web tab, you can set the values of Gif quality and JPEG quality. In this picture, the page is loaded with the values gif quality = low, jpeg quality = 10%.
Caching DNS requests
Caching DNS requests is especially effective for a slow connection. In case of a GPRS connection, DNS resolving may take a second or more. It is sufficient to know the IP addresses of the required hosts. For this, you need to conduct analysis using namebench or similar programs. This program is easy to use - launch it and click Start. After that, you will get a report with the analysis results.
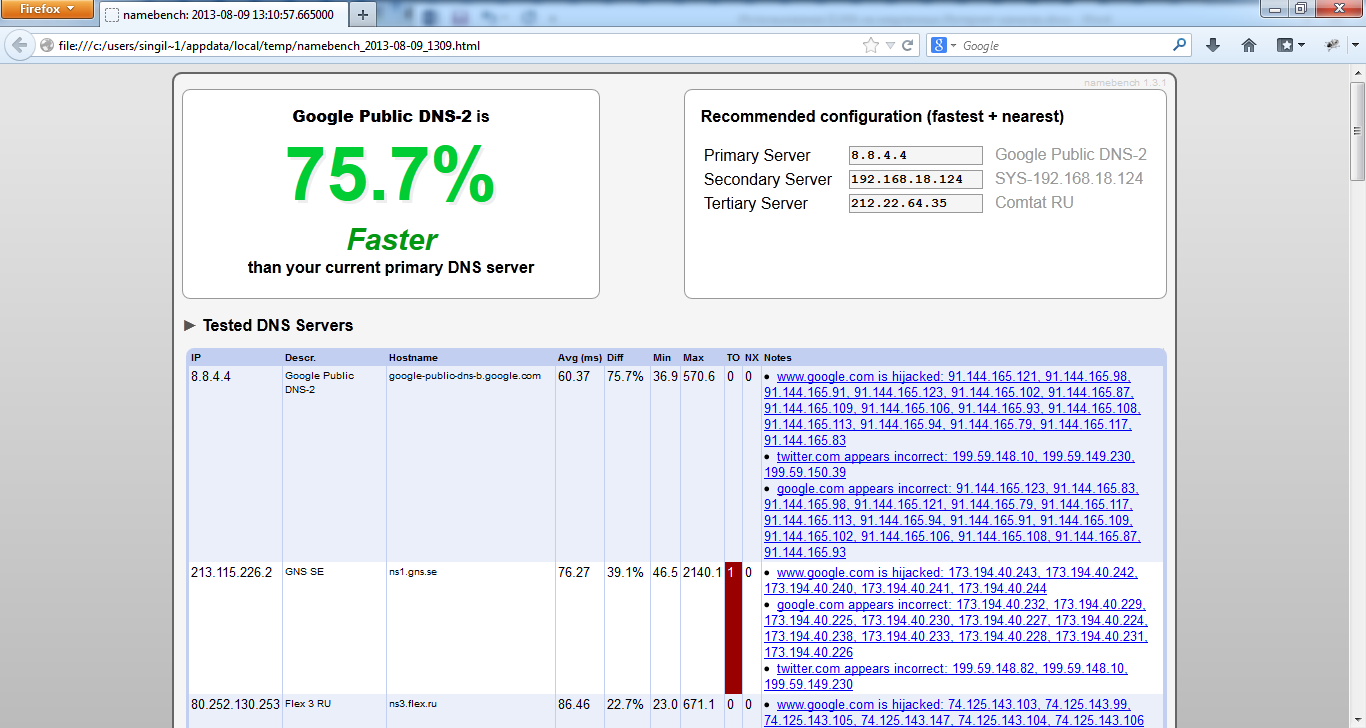
Next, you will need to speed up the processing of DNS requests, using acrylic.
After installing it, open the file Edit Configuration File. Specify the IP address of the analyzed DNS servers (which were the fastest).
PrimaryServerAddress= specify the ip of the primary dns server;
SecondaryServerAddress= specify the ip of the secondary dns server;
TertiaryServerAddress= ip of the third dns server;
QuaternaryServerAddress= ip of the fourth dns server;
Launch Restart Acrylic Service. The service is set up and running. After that, go to the network connections (Win+R -> ncpa.cpl), open the required adapter and in the DNS field specify 127.0.0.1. Remove other DNS servers. Thus, all the responses to requests are cached. I.e. if you request the same data again, you will receive an instant response, which is already saved on your PC.
Browsers
Google Chrome has many settings, and some of them can slightly increase its performance. Open the Settings and click Advanced. Here you can enable the Use a prediction service to load pages more quickly option and disable the Automatically send usage statistics and crash reports to Google option. If you are an experienced user and are not afraid of phishing, then you can also disable the Protect you and your device from dangerous sites option, because it will speed up the loading of pages, since chrome will not have to check each website.
.png)
How the "Use a prediction service to load pages more quickly" option works:
When Chrome meets a prerender instruction, it creates an invisible tab and starts loading the page on it, with all the scripts (which it executes), images, etc. If a user actually opens the predicted address, the current tab is replaced with the invisible tab, and the user gets to the loaded, or at least loading, page.
Firefox only loads the html of the specified page, while all the external resources are loaded only after opening.
You can use any available extensions for this purpose in Firefox and Chrome.