Service for starting business processes in ELMA from xml files
This article describes:
- The WorkflowRunner service, used for starting a business process in ELMA from xml-files;
- Step-by-step work with this service (installing, configuring);
- Use cases.
The WorkflowRunner service was developed in ELMA Company. It uses WebAPI services.
The principle of this service is the following:
An XML file of a particular format (scheme) is generated (automatically or manually by the system administrator) in an external system. All the context variables and their values, which should be passed to a business process, are written to this file. You have to get names of these variables from the required business process beforehand. After the XML file has been generated, it should be automatically passed to the “input” (saved in the required folder of the WorkflowRunner service).
ELMA periodically (by default, once per minute, can be configured) checks that the file is in this folder, and if it finds an unprocessed file in this folder, it starts the business process.
After that the data (values of context variables) from the XML-file are passed to ELMA, using web-service methods (SOAP-requests) at stated intervals. At the same time, the business process is started in ELMA with the imported values of variables.
XML file formats
XML files, used by the service, can be of several formats (schemes):
- Strict– using this scheme when writing an imported XML file provides validation of passed values. It is recommended to use this scheme only when importing simple objects (e.g. string values). If errors were made in the XML file, the business process will not be started in the web application.
- Custom– using this scheme when writing an imported XML file does not provide validation of passed values, however, it allows importing objects that are more complex (any context variables). In this case, the XML file will be small. This scheme is simpler, it is recommended to use it.
You can find examples of different XML files below.
Sequence of actions
To operate this service correctly, you have to perform the following actions:
- Install the WorkflowRunner service on your PC. Note that for the WorkflowRunner service to operate correctly, the user, who started the ELMA server, has to have permissions to change system folders of this service and access to the ELMA server from the PC, on which the service is installed.
- Create a business process with required context variables. The set of context variables depends on the data that will be passed to the process (an example of context variables is below). The user, defined as the initiator in the XML file, has to have permissions to start the process.
- Create an XML file of the required scheme (Strict or Custom).
- Move the created XML file to the folder with the WorkflowRunner service.
WorkflowRunner service
Installing the WorkflowRunner service
The installation media of this service is in the archive, attached to this article.
To install this service, follow a few steps.
Step 1. Run the installation media. Windows may show the user account control dialog box (fig. 1). Click Yes to start the installation.
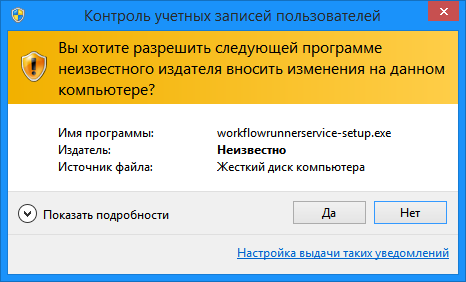
Fig. 1. User account control
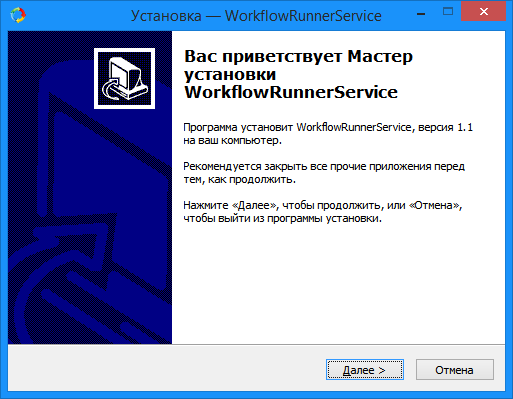
The welcome screen of the installation wizard (fig. 2) contains general information about the service and some advice about the installation process. To continue, click Далее.
Step 2. In the opened dialog box (fig. 3) select the installation folder. It is recommended that you use the default folder. To select another folder, click Обзор…. To continue, click Далее.
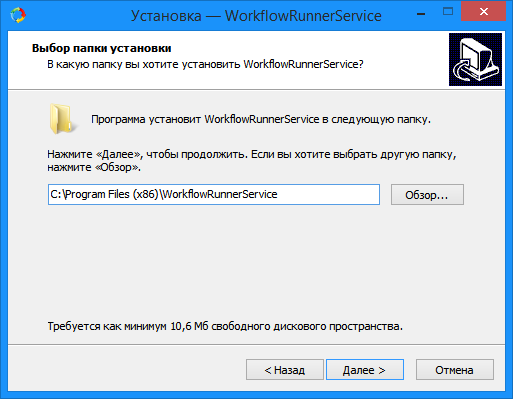
Fig. 3. Dialog box for selecting an installation folder
By default, the following folders will be added to the installation folder:
- Watching– a folder for monitoring, in which you should place XML files for processing. Processed files are automatically moved from this folder to Successfully or Failed folder (depends on the XML file processing result);
- Successfully– a folder for storing successfully processed XML files;
- Failed – a folder for storing files, whose processing failed;
- Logs– a folder for storing report-files, automatically generated after processing XML-files.
After installing the service, you can change the location of the folders for storing files. To learn more, read the Configuration file settings.
Step 3. At this installation step (fig. 4) click Установить.
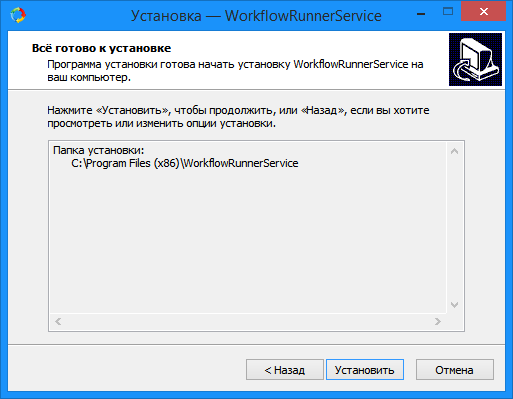
Fig. 4. Installation wizard dialog box
Step 4. Configuring the service
At this step (fig. 5), you have to fill in the required fields and click Да.
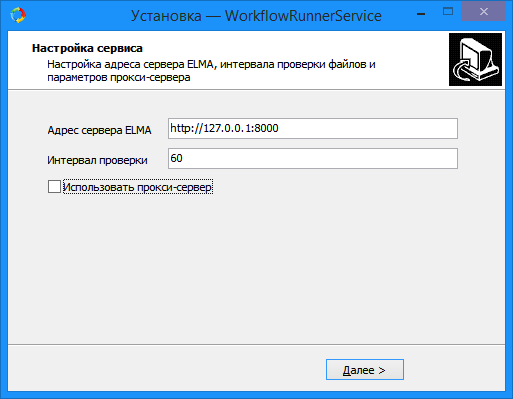
Fig. 5. Configuring the service
Адрес сервера ELMA – is the address of ELMA server to connect to. Specify the server address as: http://< ELMA server address>:<port>.
Интервал проверки – the service for checking for new XML-files starts with this interval (in seconds).
If your organization uses a proxy server, check the Использовать прокси-сервер box and fill in the appeared fields: Адрес, Порт, Логин, Пароль (fig. 6).

Fig. 6. Service settings
After installing the service, you can change its parameters and settings. To learn more, see the Configuration file settings paragraph.
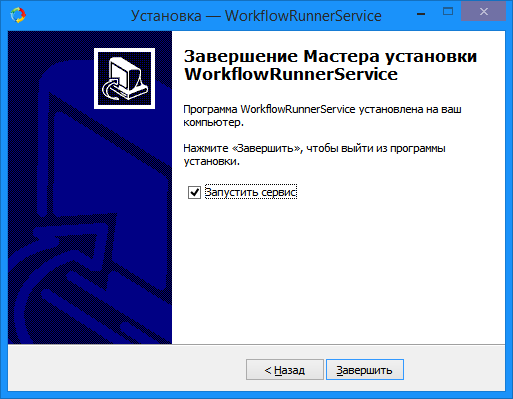
Step 5. At this step, the installation dialog box displays information about the service installation results. Check the Запустить сервис box to start the service automatically (fig. 7).
The installed service will be displayed in the list of Windows services (fig. 8).
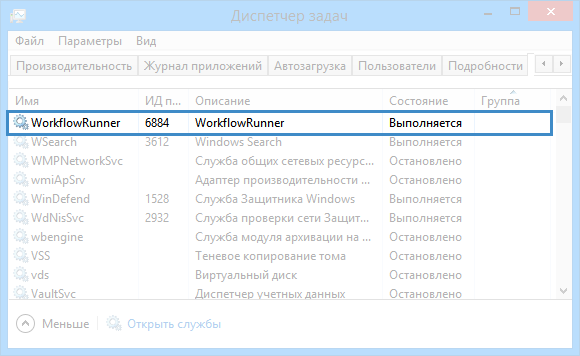
Fig. 8. Task manager. "WorkflowRunner" service
Configuration file settings
If necessary, after installing the WorkflowRunner service, you can change its settings by editing the configuration file Settings.config, located in the service folder.
The configuration file includes several key/value lines: <add key="…" value="…"/>.
To change the settings of the service, edit the respective line.
Changing ELMA server address
To change the ELMA server address, change the value in the respective line with key="elma_url". For example, <addkey="elma_url" value="localhost:7000"/>
Changing file folders
If you need to move the folders with the processed files from the directory, in which the service is installed, change the paths to these folders in the respective lines of the configuration file:
- Path to the folder with files to monitor:
<add key=" watching_directory" value="new path"/> - Path to the folder with successfully processed files:
<add key="successfully_directory" value="new path"/> - Path to the folder with files, whose processing failed:
<add key="failed_directory" value="new path"/>
You have to specify the absolute path, e.g. <C:\Program Files\ELMA\ELMAServiceRunner\successfully>
Do not add the «\» character at the end of the path, e.g. if the path is <C:\...\ successfully\>, then remove "\", so that it became <C:\...\ successfully>.
<add key="successfully_directory" value="successfully"/>,
where successfully is the folder name.
Changing timer
By default, files are checked every 60 seconds (if you did not change this value when installing the service). You can change it in the line: <add key="watching_interval" value="new value"/>
Specify the value in seconds.
Changing proxy-server settings
To disable a proxy server, specify value=”0” in the line <add key="use_proxy" value="value"/>. In this case, all the settings, specified below (address, port, login, and password) will be ignored. If a proxy server is used, then the value must be “1”.
You can edit the proxy server settings in the following lines:
- Proxy server address:
<add key="proxy_address" value="new value"/> - Proxy server port:
<add key="proxy_port" value="new value"/> - Proxy server user login:
<add key="proxy_user" value="new value"/> - Proxy server user password:
<add key="proxy_password" value="new value"/>
Service use cases
Because xml files, used by the WorkflowRunner service, can have two formats (schemes), working with them is different.
Let us take a closer look at creating XML files by strict and custom schemes, processes, to which data will be imported, and the import results.
Using the strict scheme for an XML file
Create a simple business process ("WorkflowRunnerTestStrict") with context variables (fig. 9), whose values will be passed to a process task later.
.png)
Fig. 9. ELMA Designer. Context variables of the "WorkflowRunnerTestStrict" process
An XML file, created using the strict scheme, will look like that (fig. 10):
.png)
Fig. 10. An XML file, created using the strict scheme
These are the main tags in this file:
- <login>– login of the user, who will start the business process;
- <password> – password of the user, who will start the business process;
- <token>– token of the business process from ELMA Designer;
- <workflow-name>– name of the business process to start;
- <variable-list>– list of particular variables to pass. The list of context variables can include both regular properties, and Block-type properties.
Regular properties are generated as follows:- <string-variable name="StringTest">– a String-type variable, with the name "StringTest";
- <int-variable name="IntTest">– an Integer-type variable, with the name "IntTest";
- <date-variable name="DateTest">– a Date/Time-type variable with the name "DateTest";
- <user-variable name="UserTest">– a User-type variable with the name "UserTest". Note, that in this case, you have to specify the ELMA ID of the user, not their full name;etc.
A Block-type property is generated as follows:
<block-variable name="BlockTest">
<item> <variable of the required type and its name >
The list of all the variables, presented in fig. 10 is available in an XML file, attached to this article.
After you add this XML file to the Watching folder, the created business process will be started in ELMA in 60 seconds (by default) (fig. 11). All the values of the context variables in the XML file will be passed to the process.
.png)
Fig. 11. "WorkflowRunnerTestStrict" business process
Using the custom scheme for an XML file
Create a simple business process ("WorkflowRunnerTestCustom") with context variables (fig. 12), whose values will be passed to a process task later.
.png)
Fig. 12. ELMA Designer. Context variables of the "WorkflowRunnerTestCustom" process
An XML file, created using the custom scheme, would look like that (fig. 13):
.png)
Fig. 13. XML file, created using the custom scheme
These are the main tags in this file:
- <login>– login of the user, who will start the business process;
- <password> – password of the user, who will start the business process;
- <token>– token of the business process from ELMA Designer;
- <workflow-name>– name of the business process to start;
- <variable-list>– list of particular variables to pass. The list of context variables can include both regular properties, and Block-type properties.
Regular properties are generated as follows (variable types are not specified):- <item name="StringTest">– a String-type variable, with the name "StringTest";
- <item name="IntTest">– an Integer-type variable, with the name "IntTest";
- <item name="DateTest">– a Date/Time-type variable with the name "DateTest";
- <user-variable name="UserTest">– a User-type variable with the name "UserTest". Note, that in this case, you have to specify the ELMA ID of the user, not their full name;
- etc.
A Block-type property is generated as follows:
<item name="BlockTest1">
<item> <variable of the required type and its name >
The list of all the variables, presented in fig. 13 is available in an XML file, attached to this article.
After you add this XML file to the Watching folder, the created business process will be started in ELMA in 60 seconds (by default) (fig. 14). All the values of the context variables in the XML file will be passed to the process.
.png)
"WorkflowRunnerTestCustom" business process
All the files, mentioned in this article, are attached as an archive below.