Creating a project in ELMA Projects+
This article describes step by step how a project is created: from creating a draft and adding tasks to publishing the project. As an example, we use an software implementation project.
Step 1: Projects+ application
A project is a structure that unites resources, tasks, and operations planned to achieve a particular aim.
The Projects section is available in the left menu of those users who have specific permissions managed in Administration – Users – User list. All users who need to have access to Projects must be added to the Project Participants group.
This is the main page of the section:

Fig. 1. Main page of the Projects section
This page shows all the processes that the current user participates in at the moment.
Step 2: Create project
To create a project, click Add project in the top menu. A window will appear for you to select a project template.
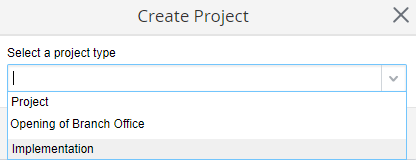
Fig. 2. Selecting project type
All active project types are available. You can read more about project types in ELMA Help.
The project creation form opens:

Fig. 3. Project creation form
You need to fill in the following fields:
Name – project name;
Start Date – project start date;
End Date – project end date;
Manager – project manager. By default, the user who is creating the project is selected. You can specify another user as project manager, simply select them by opening the user list in the field.
Additional Parameters are also available but collapsed by default. Here you can specify the General Contractor field and select a contractor from the CRM section.
After having filled out the form, save the project.

Fig. 4. Project view form
Step 3: Project stages
After saving, the project becomes a project Draft. At this step all project portlets are available.
First, you need to fill in the General Information portlet and add all the required project roles.

Fig. 5. General Information portlet
Next, create the project plan. Click on the name of the Project plan portlet and then click Edit in the top menu.
.png)
Fig. 6. Project plan page
Now you have to fill in the project plan by adding tasks. While the plan is still a Draft, the tasks will not be assigned to their executors. Only when the project plan is published will the execution start. The project plan has versions, meaning that the plan and the project itself are published separately.
You can select users who will approve the project plan and changes introduced to it.
To create a task, right-click to open the context menu (Fig. 7) and select Project task. A task creation window opens (Fig. 8) where you need to fill out all the required fields.

Fig. 7. Project plan editing page
.png)
Fig. 8. Project task creation window
You can send messages to the project public channel even when the project is at the Draft stage.

Fig. 9. Project messages portlet
Also, a folder for project documents is created in the system:

Fig. 10. Project documents folder
You can edit project risks:
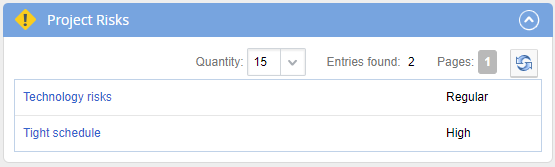
Fig. 11. Project risks portlet
You can manage the project budget:
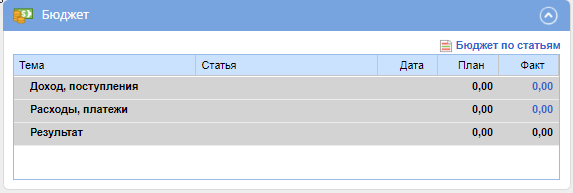
Fig. 12. Budget portlet
To publish a project you have to change its stage. For that, click Change Stage in the top menu of the project stage. In the appeared window you can select the next project stage from the drop-down list:

Fig. 13. Window for changing a project stage
After having selected the new stage click Set.

Fig. 14. Changed project stage
When the work on a project is completed, the project stage must be changed to Completed. The project will then be moved to the Archive:
Access management for the Projects+ section is described in ELMA Help.
Management of public channels is thoroughly described here.
Working with documents is described here.
You can read more about working with projects here.