To use ELMA integration with IP telephony systems, you need:
-
-
configured IP telephony server, with which ELMA will be integrated. ELMA can be integrated with three IP telephony systems: Asterisk , Oktell , MightyCall (Infratel);
Apart from these requirements, you also have to configure user profiles. To learn more, see the respective Help page.
To configure ELMA integration with IP telephony systems, you have to:
Telephony Settings
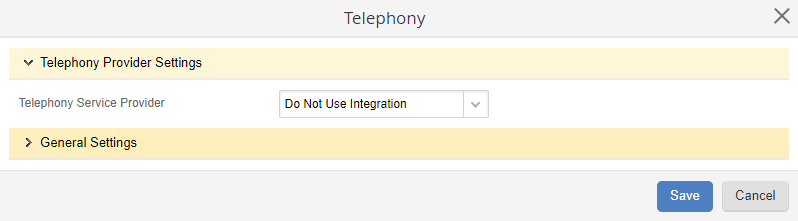
The Telephony Settings contains ELMA integration settings with IP telephony systems (fig. 1).
|
|
|
Fig. 1. Administration – System – System Settings. Telephony Settings unit
|
To edit parameters, click on the pencil icon next to the unit name (fig. 2).
|
|
|
Fig. 2. Editing telephony settings
|
Infratel Integration Module Settings
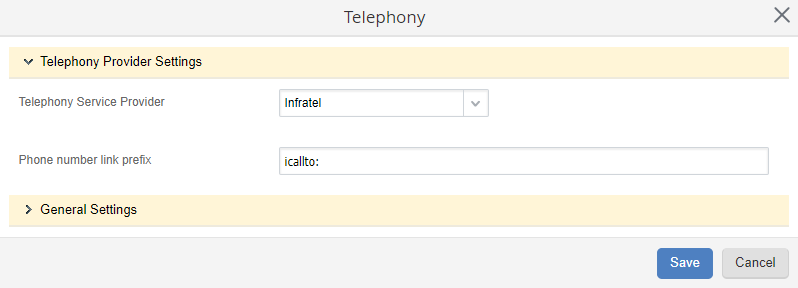
The Infratel Integration Module Settings contains ELMA integration settings with the MightyCall(Infratel) system (fig. 3).
|
|
|
Fig. 3. Administration – System – System Settings. Infratel Integration Module Settings unit
|
Phone number reference prefix - MightyCall (Infratel) system uses it to define, with which application outgoing calls will be made.
Asterisk Integration Module Settings
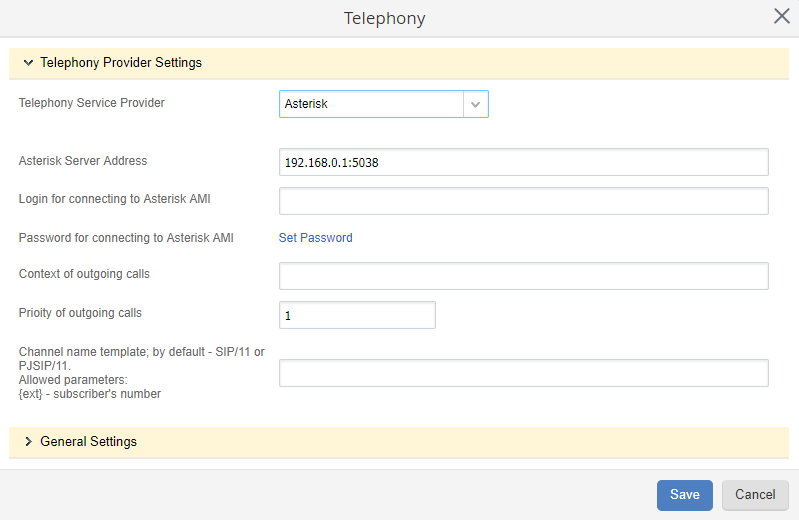
The Asterisk Integration Module Settings unit contains settings for integrating ELMA with the Asterisk system (fig. 4).
|
|
|
Fig. 4. Administration – System – System Settings. Asterisk Integration Module Settings unit
|
Asterisk server address - enter the Asterisk server address and connection port, as <Asterisk server address>:<connection port>.
Login – user login on the Asterisk server.
Password – user password on the Asterisk server.
Context of outgoing calls – set of extensions, which define rules for making outgoing calls. The context is configured on the Asterisk server.
Priority of outgoing calls - priority level number for outgoing calls on the Asterisk server.
Channel name template – a channel name template, in which additional parameters can be used. Allowed parameters: {ext} – subscriber number. By default, SIP/11 or PJSIP/11 channel is used.
General Settings
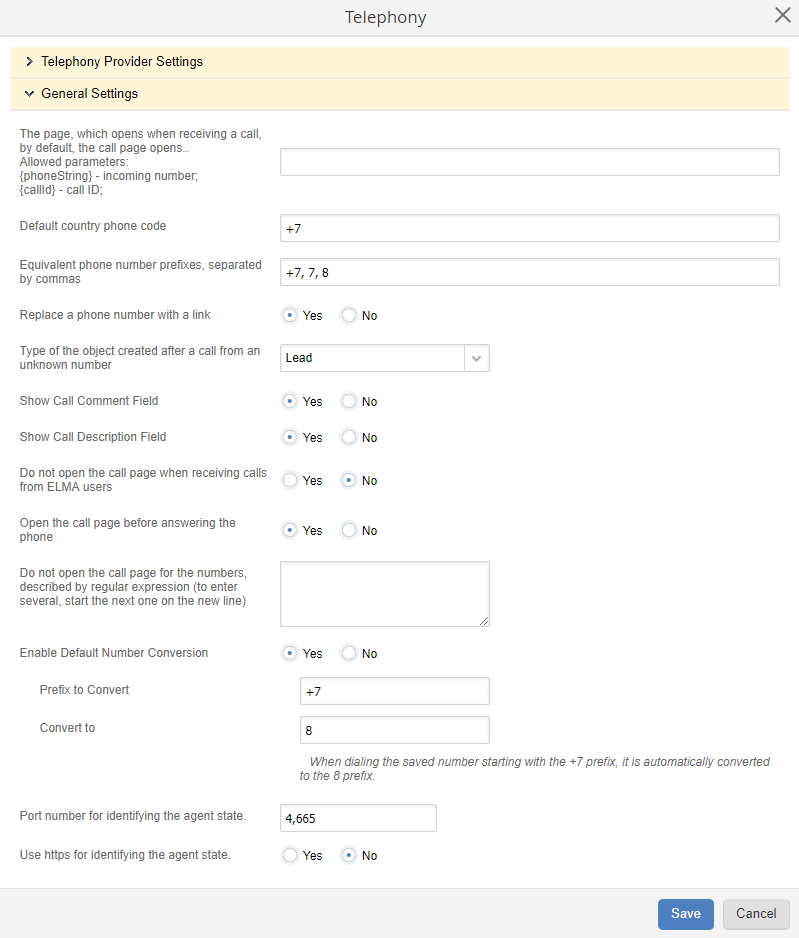
In this unit, you need to fill in the following parameters (fig. 4):
Fig. 4. Telephony general settings
The page, which opens when receiving a call, by default, the call page opens – the page that will open when receiving an incoming call. Specify the page as: <web page address>?<expression, composed of allowable parameters> (using the parameters is optional). Allowable parameters: {phoneString} – incoming number; {uniqueId} – call unique ID. Example: www.yandex.ru?PhoneString={phoneString}&UniqueId={uniqueId}.
Default country phone code – specify the country phone code that will be used by default.
Equivalent phone number prefixes, separated by commas – enter the phone number prefixes that are equivalent.
Replace a phone number with a link:
-
Yes – the number, entered in the
Phone field on the
object page, will be automatically converted to a hyperlink. When you click on the phone number a dialog box for making an outgoing call opens;
-
No – the number, entered in the
Phone field on the
object page, will not be converted to a hyperlink. To make a call to a number, you need to use the
Call button in the top menu.
Type of the object created after a call from an unknown number – select an object type. When you receive an incoming call from an unknown number, the page for creating an object of this type will open.
Show call comment field – the Comment field will be displayed on the incoming and outgoing call forms.
Show call description field – the Description field will be displayed on the incoming and outgoing call forms.
Do not open the call page when receiving calls from ELMA users:
-
Yes – when receiving an incoming call from an ELMA user the call page will not open;
-
No – when receiving a call from an ELMA users the call page will open.
Open the call page before answering the phone:
-
Yes – the call page will open before you take the call;
-
No – the call page will open after you take the call.
Do not open the call page of the numbers, described by regular expression (to enter several, start the next one on the new line) – in this field you can specify the numbers, for which a call page will not open. To specify the numbers, use a regular expression that starts with ^. Start entering each expression on a new line. Example:
^555
^32121234567
In this example, the call page will not open when receiving calls from numbers starting with 555, and when receiving calls from the number 32121234567.
Enable Default Number Conversion
-
Yes – when you dial a saved number, its prefix will be automatically replaced according to the settings below:
Prefix to Convert – prefix of a saved phone number that must be replaced when making a call.
Convert to – prefix of a saved phone number that will be used to replace the source prefix when making a call.
-
No – phone numbers will not be converted.
Port number for identifying the agent state – enter the port number (by default – 4665), to which the current ELMA Web Application page automatically sends a request to identify the ELMA Agent state – running or not. You must specify the same port number in the ELMA Agent settings as in this field. If a web page request received a response, the Telephony Panel button will change from inactive to active (fig. 5).
Fig. 5. Telephony Button change
Use https to identify the agent state:
Yes – https will be used to send a request to identify ELMA Agent state. Note, that this option also must be selected in ELMA Agent.
No – http will be used to send a request to identify ELMA Agent state. Note, that this option also must be selected in ELMA Agent.
Enable telephony panel
Yes – if IP telephony is configured and ELMA Agent is running, the telephony panel is shown in the lower right corner of Web Application. By default, this parameter is set to Yes;
No –
-
if ELMA Agent is not running, the telephony panel will be inactive;
-
if IP telephony is configured and ELMA Agent is running, the telephony panel will not be shown in the lower right corner of Web Application.
To apply the settings, click Save.
After you have configured ELMA integration with IP telephony systems, the Telephony Settings unit will display the Make a test call button (fig. 6). Use this button to check the settings.
Fig. 6. Make a test call button
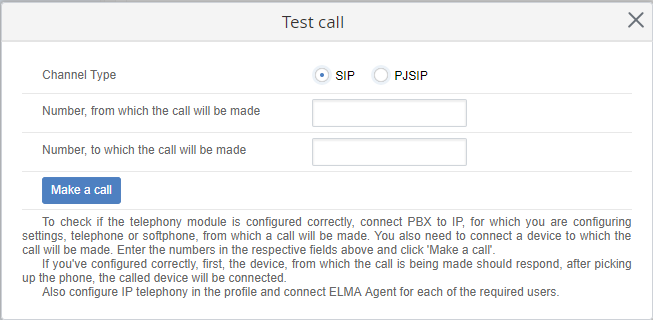
When you click on this button, the Test Call dialog box opens (fig. 7). In this dialog box select the communication channel type (SIP/PJSIP), enter source and target phone numbers for the test call and click Make a call.
Fig. 7. Test call dialog box
If the settings are correct, a call will be made to the phone number, specified in the Number, to which the call will be made field.
If the settings are incorrect, an error message will be displayed.
Copyright © 2006–2019 ELMA