Specifying Expected Due Dates
There are two ways to specify expected due dates of tasks:
-
on the project task page (fig. 1);
-
when editing a task (fig. 4).
Specifying expected due date from the task page
To specify expected due date of a task, open its page and click Actions – Specify expected due date (fig. 1).
Fig. 1. Project task page. Actions button
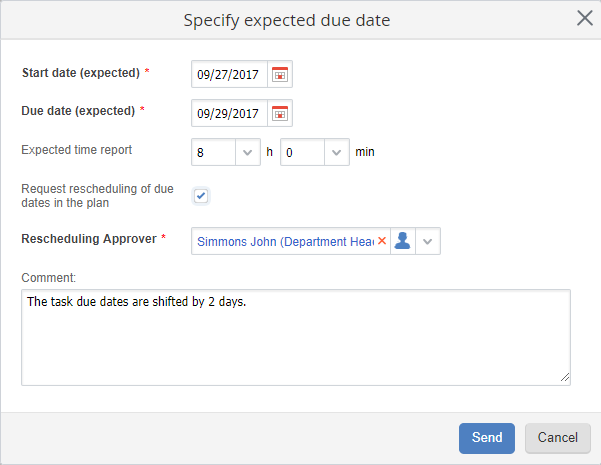
In the opened dialog box (fig. 2) fill in the required fields and click Send.
Fig. 2. Dialog box for specifying expected due date
Start date (expected) *, Due date (expected) * – expected start and due dates of the task. These fields are required. By default, the fields contains the
planned dates of the task. When you change the start date, the due date changes as well, in accordance with the specified task duration. If necessary, you can change the due date.
Expected time report – time, that will be spent executing the task. To learn more, see the
respective Help page.
Checking the Request rescheduling of due dates in the plan box allows requesting the project manager to reschedule the planned task due dates.
-
Rescheduling Approver – drop down list that includes the
manager and the
supervisors of the current project. This field is not displayed if the user, who specifies the expected due dates, is the system administrator, project manager or supervisor. The selected user will receive a task to approve the expected due dates (fig. 4).
If you leave the box unchecked, the information on the expected task due dates will be displayed only on the
task page (fig. 3). These changes will not be applied to the project plan.
Comment – in this field you can add a comment to the due dates forecast. The comment will be displayed on the
task history panel.
Fig. 3. Project task page
Approval of project task rescheduling
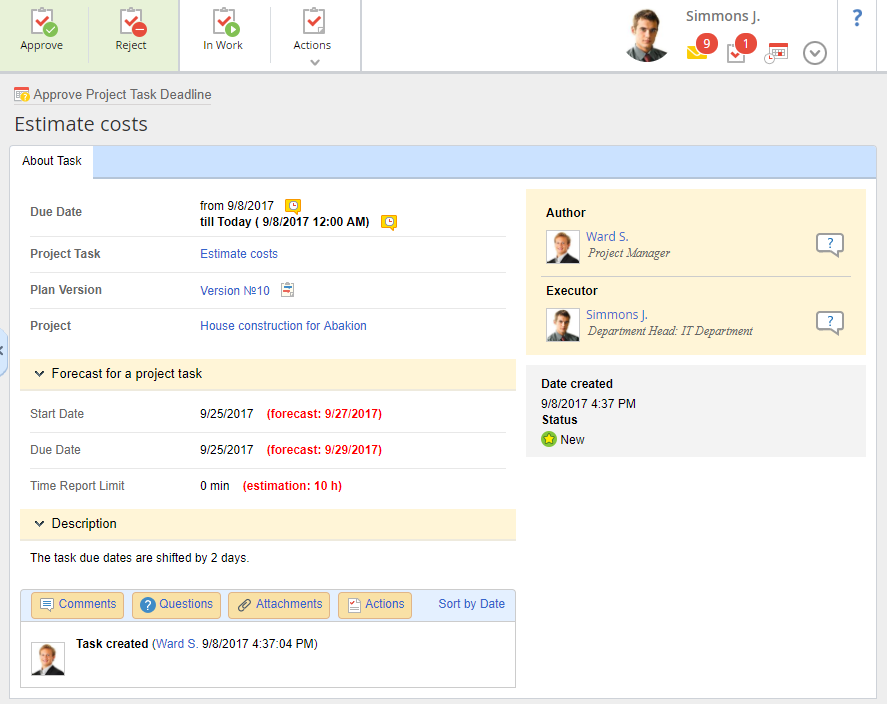
When you request (fig. 2) a user to reschedule task due dates, they receive an approval task (fig. 4).
Fig. 4. Approve Project Task Deadline task
The
Description panel displays the user
comments, added when specifying expected due dates (fig. 2).
To reject new due dates, click Reject.
To approve new due dates, click Approve. A dialog box for editing a task in the project plan will open, where the expected task due dates will be added as the planned values (Start Date, Due Date, Planned Time Report) (fig. 5).
Fig. 5. Project task editing window
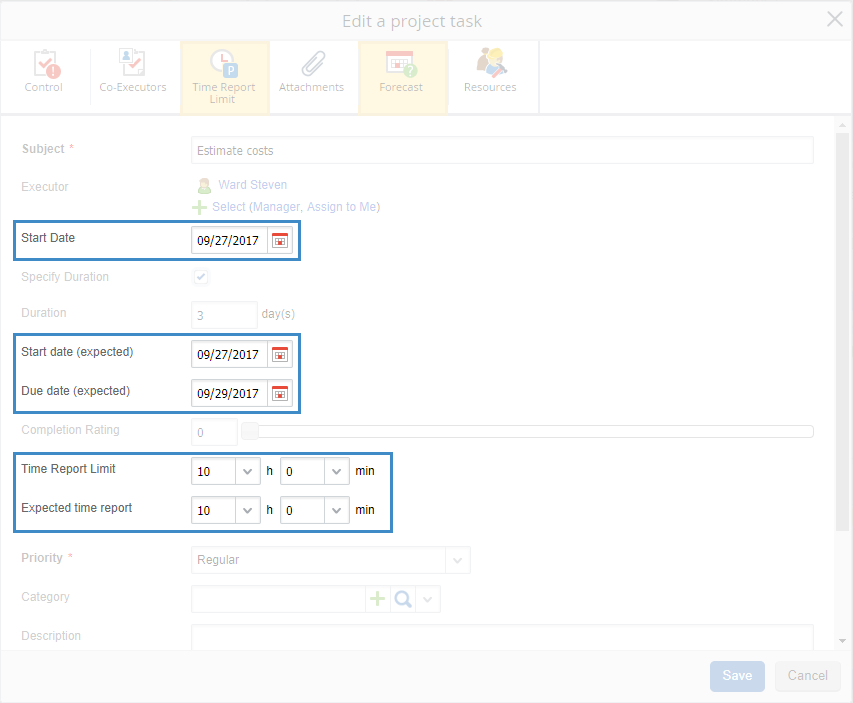
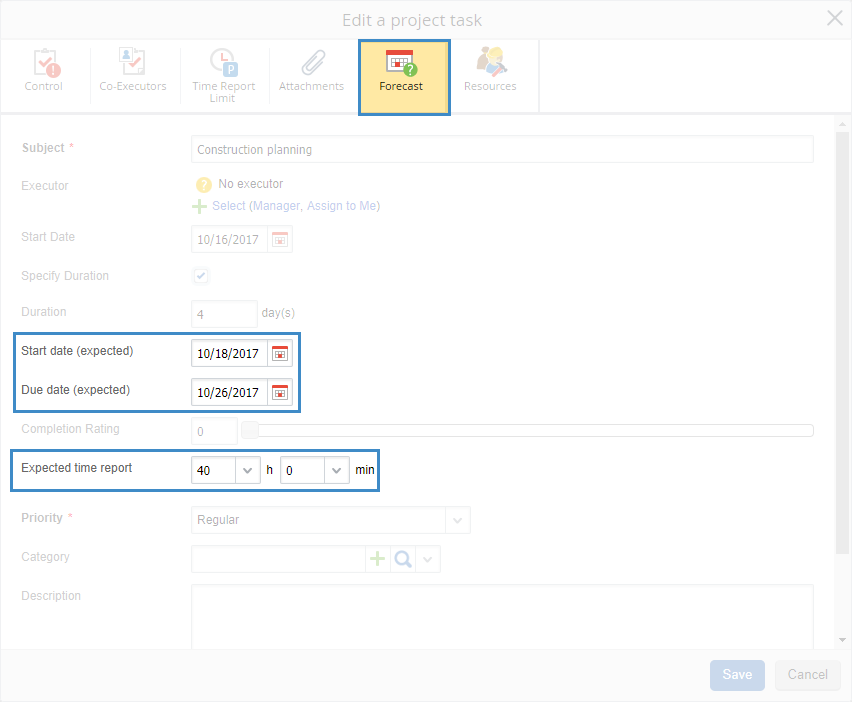
Specifying expected due dates when editing a task
To specify task due dates, open the task for
editing and click
Forecast in the top menu. Additional fields will be added to the form:
Start date (expected),
Due date (expected) and
Expected time report (fig. 6).
Fig. 6. Dialog box for editing a project task
Automatic calculation of expected task due dates
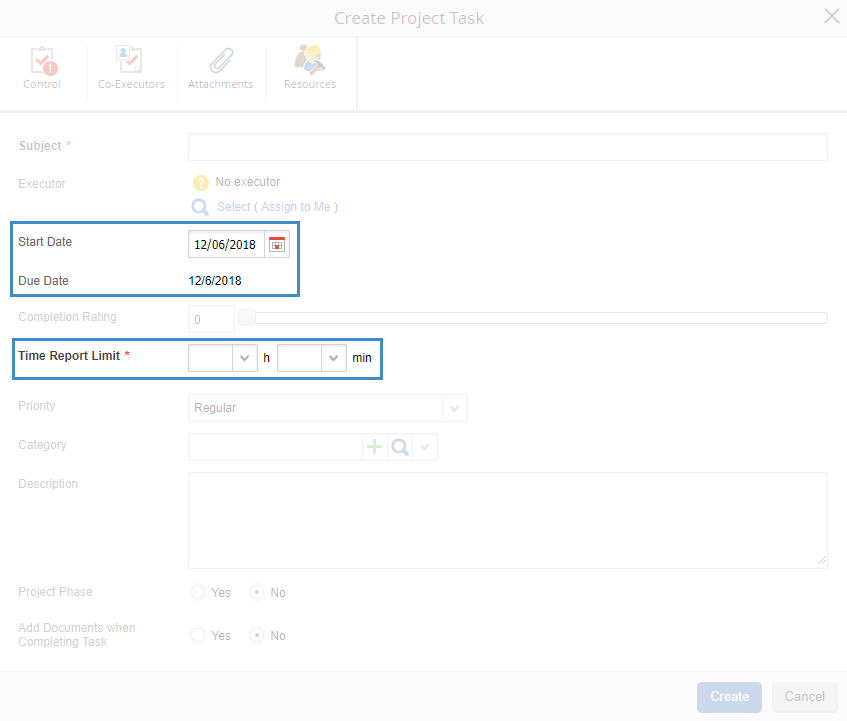
Task due dates are calculated automatically, if you go to Administration – Projects+ – Project Types and in the Take human resources into account field select Calculate task deadlines. The task creation from changes in this case (fig. 7):
-
there is no Forecast button in the toolbar;
-
the Time Report Limit field is added. This field is required;
-
the Due Date is read only, since its values is calculated automatically;
-
there is no Duration field.
Fig. 7. Task creation form
To calculate the value of the Due Date field, you need to add at least one human resource to the task. The value is calculated based on the Time Report Limit value and the workload of the selected human resource.
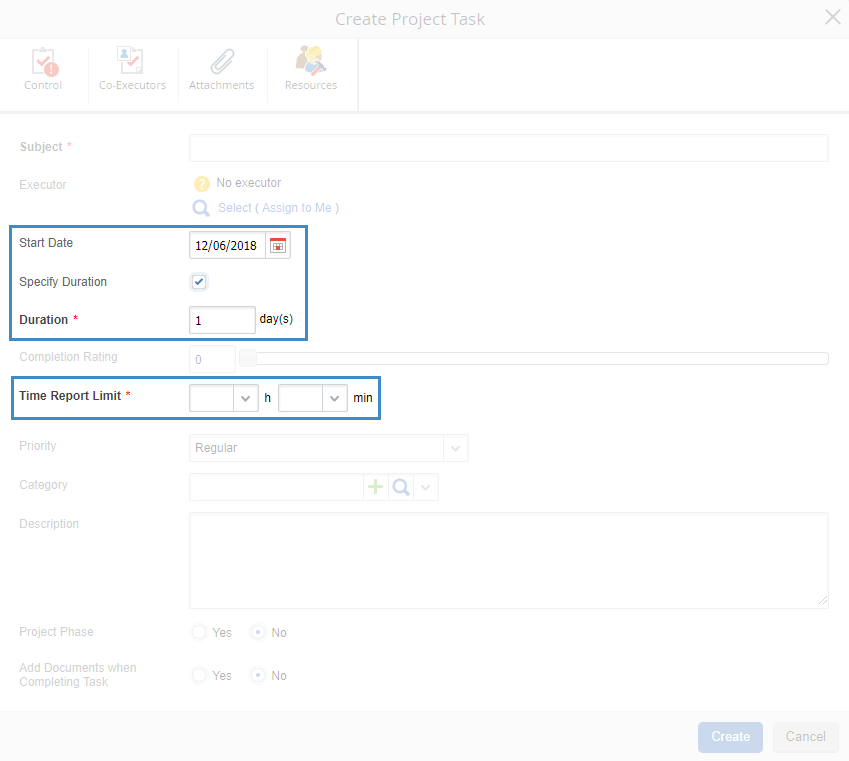
If you go to Administration – Projects+ – Project Types and in the Take human resources into account field select Double dependency, the task creation form changes as follows (fig. 8):
-
there is no Forecast button in the toolbar;
-
the Time Report Limit field is added. This field is required;
-
the Due Date field is required. If the Specify Duration box is checked, the Duration field will be displayed instead of the Due Date field, which is also required.
Fig. 8. Task creation form
Task due dates are calculated in the same way, as with the Calculate task deadlines value of the Take human resources into account setting.
This feature is not available for stage tasks, business process start tasks and parent tasks.
Copyright © 2006–2019 ELMA