Users can create a time report in different ways:
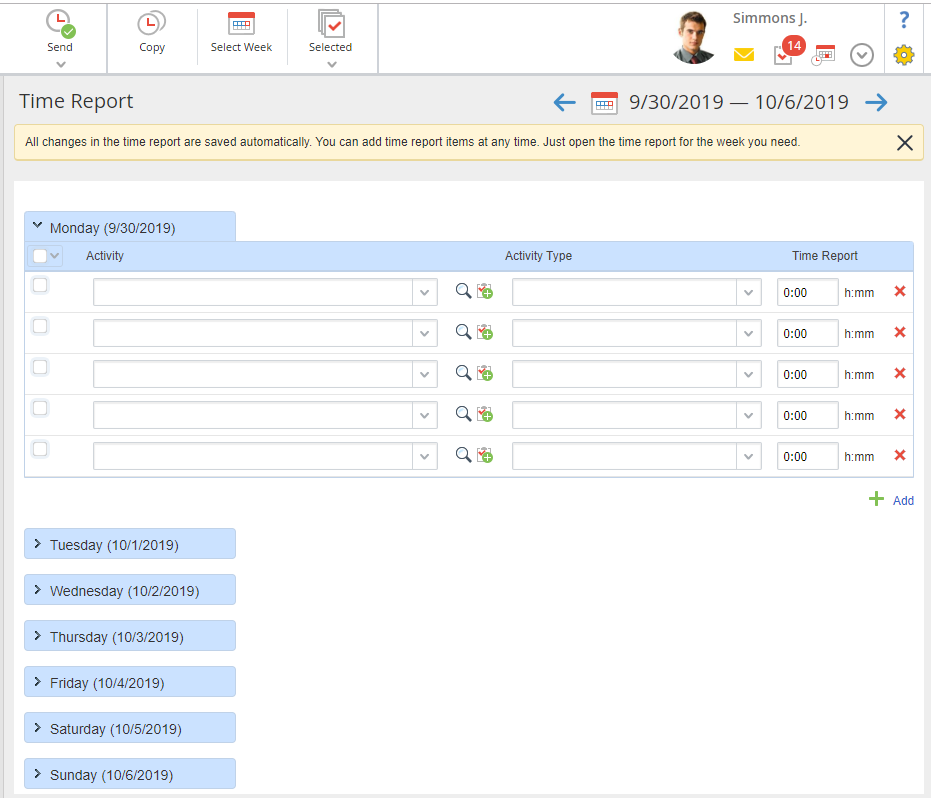
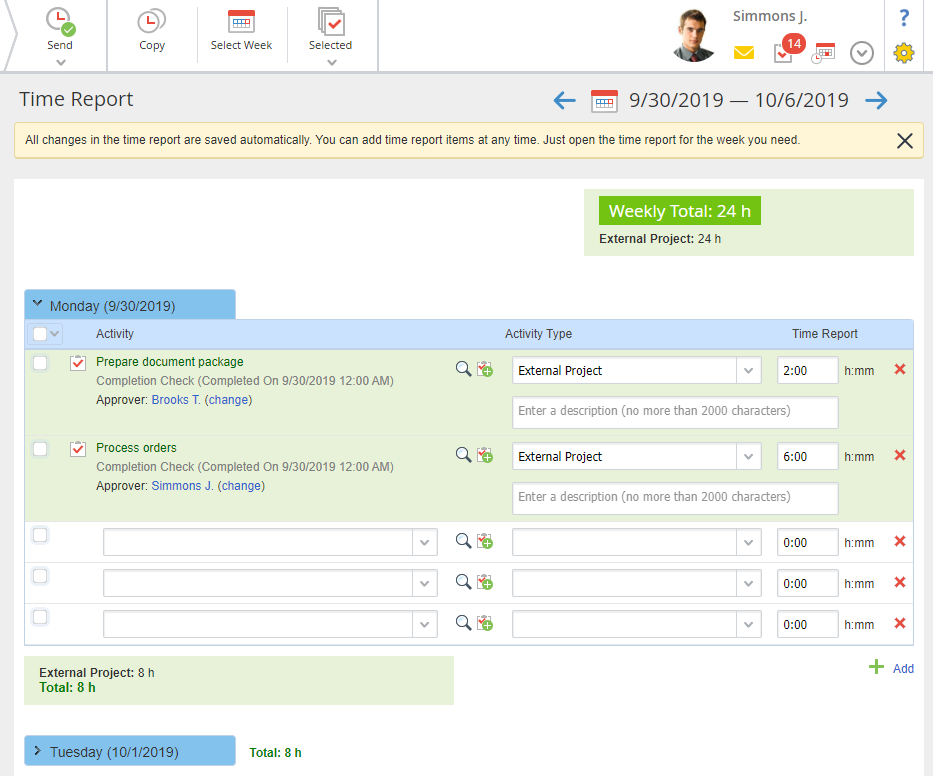
The report page for the current working week will open by default. On this page (Fig. 1) you need to:
-
select a day of the week by clicking on its name;
-
-
send selected time report for approval.
|
|
|
Fig. 1. Creating a time report
|
Note that ELMA automatically saves all the changes. Users can go back to the unaccounted time report at any time by opening the report for the required week.
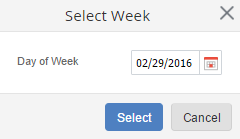
If you need to submit the report for the last week or any other period click Select Week in the toolbar of the page. In the appeared dialog box (Fig. 2) select the day of the required week and click Select.
|
|
|
Fig. 2. Select Week dialog box
|
By default the time report creation page displays the current week (Fig. 1). All the fields will be minimized, except for the current day form. To expand the form for a particular day, click on its name. You can hide the form in a similar way.
If you filled in the fields for a particular day, then the form header related to this day will be highlighted dark-blue; if the fields are not filled in – the header will be highlighted light-blue.
You can add a time report to a task. Thus, during the task execution, work hours will be automatically added to the report creation page.
You can also add a time report to other objects, such as: calendar events, contractors, meetings and so on. For more information on time report objects, see the respective Help section.
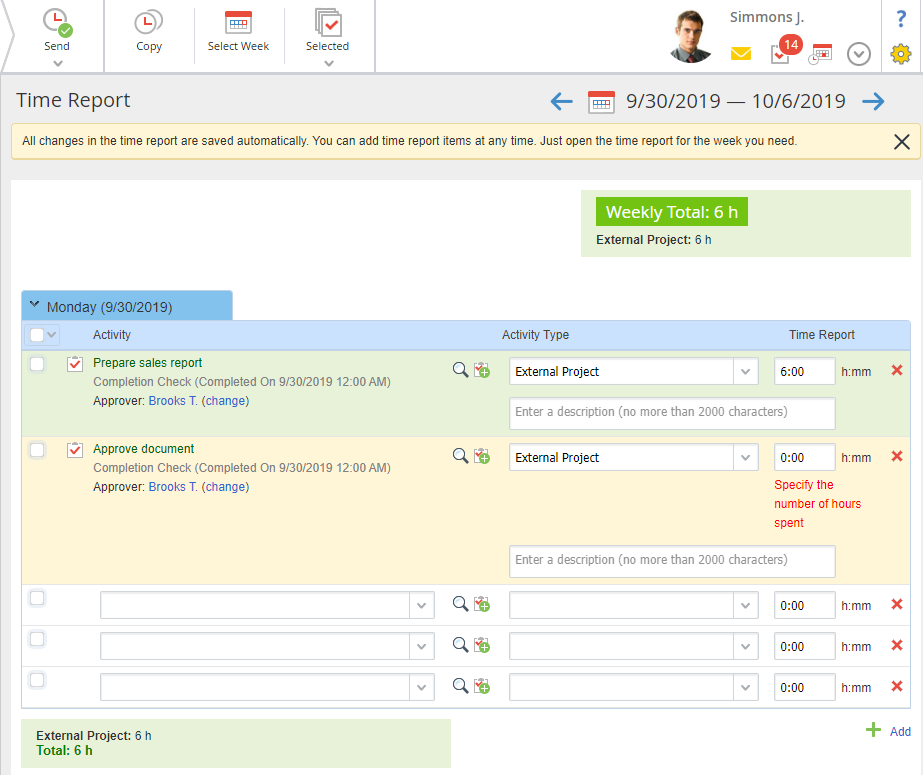
Background colors:
-
-
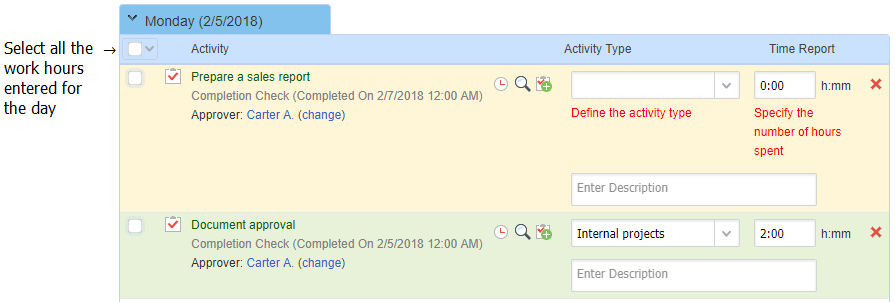
if the section is not fully completed, then it is orange (Fig. 3);
-
if the form is completed incorrectly or there are restrictions placed on it, then the form is red (Fig. 13).
|
|
|
Fig. 3. Report creation page. Background colors
|
If an activity has already been reported, you will see the  button next to the activity name (fig. 10). After clicking this button, you will see a summary table with the time reports on this activity and the table with the complete list of time reports (approved, rejected and pending approval) submitted on this activity.
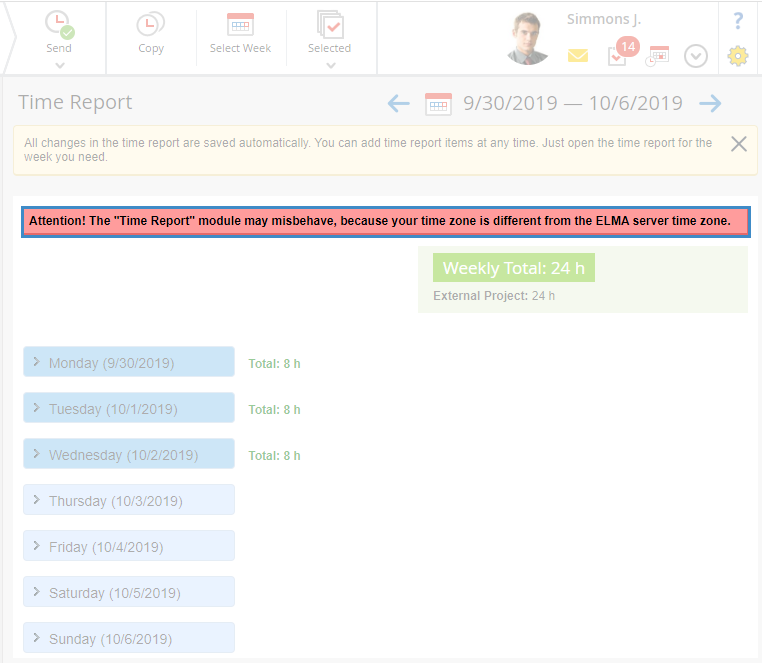
If your time zone is different from the server time zone, the respective notification will be shown on the time report page (fig. 4).
|
|
|
Fig. 4. Report creation page. Background colors
|
Adding a time report item
To add a time report item:
1. On the report creation page select the day you want to add the hours to.
2. In the Activity column select the object related to the time report. You can select an activity in different ways:
-
select an activity from the drop-down list (it will show only those tasks that were completed recently);
-
-
Clicking the change link to the right of the approver name, opens a dialog box for selecting another approver. By default the author of the task is the approver.
4. In the Time Report column enter the hours spent.
5. In the Enter Description field add a description of the work performed.
Fields in the Activity, Activity Type and Time Report columns are required, but can be filled out in any order. The system allows creating a time reports draft, e.g. the number of hours and the description can be specified in the first place, and the activity type can be defined later. If these fields are not filled out, you will not be able to Send this report for approval. The error message will appear under the blank field and the row will be highlighted yellow (Fig. 3).
To delete entered hours you can use the  button.
If you need to insert a new time report item to the table, click  below the table.
Selecting a time report object
A time report object window contains several tabs.
The Recent Activity tab (Fig. 5) includes three buttons: current weekday, Last Two Weeks and Last Two Months. It displays the list of all the activities the employee worked on (regardless of whether or not they were submitted in the time report). To select an activity object, click on its name. It will be added automatically to the Activity field.
|
|
|
Fig. 6. Report object selection. "Recent Activity – Last Two Weeks" tab
|
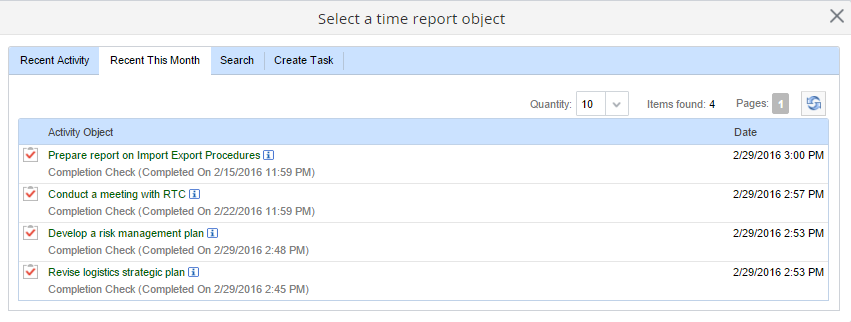
The Recent This Month tab (Fig. 6) shows the list of activities the employee spent the time on and which were submitted in the time report.
|
|
|
Fig. 7. Report object selection. "Recent This Month" tab
|
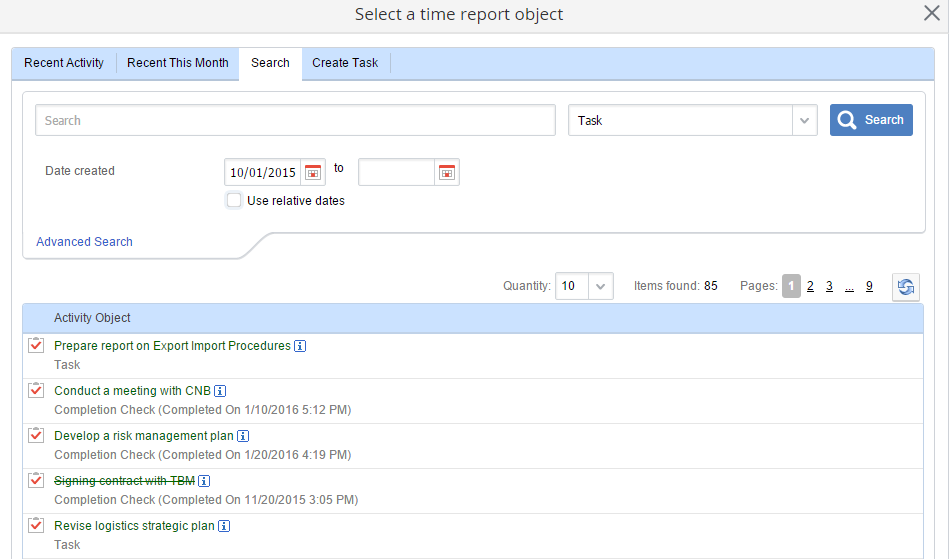
The Search tab (Fig. 7) displays all of the objects that are available to the current user. It has both quick and advanced search forms.
|
|
|
Fig. 8. Report object selection. "Search" tab
|
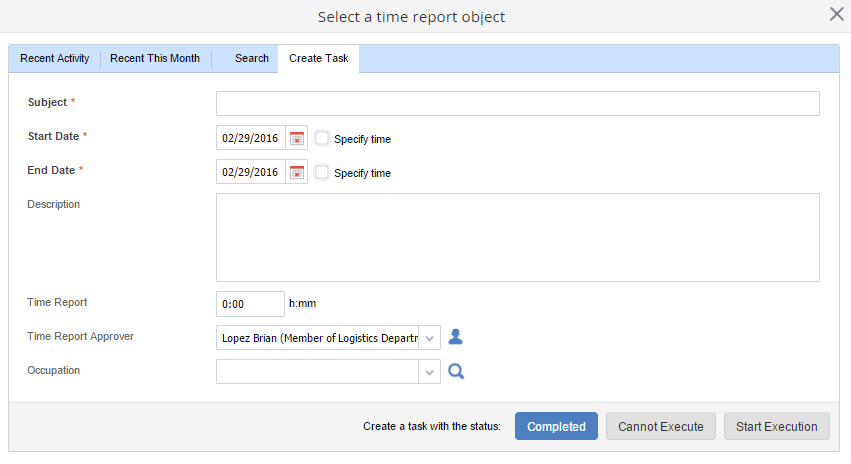
The Create Task tab (Fig. 8) allows users to create a new task. To save the task, click on one of the following buttons:
-
Completed – create the task with the Completed status ;
-
Cannot Execute – create the task with the Cannot Execute status;
-
Start Execution – create the task with the Start Execution status.
|
|
|
Fig. 9. Report object selection. "Create Task" tab
|
To open an activity page, click the  button to the right of the required activity.
Copying time report items
In ELMA, when creating a time report, you can copy items to the current week from previous weeks (up to 10 weeks back). This feature allows saving time on submitting time reports when working with numerous tasks every day.
When you copy items from previous weeks, the following information is added to the report: selected item, activity type, hours worked and description, if specified.
Note, that time report items are copied to the weekdays, corresponding to the ones they are copied from. For example, if you copy items from Monday and Wednesday of the last week, they will be added to Monday and Wednesday on this week. You can copy any time report items, except for the deleted and rejected ones.
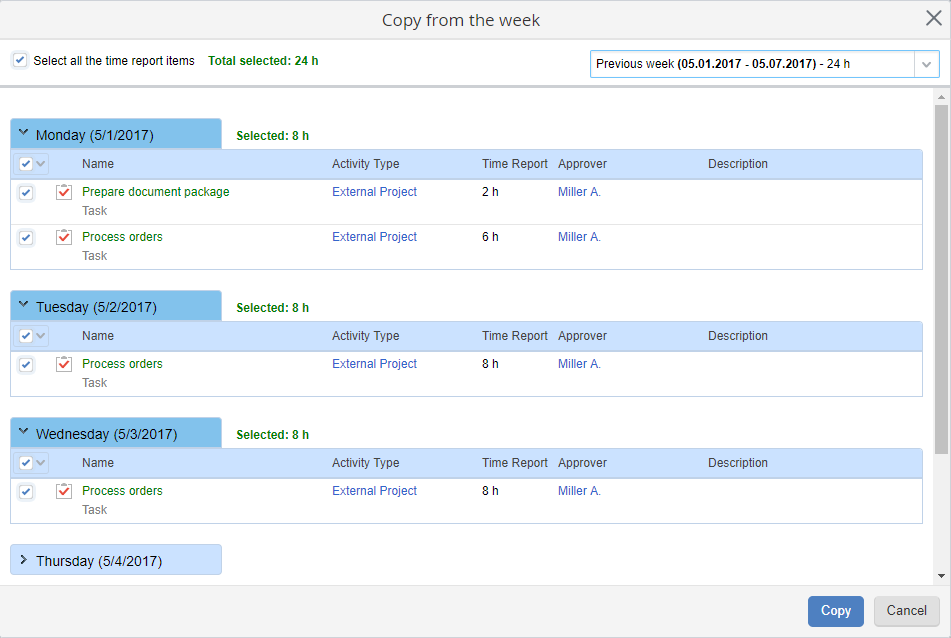
To copy time report items from previous weeks, click Copy in the toolbar. A dialog box (fig. 9) for copying time report items will open.
Fig. 9. Dialog box for copying time report items
In the upper right corner you can select a week (last 1-10 weeks). The number of submitted hours is displayed next to each week.
After specifying a week, you can select the time report items to copy. By default, all the items on the week are selected (the Select all the time report items box is checked.
To select specific days and/or items, uncheck the Select all the time report items box and select the required items (fig. 10).
To complete the procedure, click Copy.
After that, the copied items will be added to the
time report page (fig. 10).
Fig. 10. Time report page. Copied items
After copying time report items to the current week, you can change the number of hours and add a description.
Group operations with time reports
On the report creation page you can select several items at a time (Fig. 9) by checking the boxes to the left of the time report items.
|
|
|
Fig. 11. Multiple selection
|
To quickly select all the items for the current day, check the  box in the table header.
After selecting the required items, you can perform various operations. To do this use either the button or one of the toolbar buttons.
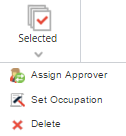
Toolbar buttons
|
|
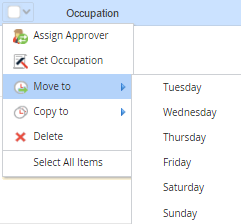
Clicking the icon opens a drop-down menu that allows you to:
-
-
-
move to (select a day of the week);
-
copy to (select a day of the week);
-
-
|
|
|
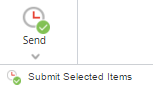
Send – submit all the time report items.
Send Selected Items – submit selected items.
|
|
|
Set Activity Type – set one activity type for the selected time report item.
Delete – delete the selected time report item.
|
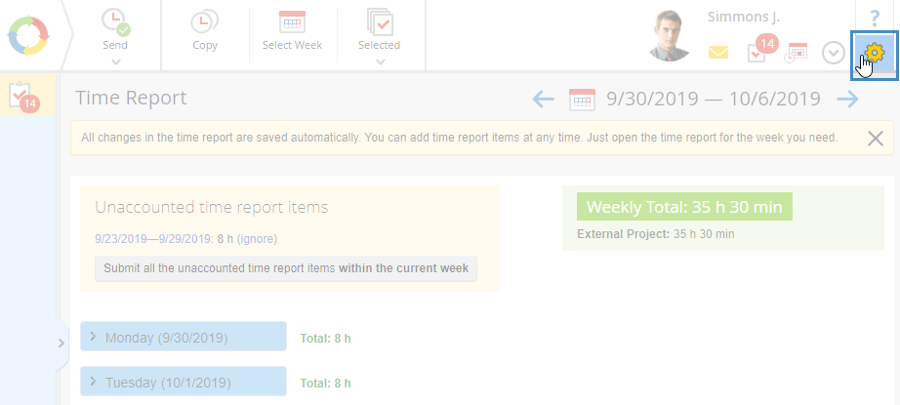
Unaccounted time report items
Unaccounted time report items are the work hours that were added but not submitted for approval.
The information on unaccounted time reports will be displayed at the top of the report creation page after the current week ends.
Fig. 12 illustrates the unaccounted time report items notification.
|
|
|
Fig. 12. "Unaccounted time report" block
|
This unit shows all the unaccounted time report items. Clicking on the week dates will open the report creation page for the selected week.
Clicking the ignore link will delete all the unaccounted work hours.
Clicking on Submit all the unaccounted time report items within the current week will open the report creation page. All the unaccounted work hours will be automatically moved to the current week (to the respective week days).
Submission restrictions
ELMA administrator can set the following restrictions:
-
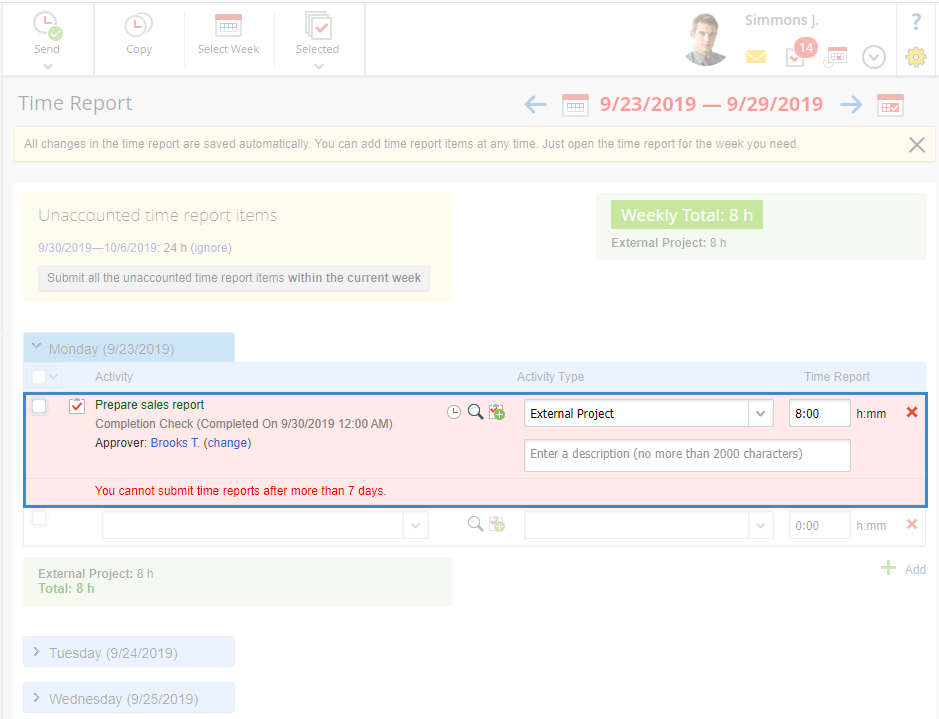
Set limits on backdated entries (in days). When submitting time reports for a past date is prohibited, you will see a message saying "The submission period is <7> days. Later submissions are not accepted". The form will be highlighted red (Fig. 13).
-
|
|
-
Fig. 13. Report creation page. Submitting a report for a past date
|
This restriction is configured by the administrator in the system
settings.
You can also select certain users who will be allowed to submit time reports even after the submission deadline. To do that, enable the "Users who don't have time report submission due date" option.
2. Set limits on daily entries (in hours). In case you try to submit a number of hours exceeding the daily hour limit, you will get a message saying "Total time reports cannot exceed {0} h. Total per day {1}". The form will be highlighted red (Fig. 14).
-
|
|
-
Fig. 14. Report creation page. Exceeding the daily work hour limit
|
This restriction is configured by the administrator in the system
settings.
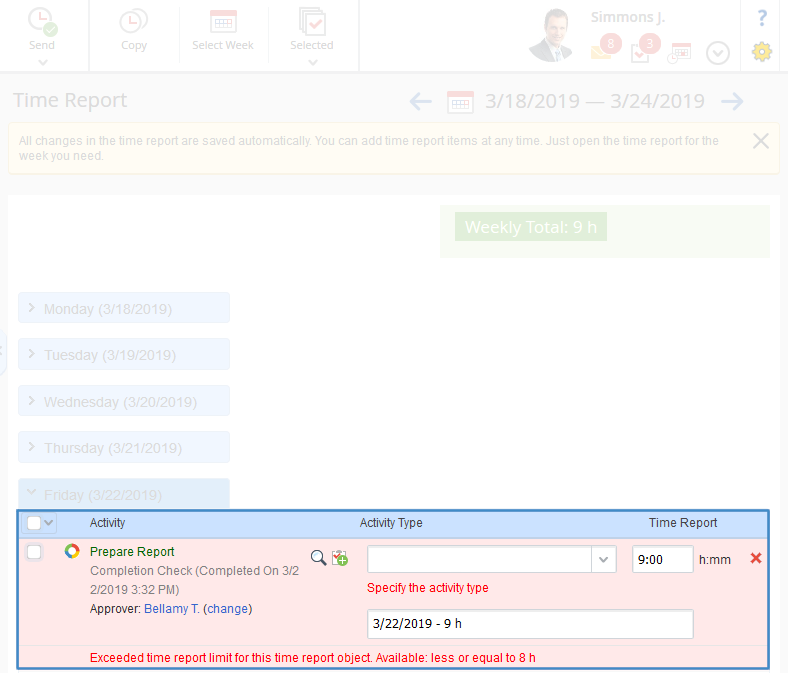
3. Limit the number of hours that users can submit on a task. If you try to submit the number of hours that exceeds the limit, you will see a message saying "Exceeded time report limit. Available: less or equal to <specified hour limit>". The form report will be highlighted red (fig. 15).
-
-
Fig. 15. Report creation page. Exceeded time report limit error
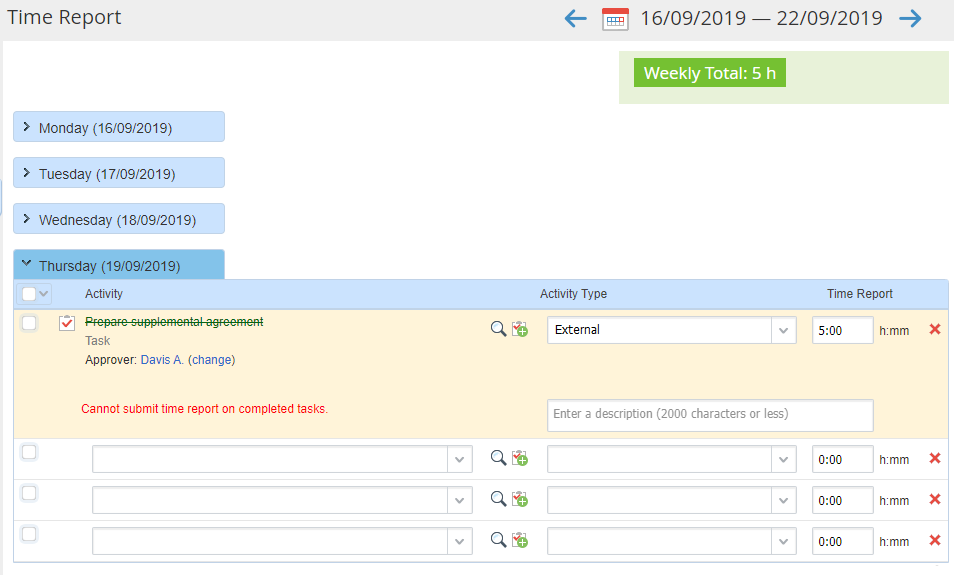
4. Prohibit to submit time reports on completed tasks. Users will not be able to submit time reports on tasks that have been completed and checked, if checking was required. To enable this option, the Add time report limits option must also be enabled. When a user will try to submit a time report on a completed task, they will see a notification in red (fig. 16).
|
|
-
Fig. 16 Submitting a time report on a completed task
|
This restriction is set up by the system administrator in ELMA settings.
Automatically submitting time reports for approval
ELMA can automatically send for approval all
time reports added by a user before the current date. To enable this setting, you need to specify how often time reports should be submitted. Go to
Administration - System - System Settings or
Administration - Basic Applications - Tasks - Time Reports. Once you select the interval for time report submission, the task
scheduler will create a task "
Automatically send time reports for approval".
Please note that the following settings will be taken into account when automatically sending time reports for approval: Time report must be submitted within (days) and Users who don't have time report submission due date. These settings are also configure at Administration - System - System Settings or Administration - Basic Applications - Tasks - Time Reports.
Once the time reports are automatically sent for approval, user will no longer see their drafts. Users receive notification about time report submission (see fig. 17).
Fig. 17 Notification about submission
The approver also receives a respective notification.
If a system error occurs when sending time reports, the drafts will be saved. If you want to notify certain users about system errors, then in Administration - System - System Settings, find the setting Users who are notified if an error occurs when automatically sending time reports for approval and select people you want to notify.
Please note, that if time reports are not sent due to any restrictions, they will be saved as drafts. In this case users will not receive any notifications.
Custom time report settings
To customize time report settings, click on the gear icon on the Time Report page (fig. 18).
Fig. 18 Customizing time reports settings
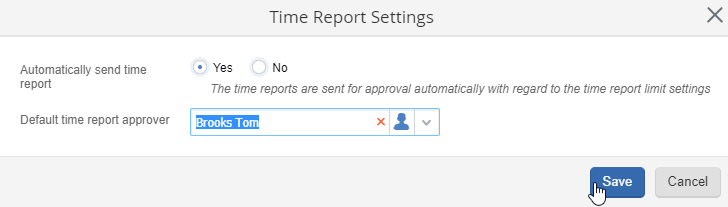
After clicking on the button, a pop-up opens. Here you can select setting same as in the user profile (fig.19).
The following options are available to you:
-
Automatically send time report
-
Default time report approver
Copyright © 2006–2019 ELMA