Creating a "Block" Property
There are several ways to create a "Block" type property::
-
click Add Property - Add Block or Add Block in the context menu at the second step of creating an object;
-
click Add - Add Block in the toolbar or Add Block on the Properties tab.
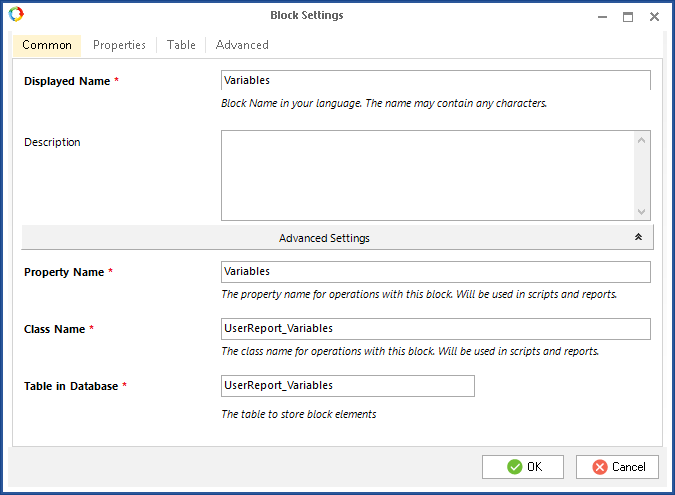
The opened dialog box (fig. 1) is the page of the "Block" type property, where you have to fill in the required fields and click OK.
|
|
|
Fig. 1. "Block" property page. "Common" tab
|
The active tab is dark yellow.
"Common" tab
An example of the Common tab is in fig. 1.
Description – "Block" property description.
"Advanced Settings" unit
Property Name * – unique name of the "Block" property, displayed in the properties list in ELMA Designer. It is filled in automatically, when you fill in the Displayed Name * field. This field is required.
Class Name * – name of the "Block" property class displayed in the properties list in ELMA Designer. It is filled in automatically, when you fill in the Displayed Name * field. The name format: <Parent object name_Block name>. This field is required.
Table in Database * – name of the database table, which will store the object instances. The name format <Parent object name_Block name>. This field is required.
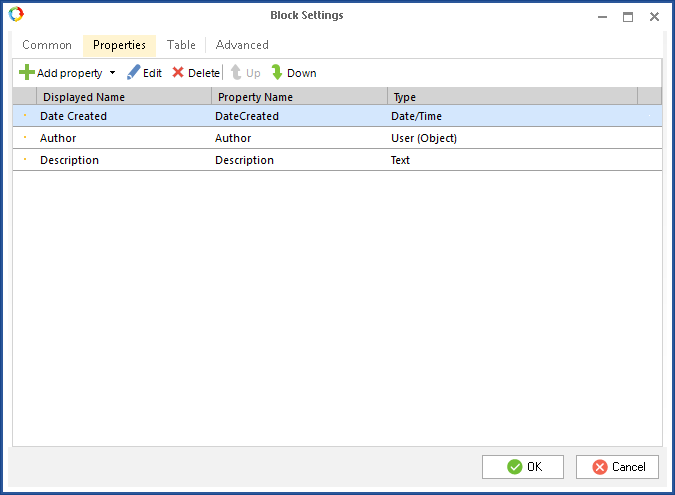
This tab (fig. 2) displays the properties, included in the block. Use the context menu or the toolbar to manage the block properties on the tab.
|
|
|
Fig. 2. "Block" property page. "Properties" tab
|
Toolbar
|
Attention!
Please note that it is possible to edit/delete/move properties of a nested block only in the block editing window.
|
|
|
|
|
|
Edit the selected object property. You can also double click the property name to edit it.
|
|
|
|
|
|
Move the property in the list. The order you set affects the order in Web Application. To learn more about the "Block" properties display in Web Application, see the respective Help section.
|
|
|
|
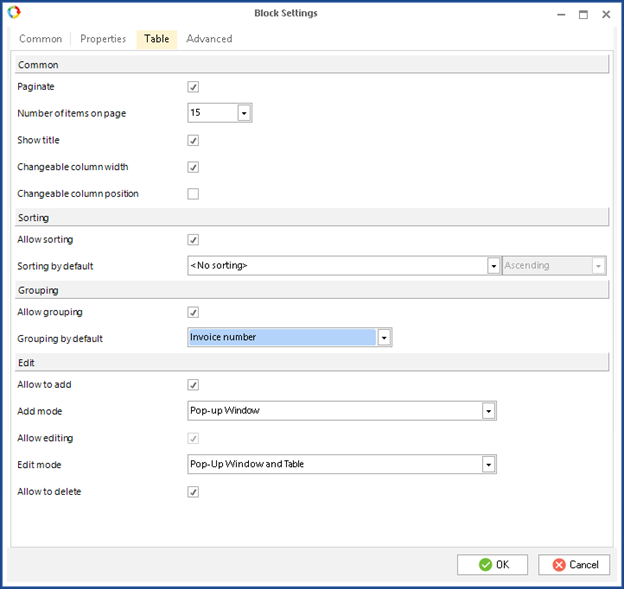
Fig. 3. "Block" property page. "Table" tab
|
"Common" unit
Paginate – when this box is checked, the block entries are paginated in Web Application, otherwise, all the entries are displayed on one page.
Number of items on page – number of block entries, displayed on one page in Web Application.
Show title – display the titles of properties in the table in Web Application.
Changeable column width – allows changing the table column width in Web Application.
Changeable column position – allows changing the order of the table columns in Web Application.
“Sorting” unit
Allow sorting – block entries can be sorted in the columns of the database table.
Sorting by default– you can specify a default sorting option, and all the entries of this block will be sorted accordingly in Web Application. After you choose an option from the drop-down list (other than No sorting) a new field becomes available where you can choose the sorting order: Ascending or Descending.
“Grouping” unit
Grouping by default – you can specify a default grouping option, and all the entries of this block will be grouped accordingly in Web Application.
"Edit" unit
Add mode:
|
|
|
|
|
Table – add entries to the block in the table.
|
Allow editing – edit block entries in Web Application.
Edit mode:
|
|
|
|
|
Table – edit the block entries in the table.
|
|
|
|
Allow to delete – possibility to delete block entries in Web Application.
"Advanced" tab
On this tab (fig. 4) you can add scripts, which will be executed when loading the block form and when changing the block values.
|
|
|
Fig. 4. "Block" property page. "Advanced" tab
|
|
Attention!
If a Block type property is added to a form as a nested object property, the scripts specified on this tab will not be executed.
|
Copyright © 2006–2019 ELMA