Installing a Paid Component
|
Attention!
Further information applies only to ELMA 3.7.0 and higher. Component installation is available starting from version 3.7.0.
|
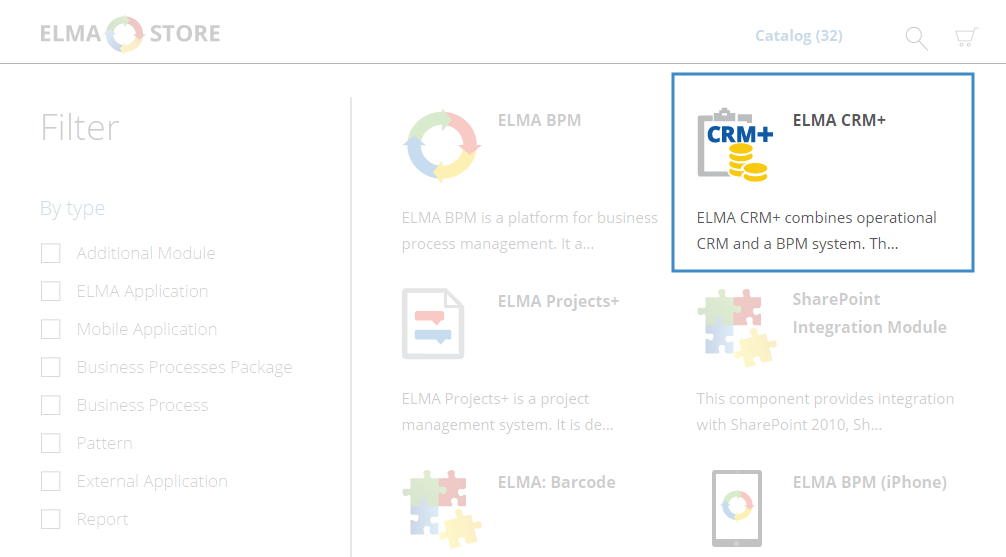
Go to the ELMA Store catalog (Fig. 1) and click on the desired component. Paid components are not marked in any way.
|
|
|
Fig. 1. ELMA Store. Paid component
|
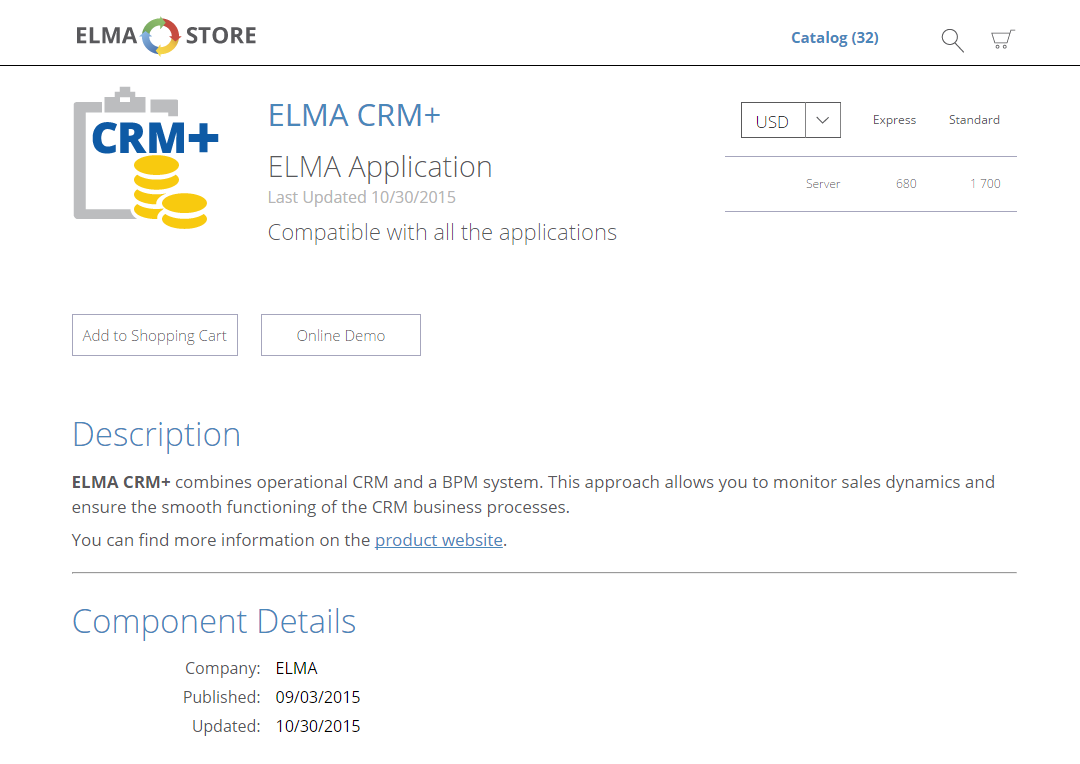
On the opened page (Fig. 2) click Add to Shopping Cart.
|
|
|
Fig. 2. ELMA Store. Component page with full information
|
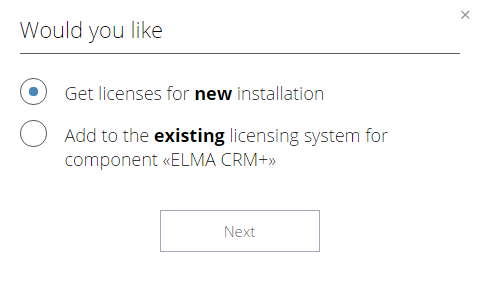
In the provided dialogue box (Fig. 3), select the desired action:
After selecting an option, click Next.
|
|
|
Fig. 3. ELMA Store. Dialogue box for selecting the type of licensing
|
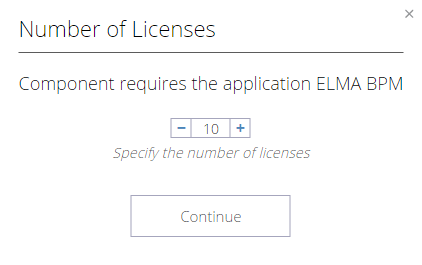
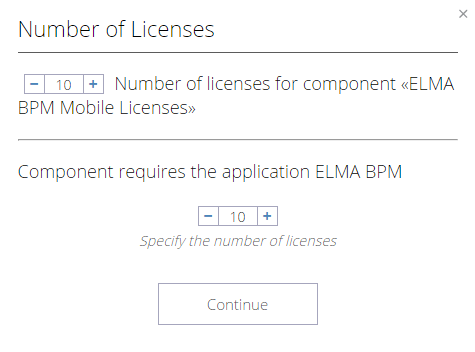
If you select Get licenses for new installation, specify the number of licenses in the provided window (Fig. 4, 5) and click Continue. If you are activating the component together with ELMA BPM Platform, the system will offer you to specify the number of licenses for ELMA: Business Process Administration (Fig. 4)
|
|
|
Fig. 4. ELMA Store. Dialogue box for selecting the number of ELMA BPM licenses
|
If the license policies require separate licenses for a certain component, the system will offer you to select the number of ELMA BPM licenses and the number of licenses for the component (Fig. 5).
|
|
|
Fig. 5. ELMA Store. ialogue box for selecting the number of ELMA BPM and component licenses
|
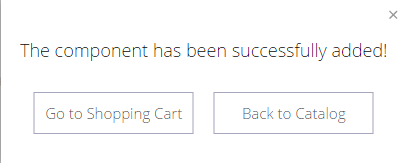
After you select the required number of licenses, a notification will appear (Fig. 6) informing you that you have successfully added the component to your shopping cart. It also offers you to select your next step:
-
Go to Shopping Cart – go to the shopping cart and continue component installation;
-
Back to Catalog – go back to the list of components (Fig. 1).
|
|
|
Fig. 6. ELMA Store. Dialogue box for your the next step
|
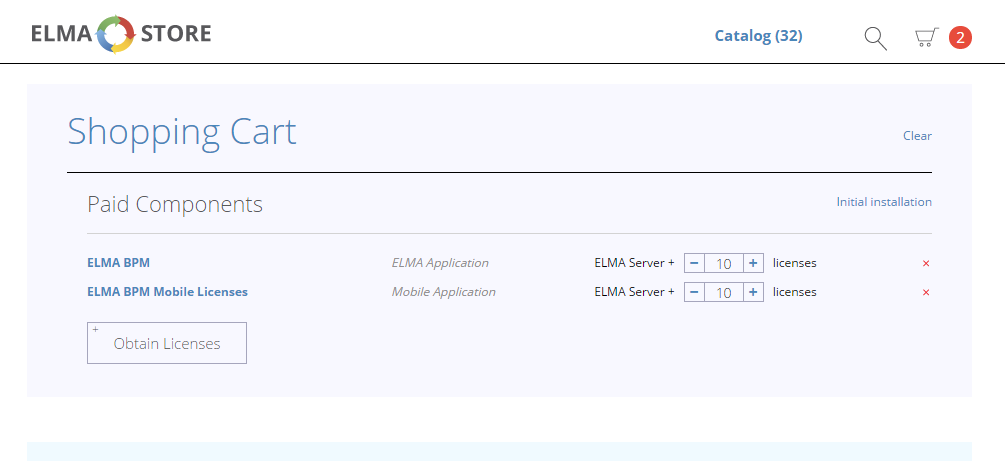
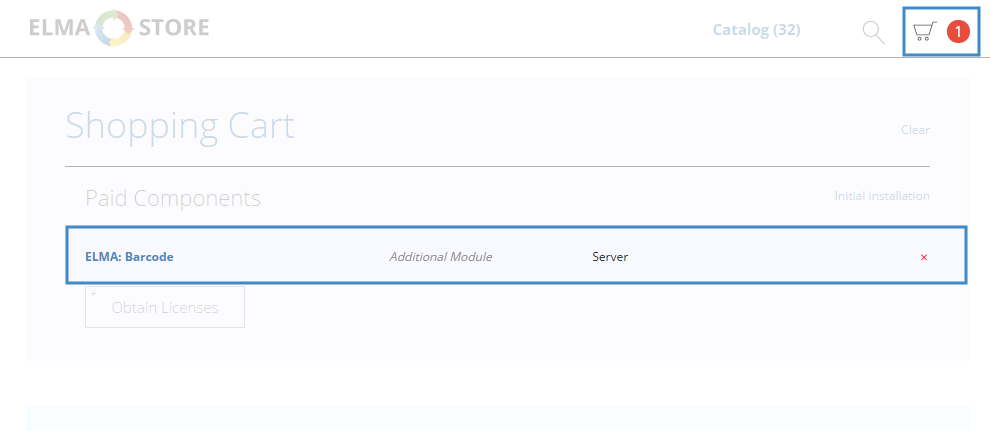
The added component will appear in your Shopping Cart (Fig. 7). The total number of items in the shopping cart is displayed in the top right corner of the page (Fig. 7). In that page you can change the number of licenses. Also, you can change the type of your order (for example, expand the installed edition); to do so, click Initial Installation.
|
|
|
Fig. 7. ELMA Store. Shopping Cart
|
To delete an item from the shopping cart, click the  button located on the right-hand side of the component. Confirm deleting in the opened window.
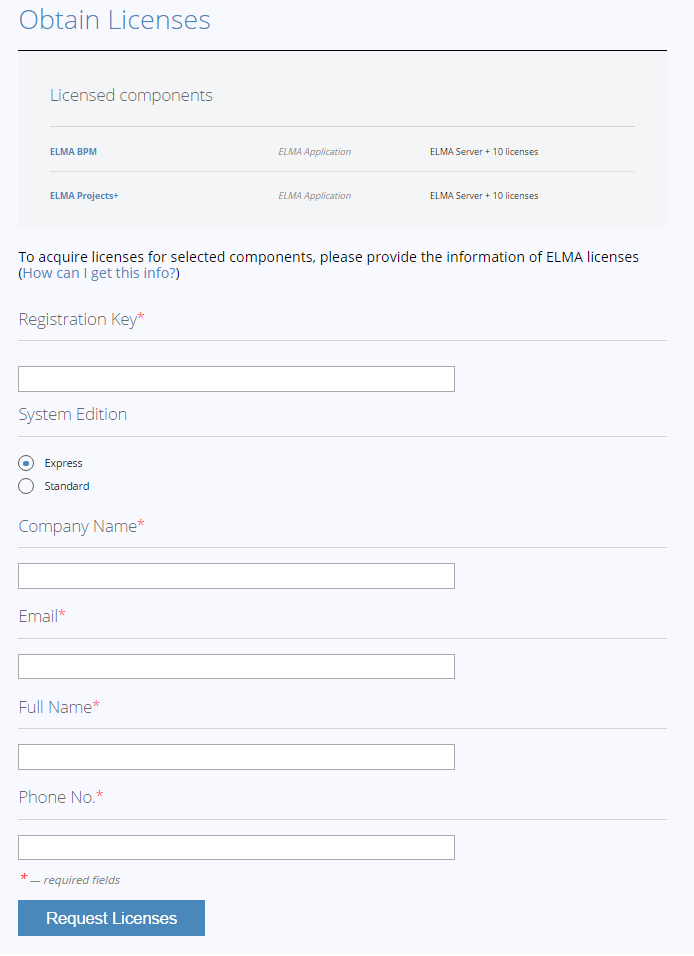
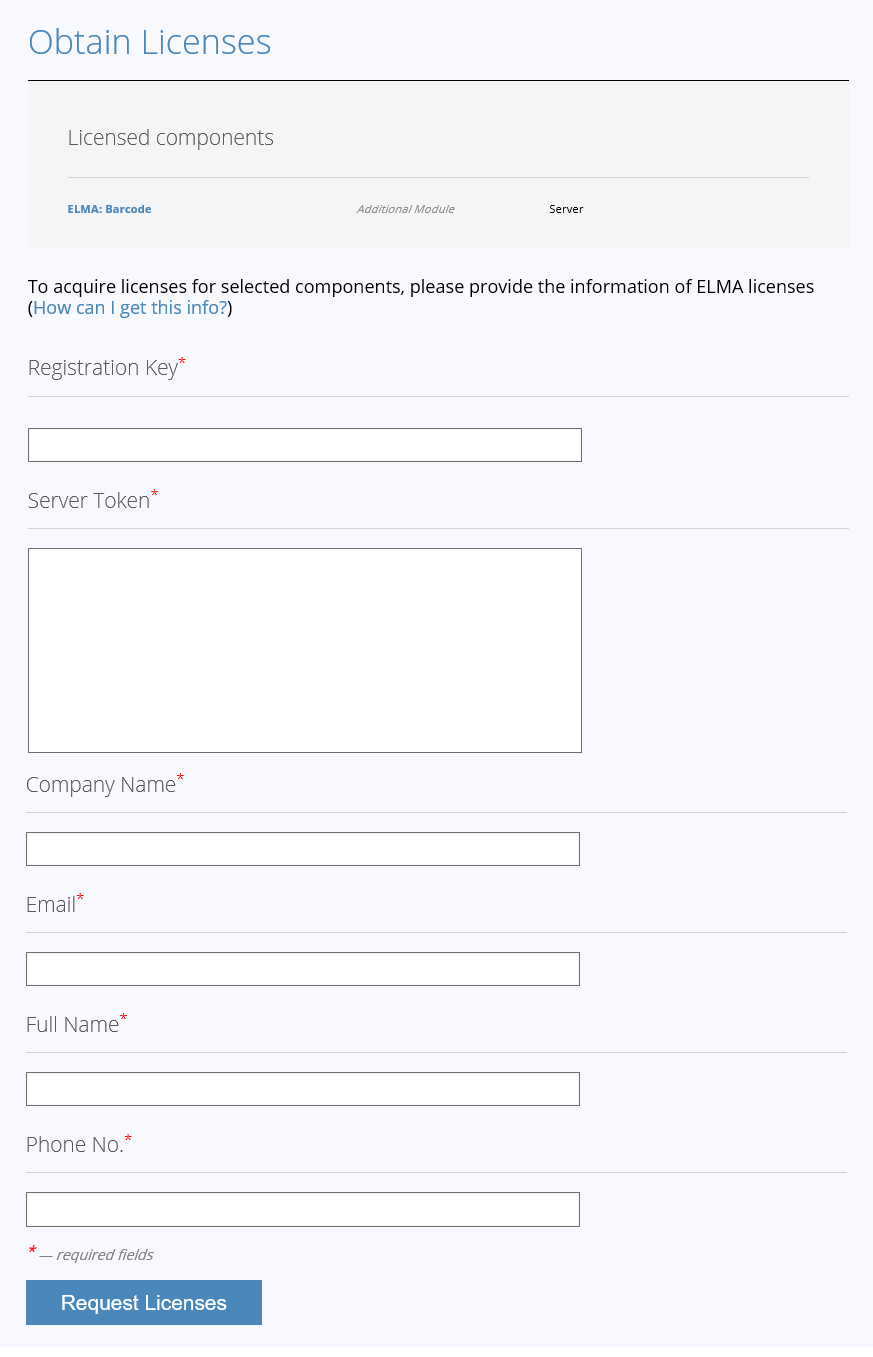
To obtain licenses for the selected components, click Obtain Licenses. The layout of the shopping cart will be slightly changed (Fig. 8).
|
|
|
Fig. 8. ELMA Store. Shopping Cart. Obtaining Licenses
|
On this page, fill in all the required fields and click Request Licenses. The fields marked with a red asterisk * are required fields.
-
-
System Edition – select the system edition (Community, Standard, Enterprise);
-
Company Name – name of the company for whom you are placing the order;
-
Email – email address of the company for whom you are placing the order;
-
Full Name – full name of the employee who is placing the order;
-
Phone No – telephone number of the employee who is placing the order.
If you select (Fig. 3) the Add to the existing licensing system for component <Name of the installed component> option, a notification will appear (Fig. 6) informing you that you have successfully added the component to your shopping cart.
The added component will appear in your Shopping Cart (Fig. 9). The total number of items in the shopping cart is displayed in the top right corner of the page (Fig. 9).
|
|
|
Fig. 9. ELMA Store. Shopping Cart
|
To delete an item from the shopping cart, click the button located on the right-hand side of the component. Confirm deleting in the window that opens. To empty your shopping cart, click Clear. It is located below the shopping cart icon.
To obtain licenses to this component, click Obtain Licenses. The layout of the shopping cart will be slightly changed (Fig. 10).
|
|
|
Fig. 10. ELMA Store. Shopping Cart. Obtaining Licenses
|
On this page, fill in all the required fields and click Request Licenses. The fields marked with a red asterisk * are required fields.
-
-
Company Name – name of the company for whom you are placing the order;
-
Email – email address of the company for whom you are placing the order;
-
Full Name – full name of the employee who is placing the order;
-
Phone No – telephone number of the employee who is placing the order.
Once you have sent the license request, the page will look as shown in Fig. 11. The selected component is listed in the Orders section.
|
|
|
Fig. 11. ELMA Store. Shopping Cart. Order pending
|
Copyright © 2006–2019 ELMA